· Lawn Care · 20 min read
How To Clean Lawn Mower
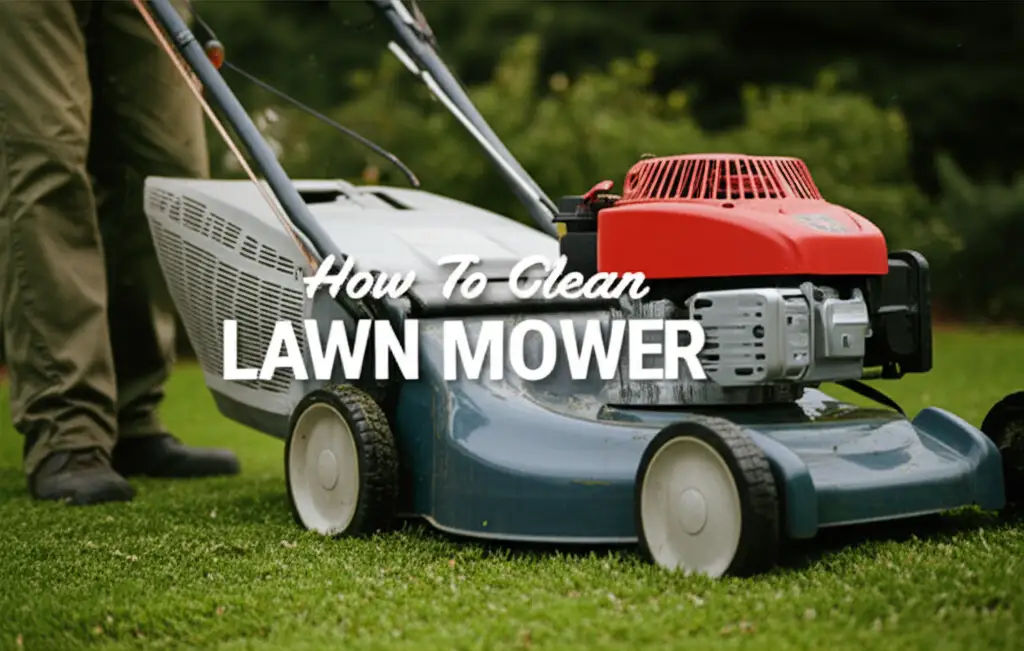
Clean Your Lawn Mower: A Complete Guide
Have you noticed your lawn mower struggles to cut grass evenly? Perhaps it sounds rougher than usual. A dirty lawn mower often causes these problems. Over time, grass clippings, dirt, and debris build up on all parts of your machine. This buildup impacts performance, shortens its lifespan, and can even pose a safety risk.
Learning how to clean your lawn mower is simple. It makes a big difference in how your machine runs. Proper cleaning prevents rust, improves cutting efficiency, and helps you avoid costly repairs. This comprehensive guide covers every step of cleaning your lawn mower. We will discuss safety measures, cleaning the deck, blades, engine, and fuel system. You will also find tips for overall maintenance.
Takeaway
- Always prioritize safety before cleaning your lawn mower. Disconnect the spark plug and remove fuel.
- Clean the lawn mower deck regularly to prevent grass buildup and maintain cutting quality.
- Inspect and clean blades for sharpness and balance.
- Address the engine’s components, including the air filter, spark plug, and carburetor.
- Ensure the fuel system, including the tank, remains free of debris and old fuel.
- Clean the exterior, wheels, and lubricate moving parts for smooth operation.
A Quick Answer to Cleaning Your Lawn Mower
To clean a lawn mower, first disconnect the spark plug and drain the fuel for safety. Tilt the mower to access the deck and scrape away built-up grass and dirt. Clean the blades, air filter, spark plug, and carburetor. Finally, wash the exterior and lubricate moving parts to ensure smooth operation and extend the machine’s life.
Essential Safety Steps Before You Clean Your Lawn Mower
Safety comes first when you clean any power equipment. Lawn mowers have sharp blades and flammable fuel. You must take specific precautions before you start any cleaning task. Ignoring these steps can lead to serious injury or damage.
Disconnect the Spark Plug
The spark plug gives power to the engine. Disconnecting it prevents the engine from accidentally starting. Find the spark plug wire, usually a thick black wire leading to a rubber boot on the engine. Pull the boot off the spark plug. Place the wire away from the plug so it cannot reconnect. This simple step ensures the engine remains off.
Drain the Fuel Tank
Gasoline is highly flammable. An empty fuel tank reduces fire risk. If your mower has a fuel shut-off valve, close it. Use a siphon pump or tilt the mower to drain fuel into an approved container. You can also run the mower until it runs out of gas, but draining is safer. Never store fuel near an ignition source.
Allow the Engine to Cool
A hot engine can burn you. Give your mower time to cool down after use. Wait at least 30 minutes, or longer, if the mower ran for an extended period. A cool engine is safe to touch. This also reduces the risk of spilled fuel igniting on hot surfaces.
Gather Your Tools and Supplies
Having all your tools ready saves time. You will need a stiff brush, scraper, gloves, safety glasses, a wrench, and a soft cloth. A pressure washer or garden hose can help, but use them carefully. Prepare appropriate cleaning solutions, like mild soap and water or specific engine cleaners. This preparation ensures a smooth cleaning process.
- Safety Gear:
- Heavy-duty gloves to protect your hands from sharp edges and grease.
- Safety glasses to shield your eyes from debris.
- Cleaning Tools:
- Stiff wire brush or scraper for heavy dirt buildup.
- Putty knife or flathead screwdriver for scraping under the deck.
- Wrench or socket set for blade removal.
- Garden hose with a spray nozzle or a low-pressure washer.
- Bucket with warm water and mild dish soap.
- Clean rags or towels.
- Can of compressed air for tight spots.
- Optional Supplies:
- WD-40 or a silicone spray for lubrication.
- Blade sharpening tool (if you plan to sharpen blades).
- Engine degreaser (use sparingly and according to instructions).
- Old newspaper or cardboard to work on.
Always read your mower’s owner’s manual for specific instructions. Some manufacturers have special recommendations. Following these safety steps sets a good foundation for a thorough and safe cleaning job.
How to Clean Your Lawn Mower Deck
The mower deck is where much of the work happens. Grass clippings and dirt stick to the underside of the deck. This buildup reduces airflow and affects cutting quality. It also promotes rust. Regular deck cleaning keeps your mower running efficiently.
Tilt the Mower Safely
Before cleaning the deck, tilt your mower carefully. For gas mowers, tilt it so the carburetor side faces up. This prevents oil or fuel from leaking into the air filter or muffler. If you tilt it the wrong way, you could flood the engine or cause damage. For electric mowers, the tilt direction does not matter as much. Use sturdy blocks or supports to keep the mower stable.
Scrape Away Built-Up Debris
Use a scraper or a putty knife to remove thick layers of dried grass and mud. Start from the edges and work your way inward. Be careful around the blade. The blade is very sharp. Heavy buildup can be difficult to remove. For stubborn areas, a wire brush works well. I often find that a few minutes of scraping saves me much more time later.
You can also consider using a plastic scraper. Plastic scrapers reduce the risk of scratching the deck’s paint. Scratches make the deck more prone to rust. Ensure you get into all corners and crevices. This initial scraping removes the bulk of the debris. For more in-depth guidance on specific types of mowers, explore resources on how to clean under riding lawn mower deck.
Wash the Underside
After scraping, rinse the deck with a garden hose. A high-pressure nozzle helps dislodge remaining dirt. You can also use a mild detergent. Mix warm water with dish soap in a bucket. Apply the soapy water with a brush. Scrub the remaining grime. Rinse thoroughly afterward. Make sure all soap residue is gone.
For tough, caked-on grass, some people suggest a pressure washer. However, use extreme caution. High pressure can force water into sealed bearings or other sensitive components. If you use a pressure washer, keep the nozzle at a distance. Avoid directing water into the engine, wheels, or any electrical parts. A simple garden hose with good pressure often does the trick without risk.
Clean the Top of the Deck and Exterior
The top of the deck also collects dirt and grass. Use a brush or a cloth to wipe down the surface. Remove any leaves, twigs, or loose debris. A damp cloth can clean the plastic casing and engine cover. Pay attention to vents and air intakes. Keep them clear for proper engine cooling. Finish by wiping the entire exterior clean. This makes your mower look good and helps you spot other maintenance needs.
- Steps for Cleaning the Deck:
- Tilt the mower safely, carburetor side up for gas models.
- Use a scraper or putty knife to remove large chunks of grass and mud.
- Brush away smaller debris with a stiff wire brush.
- Rinse the underside of the deck with a garden hose.
- Scrub with soapy water and a brush for stubborn dirt.
- Rinse again thoroughly to remove all soap.
- Clean the top of the deck and exterior casing with a damp cloth.
- Dry the deck completely to prevent rust.
Always dry the deck completely after washing. You can let it air dry in the sun or use a towel. A completely dry deck resists rust much better.
Cleaning Your Lawn Mower Blades
Sharp, clean blades are crucial for a healthy lawn. Dull blades tear grass, leaving an uneven, brown-tipped cut. This makes your lawn look unhealthy. Dirty blades also increase the strain on your mower’s engine. Cleaning and sharpening your blades is a key part of good mower maintenance.
Remove the Blade Safely
First, ensure the spark plug is disconnected and the fuel is drained. Wear heavy gloves to protect your hands from the sharp blade. Locate the bolt holding the blade in place underneath the deck. Use a wrench or socket to loosen the bolt. You may need a piece of wood to block the blade from turning while you loosen the bolt. Carefully remove the blade and set it aside. Inspect the blade for any damage like bends or cracks. If it’s damaged, replace it.
Scrape and Clean the Blade
Once the blade is off, use a scraper or wire brush to remove all caked-on grass and dirt. Pay close attention to the cutting edges. Grass buildup here can make even a sharp blade perform poorly. If the blade has rust, use a wire brush or sandpaper to clean it off. Rust weakens the metal and can cause imbalance. I find that a good scrub with a wire brush gets rid of most of the grime quickly.
Sharpen the Blade
A dull blade does not cut, it tears. You can sharpen the blade yourself with a metal file or a grinder. Maintain the original angle of the blade’s cutting edge. Sharpen both sides evenly. This helps keep the blade balanced. An unbalanced blade can cause excessive vibration and damage to the mower’s engine or deck. Many hardware stores offer blade sharpening services if you prefer a professional touch. After sharpening, wipe the blade with an oily rag to prevent rust.
- Blade Cleaning Steps:
- Disconnect the spark plug and drain fuel for safety.
- Wear heavy gloves.
- Remove the blade using a wrench, blocking it from turning.
- Scrape off all grass and dirt with a wire brush or scraper.
- Remove any rust with a wire brush or sandpaper.
- Sharpen the blade using a file or grinder, maintaining the original angle.
- Check the blade for balance after sharpening.
- Wipe the blade with an oily rag to prevent rust.
- Reinstall the blade securely.
Reinstall the Blade
Once clean and sharp, reinstall the blade. Ensure it is oriented correctly. The cutting edges should face in the direction of rotation. Tighten the blade bolt securely. Refer to your mower’s manual for the correct torque specifications. Over-tightening or under-tightening can be dangerous. A properly installed and sharpened blade ensures your mower cuts cleanly and efficiently, giving your lawn a professional look.
Engine Cleaning for Better Performance
The engine is the heart of your lawn mower. A clean engine runs more efficiently and lasts longer. Dirt, dust, and old fuel can clog vital parts. Cleaning engine components ensures proper air intake, ignition, and fuel delivery. This prevents breakdowns and keeps your mower ready for action.
Cleaning the Air Filter
The air filter prevents dirt from entering the engine. A clogged air filter restricts airflow, causing the engine to run rich and lose power. There are two main types: foam filters and paper filters.
- Foam Air Filters: Remove the filter. Wash it with warm, soapy water. Squeeze out excess water. Let it dry completely. Then, lightly coat it with fresh engine oil. Squeeze out excess oil until it is just damp. This makes it tacky, trapping more dirt.
- Paper Air Filters: Tap the filter gently against a hard surface to dislodge loose dirt. Never wash a paper filter with water. Water will ruin it. If it is heavily soiled, replace it. Many lawn mower parts stores stock common air filters. For a detailed guide, refer to our article on how to clean air filter on lawn mower.
Cleaning the Spark Plug
The spark plug creates the spark that ignites the fuel-air mixture. A dirty or fouled spark plug can cause misfires and hard starting. Remove the spark plug using a spark plug wrench. Inspect the tip for carbon buildup or discoloration. Use a wire brush to clean the electrode and the porcelain tip. If the plug looks severely worn or damaged, replace it. Check the gap between the electrodes with a feeler gauge. Adjust it to your mower’s specifications if needed. A clean spark plug ensures reliable ignition. Learn more about the process in our guide on how to clean lawn mower spark plug.
Cleaning the Carburetor
The carburetor mixes air and fuel. It ensures the engine gets the right ratio for combustion. Over time, old fuel can leave gummy deposits inside the carburetor. This causes fuel delivery problems. Your mower might surge, run rough, or not start at all. You can often clean a carburetor without fully removing it.
- Carburetor Cleaning Steps (without removal):
- Remove the air filter and its housing to access the carburetor.
- Spray carburetor cleaner into the intake opening while the engine is off.
- Also spray into any accessible jets or passages.
- Allow the cleaner to sit for a few minutes to dissolve deposits.
- You can also try running the mower briefly with a fuel stabilizer or carburetor cleaner added to the fuel tank. This helps clean it from the inside.
For more detailed instructions on this complex task, you can read our guide on how to clean lawn mower carburetor without removing or specifically for push mowers, how to clean carburetor on push mower. Always follow safety precautions when working with fuel and cleaners. Proper carburetor cleaning can revive a struggling engine.
General Engine Exterior Cleaning
While you should avoid spraying water directly onto a hot engine, you can clean the engine’s exterior. Use a stiff brush to remove loose dirt and grass from cooling fins. Compressed air can blow dust out of crevices. If grease build-up is heavy, use a degreaser sparingly. Apply it to a cloth and wipe the engine surfaces. Do not spray degreaser directly into electrical components or sensitive parts. A clean engine exterior helps with heat dissipation.
Maintaining these engine components ensures your lawn mower starts easily and runs smoothly. Regular cleaning prevents future issues and extends the life of your valuable machine.
Fuel System Care: Tank and Lines
The fuel system delivers gasoline to your engine. A clean fuel system is vital for consistent engine performance. Contaminated or old fuel can cause major problems. These issues include poor starting, rough running, or even engine damage. Taking care of your fuel tank and lines protects your engine.
Draining Old Fuel
Gasoline degrades over time, especially if it contains ethanol. Ethanol attracts water, which can corrode metal parts in the fuel system. It is best to drain old fuel at the end of the mowing season or if the mower has sat unused for more than a month. Use a siphon pump to remove fuel from the tank. Dispose of old fuel properly at a local recycling center. Never pour it down the drain or onto the ground. This step ensures you start fresh with clean, stable fuel.
Cleaning the Fuel Tank
Even after draining, residues can remain in the tank. These residues can be gummy deposits or rust particles. To clean the tank, remove it from the mower if possible. Pour a small amount of fresh gasoline into the tank. Swirl it around to loosen any deposits. Then, drain it again. For stubborn rust, you may need a specialized fuel tank cleaner or rust remover. Follow the product instructions carefully.
Use a lint-free cloth to wipe the inside of the tank if you can access it. Ensure no fibers remain. A clean fuel tank prevents contaminants from reaching the carburetor. This extends the life of your fuel filter and carburetor. For detailed instructions on this important task, consult our guide on how to clean gas tank on lawn mower.
Inspecting Fuel Lines and Filter
The fuel lines carry fuel from the tank to the engine. Inspect them for cracks, kinks, or leaks. Old fuel lines can become brittle and crack. Replace any damaged lines immediately. Fuel filters are small components that trap impurities before fuel reaches the carburetor. They are usually located inline between the fuel tank and the engine. If your mower has one, check its condition.
- Fuel System Checklist:
- Drain old or stagnant fuel from the tank.
- Dispose of old fuel responsibly.
- Clean the inside of the fuel tank to remove residues.
- Inspect fuel lines for cracks or damage; replace if needed.
- Check the fuel filter for clogging; replace if dirty.
- Refill with fresh, stabilized fuel before next use.
A dirty fuel filter restricts fuel flow. This can starve the engine. Most fuel filters are inexpensive and easy to replace. Replacing a dirty fuel filter is often part of routine maintenance. It is a small investment that prevents big problems. Always use fresh fuel, especially for winter storage. Adding a fuel stabilizer helps prevent fuel degradation. This keeps your fuel system clean and your mower running smoothly.
Wheels, Casing, and Exterior Cleaning
While the engine and deck are vital, don’t overlook the rest of your lawn mower. Cleaning the wheels, casing, and other exterior parts contributes to overall performance. It also helps preserve your machine’s appearance. Proper cleaning of these areas prevents issues like stuck wheels or rusting body parts.
Cleaning the Wheels and Axles
Dirt, grass, and debris often accumulate around the wheels and axles. This buildup can make the wheels stiff or difficult to turn. It adds unnecessary strain when pushing or steering the mower. Use a stiff brush or a scraper to remove any stuck-on material. Pay attention to the inside of the wheel wells and around the axle shafts.
After removing the bulk of the dirt, you can wash the wheels with soapy water and a brush. Rinse them thoroughly. Once clean and dry, apply a lubricant like WD-40 or a silicone spray to the wheel axles. This ensures the wheels spin freely. Smooth-rolling wheels make mowing much easier and reduce wear on moving parts.
Washing the Outer Casing
The outer casing of your lawn mower protects the internal components. It also gets dirty with grass stains, mud, and dust. Use a garden hose with moderate pressure to rinse off loose dirt. Then, mix warm water with a mild dish soap. Use a soft brush or sponge to wash the entire casing. For stubborn stains, a slightly stronger cleaner might be needed, but avoid abrasive chemicals.
Pay attention to plastic parts and decals. Harsh cleaners can damage them. Rinse the casing thoroughly to remove all soap residue. Soap left on the surface can attract dust or leave streaks. A clean casing not only looks good but also allows you to spot any new damage or leaks more easily during future inspections.
Lubricating Moving Parts
Many parts of your lawn mower benefit from lubrication. This includes:
- Wheel Axles: As mentioned, lubricate these for smooth rolling.
- Height Adjustment Levers: These mechanisms can get stiff from dirt. Clean them and apply a light coat of lubricant. This makes adjusting cutting height much easier.
- Throttle Cable (if applicable): A small drop of oil can keep the throttle cable moving freely.
- Starter Rope Pulley (if applicable): Some models benefit from a light spray of silicone lubricant here.
Use a silicone spray or a light oil for lubrication. Avoid heavy grease, as it can attract more dirt. Lubrication reduces friction, prevents rust, and extends the life of moving components. Always wipe off excess lubricant to prevent it from attracting more grime.
- Exterior Cleaning Checklist:
- Scrape and brush away dirt from wheels and axles.
- Wash wheels with soapy water; rinse and dry.
- Lubricate wheel axles for smooth operation.
- Rinse the outer casing with a hose.
- Wash the casing with mild soapy water and a soft brush/sponge.
- Rinse the casing completely.
- Lubricate height adjustment levers and other moving parts.
- Dry the entire exterior thoroughly.
Regularly cleaning these external parts ensures your lawn mower not only performs well but also maintains its value and appearance for many years.
Post-Cleaning Maintenance and Storage Tips
Cleaning your lawn mower is a great first step. After cleaning, some quick maintenance checks and proper storage are important. These final steps protect your investment. They ensure your mower remains in top condition for your next use, or for long-term storage.
Check Bolts and Belts
After any cleaning, it is a good habit to check critical fasteners. Vibration can loosen bolts over time. Ensure all bolts holding the deck, engine, and wheels are tight. Look for any loose nuts or screws. If your mower has belts (like riding mowers or some self-propelled models), check their tension and condition. Belts should not be frayed or cracked. A loose belt can slip, reducing power delivery. A worn belt can break during operation. Tightening loose bolts prevents parts from falling off or vibrating excessively.
Rust Prevention
Water and metal lead to rust. After washing, ensure every part of your mower is thoroughly dry. You can leave it in the sun for a few hours. For added protection, consider applying a thin layer of silicone spray or a rust-inhibiting coating to exposed metal surfaces. Pay special attention to the underside of the deck and the blade. A little rust protection now saves you from major issues later. Storing your mower in a dry environment also helps prevent rust.
Proper Storage
How you store your lawn mower significantly impacts its lifespan.
- Short-Term Storage (between uses):
- Store your mower in a dry place, like a garage or shed.
- Cover it with a tarp or a mower cover to protect it from dust and moisture.
- Ensure the fuel tank has fresh, stabilized fuel if storing for a few weeks.
- Long-Term Storage (winterization):
- Drain the fuel tank or add a fuel stabilizer if you prefer to keep it full.
- Remove the spark plug and pour a small amount of engine oil into the cylinder. Gently pull the starter cord a few times to distribute the oil. This prevents cylinder rust.
- Clean the entire mower thoroughly as described in this article.
- Store in a clean, dry, and protected area.
- Disconnect the battery on electric start models to prevent drainage.
Proper storage prevents premature wear. It ensures your mower starts easily when you need it next. It also protects it from harsh weather. My mower always starts right up after winter thanks to these steps.
Final Inspection
Before you put your mower away or use it again, do one last quick inspection.
- Are all guards and safety features in place?
- Is the spark plug reconnected securely?
- Is the fuel tank cap tight?
- Are there any new leaks?
- Are all parts moving freely?
A quick final check catches any forgotten steps. It confirms your mower is safe and ready for its next task. Regular cleaning and attention to these maintenance points will keep your lawn mower reliable and efficient for years to come.
Frequently Asked Questions (FAQ)
Q1: How often should I clean my lawn mower?
You should clean your lawn mower’s deck after every use to prevent grass buildup. A thorough cleaning, including the engine components and fuel system, is recommended at least once per mowing season. More frequent use or mowing wet grass may require more frequent deep cleaning to maintain performance and extend the mower’s lifespan.
Q2: Can I use a pressure washer to clean my lawn mower?
Using a pressure washer on your lawn mower requires extreme caution. While it can quickly remove stubborn dirt, high pressure can force water into sealed bearings, electrical components, and the engine. This can cause severe damage or rust. A garden hose with a spray nozzle and a stiff brush is generally a safer and sufficient cleaning method.
Q3: What cleaning solutions are safe for lawn mowers?
For most parts of your lawn mower, a mixture of warm water and mild dish soap works well. You can use a dedicated engine degreaser for heavy oil and grease buildup on engine parts, applied with a cloth. Avoid harsh solvents or abrasive cleaners that can damage paint, plastic, or rubber components. Always rinse thoroughly.
Q4: How do I prevent rust on my lawn mower?
To prevent rust, thoroughly dry your lawn mower after every cleaning, especially the deck. You can let it air dry in the sun or wipe it down with towels. Apply a thin layer of silicone spray or a rust inhibitor to exposed metal surfaces. Store your mower in a dry, covered area, like a garage or shed, away from moisture.
Q5: Is it necessary to remove the blade to clean it?
Yes, it is highly recommended
- Lawn Mower Maintenance
- Engine Cleaning
- Deck Cleaning
- DIY Lawn Care