· Home Cleaning · 19 min read
How To Clean Matte Black Faucet
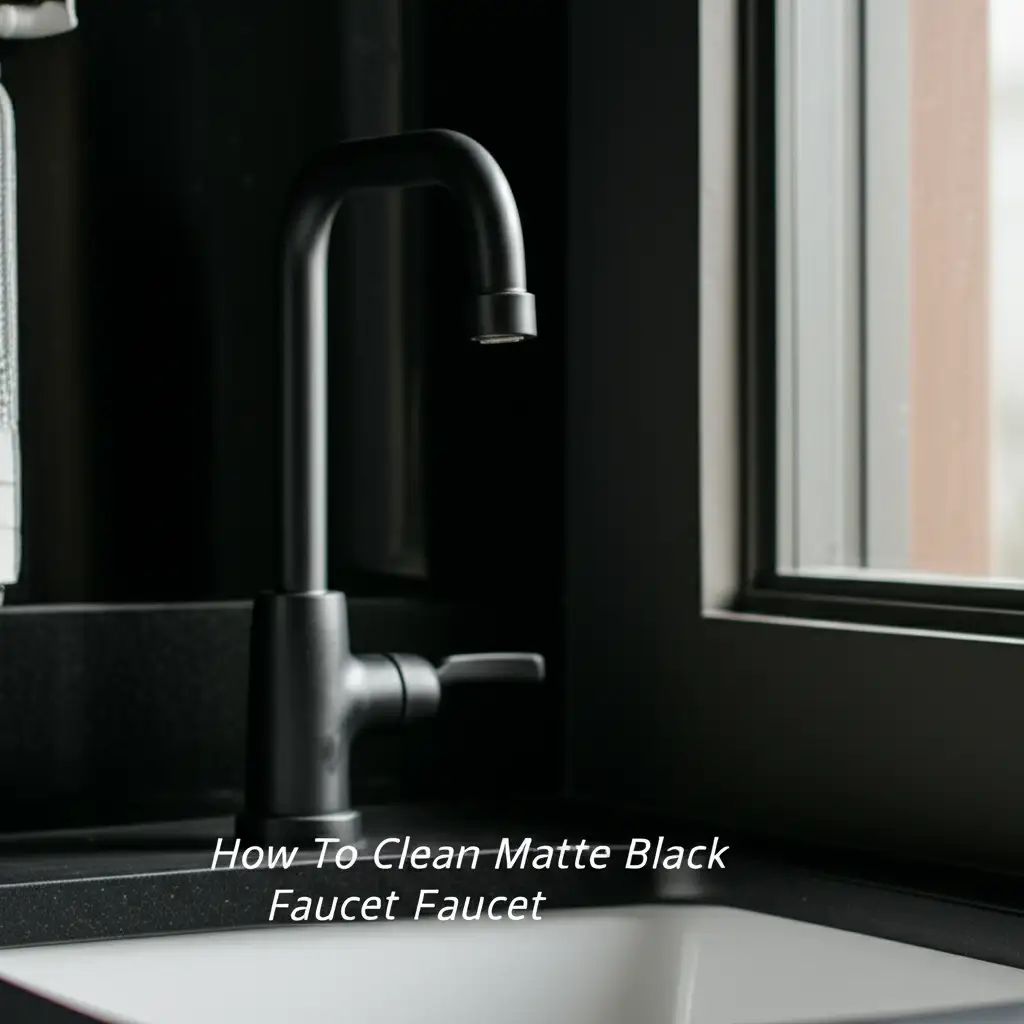
How To Clean Matte Black Faucet Safely and Effectively
Matte black faucets add a sleek, modern touch to any kitchen or bathroom. Their unique finish creates a bold statement. However, this beautiful look comes with a special cleaning challenge. Matte black surfaces show fingerprints, water spots, and soap scum easily. Standard cleaners can also harm their non-reflective finish. Knowing how to clean matte black faucet fixtures correctly helps preserve their appearance. It ensures they stay looking new for years. This guide will walk you through gentle yet effective methods. You will learn about safe cleaning supplies, step-by-step cleaning processes, and important prevention tips. We cover common issues like water spots and general grime. We also highlight what products to avoid. Let’s keep your matte black fixtures stunning and spotless.
Takeaway
- Use soft microfiber cloths.
- Stick to mild soap and water.
- Dry surfaces immediately to prevent water spots.
- Avoid abrasive cleaners and harsh chemicals.
- Clean regularly to prevent buildup.
To clean a matte black faucet, mix a few drops of mild dish soap with warm water. Dampen a soft microfiber cloth with this solution. Gently wipe down the faucet surface. Rinse the cloth with clean water and wipe the faucet again to remove soap residue. Immediately dry the faucet with a clean, dry microfiber cloth to prevent water spots and streaks.
Understanding Matte Black Faucet Finishes
Matte black faucets are popular because they offer a contemporary design. This finish is not shiny like chrome or stainless steel. Instead, it has a flat, non-reflective surface. This unique texture can hide minor imperfections better than glossy finishes. However, it also tends to show marks more clearly.
The matte appearance comes from specific coatings applied to the faucet. These coatings are often durable but also delicate. They are sensitive to harsh chemicals and abrasive materials. Using the wrong cleaner can strip the finish. This can lead to discoloration or shiny spots. It can also cause permanent damage. Therefore, understanding the nature of this finish is the first step in proper care. My experience shows that gentle methods work best for these fixtures.
Why Matte Black Shows Marks
Matte black surfaces absorb light rather than reflect it. This is why they look so rich and deep. But this characteristic also means that oils, grease, and minerals sit on the surface. They do not blend in. Instead, they stand out against the dark, flat background. Fingerprints leave behind natural oils from our skin. Water droplets leave mineral deposits when they dry. Soap scum also creates a hazy film. These elements become very visible on a matte black faucet. This requires frequent, careful cleaning.
Common Issues Faced by Matte Black Faucets
Several common problems affect matte black faucets. Water spots are perhaps the most frequent issue. These appear as white or light rings where hard water has dried. Mineral buildup can also occur, especially around the base or spout. This looks like crusty deposits. Fingerprints are another common enemy. They leave oily marks all over the faucet. Soap scum from daily use in bathrooms or kitchens also makes the surface look dull. These issues make the faucet lose its sleek appearance. It is crucial to address them with the right techniques.
Essential Cleaning Supplies for Matte Black Faucets
Choosing the right cleaning supplies is crucial for matte black faucets. Harsh chemicals or abrasive tools can easily damage their unique finish. The goal is to clean effectively without stripping away the matte look. I always opt for the gentlest options first. This protects the faucet’s integrity.
You need basic, gentle items for regular cleaning. Avoid anything that scratches or corrodes. The simpler your cleaning kit, the better. This approach ensures your faucet stays looking new. It also makes your cleaning routine easier.
Recommended Cleaning Solutions
Using mild cleaning agents is key. Strong cleaners can ruin the matte finish. They can cause discoloration or create shiny spots.
- Mild Dish Soap: This is your best friend for general cleaning. A few drops of gentle dish soap mixed with warm water is highly effective. It cuts through grease and grime without harming the finish.
- Distilled Water: Hard water leaves mineral spots. Using distilled water for rinsing or for making your cleaning solution helps prevent these spots. It has no minerals to leave behind.
- White Vinegar (Diluted and Cautiously): Vinegar can remove hard water spots and mineral buildup. However, use it with extreme caution and dilute it heavily. Some manufacturers advise against vinegar on matte finishes entirely. Always test a small, hidden area first. Use a 50/50 mixture with distilled water at most. Rinse very quickly and thoroughly after use. For general faucet buildup, explore options on how to clean build up on faucet.
Ideal Cleaning Tools
The tools you use are just as important as the solutions. Abrasive materials will scratch the surface. This will permanently damage the matte finish.
- Soft Microfiber Cloths: These are indispensable. They are non-abrasive and highly absorbent. They lift dirt and water effectively without scratching. Keep several on hand: one for cleaning, one for rinsing, and one for drying.
- Soft Sponge: A non-scratch sponge can be used for more stubborn areas. Make sure it does not have an abrasive scrubbing side.
- Soft-Bristle Brush (e.g., old toothbrush): This is useful for getting into tight spots. Use it gently around the base or handles. It helps clean seams and crevices without scratching the surface.
- Cotton Swabs: These are great for cleaning very small, hard-to-reach areas. They can tackle grime around the aerator or handle joints.
- Spray Bottle: A small spray bottle is useful for applying your cleaning solution evenly. This prevents oversaturation in one area.
Step-by-Step Guide to Daily Cleaning
Daily cleaning keeps your matte black faucet looking pristine. Regular, gentle maintenance prevents buildup. It reduces the need for deeper, more intensive cleaning sessions. This simple routine only takes a few moments. It saves you time and effort in the long run. I find that quick daily wipes make a huge difference.
Follow these steps to keep your faucet sparkling. This method is safe for the finish. It removes fingerprints, light water spots, and general dust.
Preparation
Before you start cleaning, gather your supplies. You will need mild dish soap, warm water, and at least two clean, soft microfiber cloths. One cloth will be for cleaning, and the other for drying. Ensure your cloths are completely free of lint or debris. Even tiny particles can scratch the delicate matte finish. Turn off the water supply if you plan to clean the aerator separately.
The Cleaning Process
- Prepare the Cleaning Solution: In a small bowl or spray bottle, mix a few drops of mild dish soap with warm water. Stir or shake gently to combine. You want a slightly soapy water, not sudsy.
- Dampen a Microfiber Cloth: Dip one clean microfiber cloth into the soapy water. Wring it out well. The cloth should be damp, not dripping wet. Excess water can leave spots.
- Gently Wipe the Faucet: Carefully wipe down all surfaces of the matte black faucet. Cover the spout, handles, and base. Use light pressure. Do not scrub harshly. The goal is to lift dirt and oils, not to rub them in. For any black gunk that has accumulated, refer to methods described on how to clean black gunk from faucet.
- Rinse Thoroughly: Rinse the dirty microfiber cloth under clean, running water. Wring it out completely. Now, use this damp, clean cloth to wipe down the faucet again. This step removes all soap residue. Soap left on the surface can dull the finish or attract more dirt.
- Dry Immediately: This is perhaps the most important step. Grab your second clean, dry microfiber cloth. Immediately and thoroughly dry the entire faucet surface. Pay close attention to curves and crevices where water can pool. Drying prevents water spots from forming as the water evaporates. This immediate drying also prevents streaks. For faucet heads, specifically, you might find tips on how to clean kitchen faucet spray head.
Tackling Stubborn Water Spots and Mineral Buildup
Matte black faucets beautifully highlight any water spots or mineral buildup. Hard water deposits can appear as white, chalky patches. These can be tough to remove with just soap and water. Addressing them quickly is important. Prolonged exposure to hard water can etch the finish.
This section provides specific techniques for removing these stubborn marks. We will focus on gentle yet effective solutions. The key is patience and careful application.
Using a Diluted Vinegar Solution (with caution)
Vinegar is a natural acid. It effectively dissolves mineral deposits. However, its acidity can damage matte finishes if used improperly. Always proceed with extreme caution.
- Dilution is Key: Mix equal parts white vinegar and distilled water. A 50/50 ratio is the maximum strength you should use. Some prefer an even weaker solution, like 1 part vinegar to 3 parts water. Distilled water ensures no new minerals are introduced. For cleaning faucet heads without using vinegar, there are alternative methods discussed on how to clean faucet head without vinegar.
- Spot Treatment Method: Dampen a clean microfiber cloth with the diluted vinegar solution. Do not spray directly onto the faucet. Place the damp cloth over the water spots or mineral buildup. Let it sit for only a few minutes (2-5 minutes maximum). Do not let it dry on the surface.
- Gentle Scrubbing: After the short soak, gently rub the area with the same cloth. The spots should begin to loosen. For stubborn buildup, you might need a soft-bristle toothbrush. Use very light pressure.
- Immediate and Thorough Rinsing: This step is critical. Rinse the faucet completely with plain water. Use a clean, wet microfiber cloth to wipe away all vinegar residue. Do not leave any vinegar on the surface.
- Immediate Drying: As always, dry the faucet thoroughly with a separate dry microfiber cloth. This prevents new water spots from forming.
Alternative Spot Removal Methods
If you prefer to avoid vinegar or find it too risky, other methods exist for water spots.
- Lemon Juice and Water: Similar to vinegar, lemon juice is acidic. Dilute fresh lemon juice with water (50/50). Apply with a cloth. Rinse and dry immediately. Test in an inconspicuous area first.
- Rubbing Alcohol: For light water spots, rubbing alcohol (isopropyl alcohol) can sometimes work. Apply a small amount to a microfiber cloth. Wipe the spots gently. Alcohol evaporates quickly, reducing new spots. Ensure it is pure rubbing alcohol, not a scented or colored variety.
- Commercial Water Spot Removers (Non-Abrasive, pH Neutral): Some manufacturers offer products specifically designed for matte finishes. Look for formulas that are non-abrasive and pH neutral. Always read the product label carefully. Check for compatibility with matte black finishes. Test the product on an hidden area before full application.
Cleaning the Aerator
Mineral buildup often clogs the faucet aerator. This reduces water flow or makes it spray unevenly.
- Remove the Aerator (if possible): Most aerators unscrew from the faucet spout. Use a pair of pliers if needed, but wrap the aerator in a cloth to prevent scratching.
- Soak the Aerator: Place the aerator in a small bowl. Cover it with a solution of diluted vinegar (50/50 with water) or pure lemon juice. Let it soak for 30 minutes to an hour. For a method that avoids removing the aerator, you can find techniques on how to clean faucet aerator without removing.
- Brush Clean: After soaking, use a soft-bristle brush (like an old toothbrush) to gently scrub away loosened mineral deposits. Rinse the aerator thoroughly under running water.
- Reinstall: Screw the clean aerator back onto the faucet. Ensure it is snug but do not overtighten. This prevents leaks.
Dealing with Grime and Grease
Kitchen matte black faucets often collect grease and grime. Cooking splatters and food residue stick to the surface. These substances can make the faucet look dull and dirty. Standard cleaning with mild soap works for general dirt. But some grime requires a bit more focus. The challenge is to remove the stickiness without harming the matte finish.
This section offers methods to tackle these greasy issues. We aim to restore your faucet’s clean, smooth feel. These techniques are safe for the delicate surface.
Addressing Oily Residue and Fingerprints
Oily residue and fingerprints are common on kitchen faucets. Natural oils from hands transfer easily. They create noticeable smudges on the dark, non-reflective surface.
- Mild Soap Solution: For everyday oily marks, a mild dish soap solution is highly effective. Dish soap is designed to cut through grease. Mix a few drops of soap with warm water. Dampen a microfiber cloth with this solution. Wipe the faucet gently. The soap will dissolve the oils.
- Rinse Thoroughly: After wiping with the soapy cloth, rinse the cloth with clean water. Then, wipe the faucet again to remove all soap residue. Any leftover soap can attract more dirt.
- Immediate Drying: Always dry the faucet immediately with a clean, dry microfiber cloth. This step prevents water spots from forming. It also ensures a streak-free finish.
- Isopropyl Alcohol (for light residue): For very light, fresh fingerprints or oily smudges, isopropyl alcohol can work. Apply a small amount to a clean microfiber cloth. Wipe the affected area gently. Alcohol evaporates quickly, leaving no residue. Ensure you use pure isopropyl alcohol. Avoid scented or colored varieties.
Removing Stuck-On Grime
Sometimes, grease or food particles dry onto the faucet. These can be harder to remove. They require a bit more patience.
- Soak and Soften: Do not pick or scrape at stuck-on grime. This can scratch the finish. Instead, dampen a microfiber cloth with your mild dish soap solution. Place the damp cloth directly over the grime. Let it sit for 5-10 minutes. This helps to soften the stuck-on material.
- Gentle Rubbing: After soaking, gently rub the area with the damp cloth. The grime should now be easier to lift. If necessary, use a soft-bristle brush. An old toothbrush works well for crevices. Use very light pressure.
- Repeat if Necessary: For very stubborn grime, you may need to repeat the soak-and-rub process. Patience is key to avoiding damage.
- Rinse and Dry: Once the grime is gone, rinse the faucet thoroughly with a clean, damp cloth. Then, dry it immediately with a dry microfiber cloth.
- Dealing with Black Gunk: If you find specific black gunk buildup, you might find additional specialized advice on how to clean black gunk from faucet. This can be helpful for concentrated areas of grime.
Maintaining Cleanliness in Kitchens
Kitchens are high-traffic areas. This means more frequent cleaning for matte black faucets.
- Wipe After Every Use: Make it a habit to quickly wipe down the faucet after each use. This removes fresh water droplets and prevents them from drying into spots.
- Clean Splatters Immediately: If cooking causes splatters, wipe them off as soon as possible. Fresh grease is much easier to remove than dried, caked-on grime.
- Use a Faucet Protector (Optional): Some people apply a very thin layer of car wax or a specialized faucet protectant. This creates a barrier against water and oils. It makes future cleaning easier. Always choose products safe for matte finishes. Test in a hidden area first.
Preventative Measures for a Lasting Finish
Prevention is the best strategy for keeping your matte black faucet looking new. By taking simple steps, you can significantly reduce cleaning time. You also protect the finish from damage. Proactive care extends the life and beauty of your fixture. My goal is always to prevent issues before they start.
These measures are easy to incorporate into your daily routine. They save you from stubborn cleaning tasks later. A little effort each day goes a long way.
The Power of Immediate Drying
This is the single most important preventative measure. Water contains minerals. When water evaporates, these minerals are left behind. They form unsightly water spots and mineral buildup. Matte black finishes show these spots very clearly.
- Always Dry After Use: Keep a dedicated clean, dry microfiber cloth near your faucet. After every use, especially after washing hands or dishes, quickly wipe down the entire faucet. This removes all water droplets.
- Focus on Problem Areas: Pay extra attention to the base of the faucet and any curved areas. Water tends to pool in these spots. Drying immediately prevents mineral deposits from forming.
Regular Gentle Wiping
Consistent, light cleaning helps prevent dirt and oils from accumulating.
- Daily Quick Clean: A daily wipe with a damp microfiber cloth is enough for most situations. Follow up with immediate drying. This removes fingerprints and light dust before they become difficult.
- Weekly Deeper Clean: Once a week, perform the mild dish soap and water cleaning method. This removes any lingering oils or soap scum that accumulate over time.
Using the Right Products Consistently
Sticking to safe cleaning products protects your faucet.
- Mild Soap Only: Use only mild dish soap and water for regular cleaning. Avoid harsh detergents, abrasive cleaners, or anything with strong acids.
- No Wax or Polish (Unless Specific for Matte): Most waxes and polishes are designed for shiny surfaces. They can leave a streaky or greasy residue on matte finishes. If you use a protectant, ensure it is specifically made for matte black fixtures. Test it first.
- Consider Water Softeners: If you have very hard water, consider installing a whole-house water softener. This reduces mineral content in your water. It significantly reduces water spots and mineral buildup on all your fixtures. It also protects appliances.
Protecting Against Scratches
The matte finish can be susceptible to scratches.
- Soft Tools Only: Only use soft microfiber cloths and non-abrasive sponges. Never use scouring pads, steel wool, or stiff brushes.
- Remove Jewelry: Take off rings or bracelets when cleaning near the faucet. These can accidentally scratch the surface.
- Careful Handling: Be mindful when placing objects near the faucet. Avoid dropping hard items onto the surface.
By implementing these preventative measures, your matte black faucet will maintain its stunning appearance. It will look like new for many years to come. This also makes your cleaning routine much easier.
Common Mistakes to Avoid When Cleaning Matte Black Faucets
Cleaning a matte black faucet requires special care. Making a mistake can quickly damage its unique finish. I’ve seen many people accidentally ruin their beautiful fixtures. Knowing what to avoid is as important as knowing what to do.
This section covers common pitfalls. It helps you prevent costly damage. These mistakes often stem from using the wrong products or techniques.
Using Abrasive Cleaners or Tools
This is the number one mistake. Matte finishes are delicate. They scratch easily.
- Avoid Scouring Pads: Never use scrubbing sponges with abrasive surfaces, steel wool, or rough cloths. These will create tiny scratches. Over time, these scratches will dull the finish and make it look shiny in spots.
- No Harsh Brushes: Stiff-bristle brushes are too harsh. They can damage the surface texture. Stick to soft-bristle brushes like an old toothbrush for tight spots.
- Say No to Abrasive Cleansers: Powders, scrubbing creams, or cleansers containing gritty particles will ruin the finish. They abrade the surface and leave permanent marks.
Applying Harsh Chemicals
Many common household cleaners are too strong for matte black finishes.
- Avoid Bleach and Ammonia-Based Cleaners: Products like bleach, window cleaner (Windex), or multi-surface cleaners often contain ammonia. These chemicals can strip the finish. They can cause discoloration or permanent dullness.
- No Strong Acids or Alkalis: Drain cleaners, oven cleaners, or strong descalers are extremely corrosive. They will instantly damage the matte coating. Even prolonged exposure to strong vinegar can be harmful, as discussed previously.
- Steer Clear of Wax or Oil-Based Polishes (Unless Specific): Regular furniture polish or car wax might seem like a good idea for shine. However, they can leave a greasy residue or streaks on matte surfaces. Use only products specifically designed for matte finishes if you choose to use a protectant.
Allowing Water or Cleaning Solutions to Dry on the Faucet
This mistake leads to visible spots and streaks.
- Immediate Drying is Crucial: Never let water drops air dry on the faucet. The minerals in the water will leave behind spots. Always wipe the faucet completely dry immediately after cleaning or use.
- Rinse Thoroughly: After using any cleaning solution, even mild soap and water, ensure you rinse every trace of it off the faucet. Dried soap residue will leave a dull film. This film also attracts more dirt and makes the faucet look dirty faster.
Ignoring Manufacturer’s Guidelines
Manufacturers often provide specific care instructions.
- Read the Manual: Always check the faucet’s care manual or the manufacturer’s website. They may have unique recommendations or warnings for their specific finish. Some matte black finishes might have slightly different tolerances.
- Warranty Issues: Using unapproved cleaning methods can void your faucet’s warranty. This is important to consider if issues arise later.
Over-Cleaning or Under-Cleaning
Balance is important.
- Don’t Over-Clean: Excessive scrubbing or using strong solutions too often can wear down the finish. Gentle and consistent is better than aggressive and infrequent.
- Don’t Under-Clean: Allowing grime, soap scum, or mineral buildup to sit for too long makes it much harder to remove. It also increases the risk of permanent damage. Regular, light cleaning prevents major issues.
Avoiding these common mistakes will ensure your matte black faucet remains a beautiful focal point in your home for many years.
Advanced Tips for Maintaining Matte Black Faucets
Beyond basic cleaning, a few advanced tips can help you keep your matte black faucet in top condition. These methods focus on prevention and long-term preservation. They go beyond simple daily wipes. My experience suggests that thinking proactively always pays off.
These tips help maintain the deep, rich appearance of your faucet. They prevent common issues before they become problems. Investing a little extra effort now saves significant time and money later.
Implementing a Protective Barrier
Adding a protective layer can make cleaning easier and repel water.
- Car Wax (Carnauba-based, non-abrasive): A very thin layer of high-quality carnauba wax can provide a barrier. This makes water bead up and roll off. Apply a tiny amount to a clean microfiber cloth. Wipe it onto the faucet. Let it dry for a few minutes. Then, buff very gently with a fresh, clean microfiber cloth until no residue remains. Always test in an inconspicuous area first. Ensure the wax is non-abrasive and free of cleaning agents or dyes. This method works well for repelling water, as does how to clean black stuff in sink drain that sometimes appear from similar buildup.
- Specialized Faucet Sealants: Some brands offer sealants specifically for matte finishes. These products are designed to create a protective, water-repellent layer without altering the finish. Follow the product instructions precisely. They are formulated to be safe.
Addressing Scratches and Blemishes (Limited Options)
Matte black finishes are generally not repairable if scratched deeply. The coating is a thin layer.
- Light Scuffs: For very light surface scuffs that haven’t broken through the finish, sometimes a tiny drop of mineral oil applied and buffed gently with a microfiber cloth can help to blend them in visually. This is a cosmetic fix only.
- Manufacturer Touch-Up Kits: Some faucet manufacturers offer touch-up pens or kits for minor imperfections. Check with your faucet’s brand. These are typically for paint chips, not deep scratches. Using these ensures the color matches.
Dealing with Stubborn Buildup Prevention
Preventing heavy mineral buildup is better than treating it.
- Water Hardness Test: Test your home’s water hardness. If you have very hard water, consider a water softener system. This is a long-term solution. It protects all your plumbing fixtures and appliances.
- Regular Aerator Cleaning: Don’t wait for water flow to diminish. Periodically clean your faucet aerator. Soak it in diluted vinegar. This prevents hard mineral
- matte black faucet
- faucet cleaning
- black faucet care
- water spots
- cleaning tips
- home maintenance