· Automotive Maintenance · 15 min read
How To Clean Oil Cooler Radiator
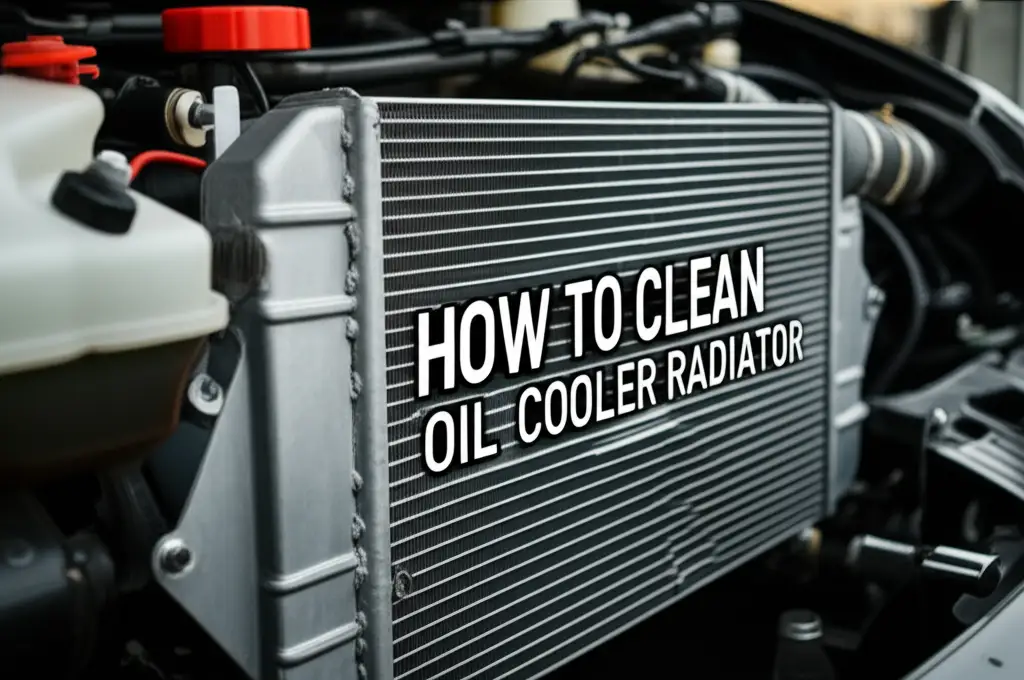
Restore Your Engine: How to Clean Oil Cooler Radiators
An oil cooler radiator plays a vital role in keeping your engine running smoothly. It helps manage engine oil temperature. Over time, dirt, debris, and even oil residue can build up on or inside this component. This buildup reduces its efficiency. Learning how to clean an oil cooler radiator can prevent serious engine problems. It helps maintain performance and extend engine life. This guide provides a detailed look at cleaning an oil cooler radiator. It covers why it’s important, what tools you need, and step-by-step cleaning methods.
Takeaway
- Regular Cleaning Prevents Overheating: Keep your engine cool by maintaining a clean oil cooler.
- External Cleaning is Key: Remove dirt and debris from fins for better airflow.
- Internal Flushing Addresses Sludge: Use appropriate cleaners to remove internal oil buildup.
- Proper Tools Make a Difference: Gather degreasers, brushes, and safety gear before starting.
- Preventative Maintenance Saves Money: Regular checks extend the life of your oil cooler and engine.
Quick Answer
To clean an oil cooler radiator, first, remove it from the vehicle for thorough access. Use a gentle degreaser and soft brush to clean external fins, then rinse thoroughly. For internal cleaning, flush with a specialized cleaner or mineral spirits to remove sludge, ensuring all residue is purged before reinstallation.
Understanding Your Oil Cooler Radiator
The oil cooler radiator is a heat exchanger. It looks similar to a small car radiator. Its main job is to cool the engine oil. Hot oil from the engine flows through the cooler’s core. Air passes over the fins, removing heat from the oil. This process keeps the oil at an optimal temperature. Proper oil temperature ensures efficient lubrication. It also prevents oil breakdown.
Over time, this component can get dirty. External surfaces gather road grime, bugs, and dust. These block airflow. Internal passages can accumulate sludge and old oil deposits. This reduces the oil’s ability to transfer heat. A dirty oil cooler means hotter oil. Hotter oil means less engine protection. Understanding its function helps you see why cleaning is so important. A clean oil cooler directly impacts your engine’s health.
Why Cleaning Your Oil Cooler is Essential
Cleaning your oil cooler radiator is not just about keeping things neat. It is a critical maintenance task. A dirty oil cooler cannot dissipate heat effectively. This leads to higher engine oil temperatures. High oil temperatures can cause the oil to break down faster. When oil breaks down, it loses its lubricating properties. This increases wear and tear on engine components. Overheating is a major risk when the oil cooler is clogged.
Moreover, a clogged oil cooler can restrict oil flow. This starves parts of the engine of proper lubrication. Such issues lead to premature engine wear. It can also cause costly engine damage. Regular cleaning ensures maximum heat transfer. It maintains optimal oil pressure and flow. This translates to better engine performance and longevity. Ignoring this task can lead to expensive repairs. Maintaining your oil cooler is an investment in your vehicle’s future. It keeps your car running efficiently.
Gathering Your Tools: What You Need
Before you start cleaning your oil cooler radiator, gather all necessary tools and supplies. Having everything ready saves time and frustration. Safety gear should always be your first priority. This job involves working with oil and cleaning chemicals. You will also deal with tight spaces in your engine bay. Preparing properly ensures a safe and effective cleaning process.
Here is a list of items you will likely need:
- Safety Glasses and Gloves: Protect your eyes and hands from chemicals and sharp edges.
- Socket Set and Wrenches: For disconnecting hoses and mounting bolts.
- Drain Pan: To catch any oil or fluid that spills during removal.
- Degreaser: An automotive-specific degreaser works best for oil and grime.
- Soft Bristle Brush or Fin Comb: For cleaning external fins without damaging them.
- Garden Hose with Spray Nozzle: For rinsing. Avoid high-pressure washers unless specifically designed for radiators.
- Compressed Air: For drying and blowing out debris from fins.
- Funnel: For pouring cleaning solutions into the cooler.
- Mineral Spirits or Dedicated Engine Flush: For internal cleaning of oil passages.
- New O-rings or Gaskets: It is good practice to replace these when reinstalling.
- Shop Rags or Old Towels: For wiping up spills.
- Flashlight: To inspect hard-to-reach areas.
Using the right tools makes the job easier. It also reduces the risk of damaging the oil cooler. Always refer to your vehicle’s service manual for specific removal instructions. This ensures you know the exact steps for your car.
Step-by-Step Guide: Cleaning the Oil Cooler Externally
Cleaning the exterior of your oil cooler radiator is a crucial first step. This process removes surface grime and debris. It improves airflow significantly. Restricted airflow means less heat exchange. A clean exterior allows the cooler to work at its best. Always ensure the engine is cool before you begin.
Here is how to clean the oil cooler externally:
1. Disconnect and Remove the Oil Cooler
First, locate your oil cooler. It is usually near the main radiator or oil filter. Place a drain pan underneath to catch any oil. Use your socket set to loosen the oil lines connected to the cooler. Be prepared for a small amount of oil to drain out. Next, unbolt the mounting brackets. Carefully remove the oil cooler from the vehicle. This step provides full access for thorough cleaning.
2. Initial Rinse
Once the oil cooler is removed, give it an initial rinse. Use a garden hose with a gentle spray nozzle. Aim the water parallel to the fins, not directly into them. Direct pressure can bend or damage the delicate fins. This initial rinse removes loose dirt, dust, and large debris. It prepares the surface for degreasing.
3. Apply Degreaser
Spray a generous amount of automotive degreaser onto the external fins. Make sure to cover all surfaces. Let the degreaser sit for 5-10 minutes. This allows it to break down stubborn oil, grease, and grime. Always follow the product manufacturer’s instructions for dwell time. Choosing a high-quality degreaser helps lift contaminants effectively.
4. Gentle Scrubbing
Use a soft-bristle brush or a fin comb to gently clean between the fins. Work slowly and carefully. Avoid putting too much pressure on the fins. Bent fins block airflow and reduce efficiency. The brush helps dislodge baked-on dirt and grease that the degreaser has loosened. Pay attention to all sides of the cooler.
5. Final Rinse and Inspection
After scrubbing, rinse the oil cooler thoroughly with the garden hose. Continue rinsing until all degreaser residue is gone. Water should run clear from the fins. Inspect the fins for any remaining debris or bent areas. You can gently straighten bent fins with a fin comb or a small, flat-blade screwdriver. Ensure the cooler looks clean and free of blockages.
If you have oil stains on your garage floor from previous work, this is a good time to address them. Products designed for oil stain removal can help. For guidance, see our article on how to clean oil off garage floor.
Deep Cleaning Methods: Addressing Internal Buildup
While external cleaning is important, internal cleaning addresses sludge and deposits that restrict oil flow. This is where most efficiency loss occurs. Internal cleaning methods require more attention and specific solutions. It ensures the oil cooler functions optimally. Ignoring internal buildup can lead to serious engine issues.
1. Flushed with Mineral Spirits
Mineral spirits is a common choice for flushing oil coolers. It dissolves oil residue and sludge effectively. First, cap off one port of the oil cooler. Pour mineral spirits into the other port until the cooler is full. Let it sit for several hours, or even overnight, for severe buildup. This allows the spirits to break down the hardened deposits. Then, vigorously shake the cooler to agitate the solution. Finally, drain the mineral spirits into a suitable container. Repeat this process until the drained fluid runs clear. This indicates most contaminants are removed. You might also consider reading about how to clean engine oil sludge for more insights on sludge removal.
2. Using Specialized Oil Cooler Flush Products
Several automotive brands offer dedicated oil cooler flush products. These are formulated to safely and effectively dissolve internal oil deposits. Follow the product’s specific instructions. Generally, you introduce the flush solution into the cooler. You let it circulate or sit for a specified time. Then you drain it. These products are often more aggressive than mineral spirits. They can provide a more thorough clean. Always ensure the product is compatible with your oil cooler’s materials.
3. Compressed Air Blow-Out
After flushing, use compressed air to blow out any remaining liquid or loosened debris. Connect an air nozzle to one port and aim it through the cooler. This helps to completely dry the internal passages. It also expels any small particles that might still be present. Ensure all internal passages are clear and dry before reinstallation. Any remaining moisture or cleaner can contaminate your fresh engine oil.
4. Backflushing (If Applicable)
Some oil coolers can be backflushed. This involves forcing fluid or air through in the opposite direction of normal oil flow. This method helps dislodge stubborn particles. It pushes them out the way they came in. Check your vehicle’s service manual to see if backflushing is recommended for your specific oil cooler design. Use a low-pressure air source or a controlled water flow for backflushing. High pressure can cause internal damage.
Properly cleaning the internal passages restores the oil cooler’s full capacity. It ensures efficient heat exchange. This step is vital for extending the life of your engine and preventing future issues.
Reassembly and Final Checks
After cleaning your oil cooler radiator, reassembly requires careful attention. Proper reinstallation prevents leaks and ensures the cooler functions correctly. This step is as important as the cleaning itself. Rushing through it can negate all your hard work. Always use new gaskets or O-rings when reconnecting components. This prevents leaks.
Here’s how to reassemble your oil cooler and perform final checks:
1. Replace Gaskets and O-rings
Before installing the oil cooler, replace any old gaskets or O-rings. These seals harden and lose their elasticity over time. Reusing old ones often leads to leaks. Apply a thin layer of clean engine oil to the new O-rings. This helps them seat properly and prevents tearing during installation. This simple step saves you from future headaches and potential oil loss.
2. Mount the Oil Cooler
Carefully position the oil cooler back into its original mounting location. Hand-tighten the mounting bolts first. Ensure the cooler is seated correctly. Then, use your wrench or socket set to tighten the bolts to the manufacturer’s specified torque. Do not overtighten, as this can strip threads or damage components. Refer to your service manual for torque specifications.
3. Reconnect Oil Lines
Reconnect the oil lines to the cooler. Ensure they are aligned properly before tightening. Again, hand-tighten first, then use your tools. Make sure the connections are snug but not overtightened. Leaks often occur at these connection points if they are not tightened correctly. Double-check all connections.
4. Refill Engine Oil
After reassembly, you must check your engine oil level. The process of removing the oil cooler will have resulted in some oil loss. Add fresh engine oil as needed. Bring the oil level to the full mark on your dipstick. Using fresh, clean oil is always recommended after any work involving the oil system.
5. Start the Engine and Check for Leaks
Start your engine and let it run for a few minutes. While the engine runs, carefully inspect the oil cooler and its connections for any signs of leaks. Look for drips or wet spots around the oil lines and mounting points. If you find a leak, shut off the engine immediately. Then tighten the connection or investigate the seal. Sometimes, a very small leak can be hard to spot immediately. Drive the vehicle for a short distance and recheck for leaks. Catching a leak early saves your engine from damage. If you encounter any unexpected oil spills during this process, consult guides like how to clean engine oil off concrete for proper cleanup.
Preventative Maintenance for Your Oil Cooler
Preventative maintenance is key to prolonging the life of your oil cooler radiator. It also maintains optimal engine performance. Regular checks and simple habits can prevent significant buildup. This reduces the need for frequent deep cleaning. Taking proactive steps saves you time and money in the long run. It also gives you peace of mind about your engine’s health.
Here are some tips for preventative maintenance:
1. Regular External Checks
Make it a habit to visually inspect your oil cooler’s external fins during routine vehicle maintenance. Look for signs of dirt, leaves, bugs, or bent fins. You can gently brush off loose debris with a soft brush or compressed air. Straighten any bent fins using a fin comb. A quick rinse with a garden hose can also keep the exterior clean. These small steps prevent major airflow blockages.
2. Monitor Engine Oil Quality
The quality of your engine oil directly impacts internal oil cooler cleanliness. Old, degraded oil can lead to sludge buildup inside the cooler. Follow your vehicle manufacturer’s recommended oil change intervals. Use the correct type and viscosity of oil. High-quality synthetic oils often resist breakdown better. They also produce less sludge. Regularly checking your oil level and condition is a good practice. If you notice your oil appears dark or gritty quickly, it might indicate other engine issues.
3. Check for Leaks and Damage
Regularly inspect the oil cooler and its connections for any signs of oil leaks. Even small leaks can indicate a problem. They can also lead to contaminants accumulating on the cooler’s surface. Check hoses and mounting brackets for damage or looseness. Addressing small leaks early prevents them from becoming larger, more costly problems. A strong oil odor or visible drips under the car are signs to investigate.
4. Consider a Bypass Filter (Advanced)
For some vehicles, especially those used for heavy towing or performance, a bypass oil filter system can be a beneficial addition. A bypass filter filters a small portion of the oil stream very finely. This removes even tiny contaminants that the main oil filter might miss. This can significantly reduce sludge and varnish formation. This keeps internal engine components, including the oil cooler, cleaner for longer. This is a more advanced modification. Consult with an automotive professional before installing one.
By incorporating these preventative measures, you can significantly extend the life of your oil cooler. You also reduce the need for intensive cleaning. Consistent maintenance ensures your engine runs efficiently and stays cool.
FAQ Section
Q1: How often should I clean my oil cooler radiator?
A1: The cleaning frequency depends on your driving conditions and vehicle type. For typical driving, an external inspection and light cleaning every 1-2 years or during major service is good. Internal flushing is usually only needed if you suspect performance issues like overheating or if you find significant sludge during other engine work. Always check your vehicle’s service manual.
Q2: Can I clean my oil cooler radiator without removing it from the car?
A2: You can perform a basic external cleaning without removal. Use a garden hose with low pressure and a soft brush to clean visible fins. However, for a thorough external clean or any internal flushing, removal is highly recommended. This allows full access to all surfaces and ensures proper drainage and drying.
Q3: What happens if I don’t clean my oil cooler radiator?
A3: If you do not clean your oil cooler radiator, dirt and debris will accumulate on the fins, blocking airflow. Inside, oil sludge will build up, restricting oil flow and reducing heat transfer. This leads to higher engine oil temperatures, oil breakdown, increased engine wear, and potential overheating, which can cause severe engine damage.
Q4: Can I use a pressure washer to clean my oil cooler?
A4: Using a high-pressure washer is not recommended for oil coolers. The high pressure can easily bend or damage the delicate fins. Bent fins restrict airflow. This reduces the cooler’s efficiency. Use a garden hose with a gentle spray nozzle instead. For stubborn dirt, use a soft brush and automotive degreaser.
Q5: What type of degreaser is best for oil coolers?
A5: An automotive-specific degreaser is best for cleaning oil coolers. These products are designed to break down oil and grease without damaging automotive components. Avoid harsh industrial cleaners or strong solvents that might corrode or damage the cooler’s materials. Always read product labels and safety instructions before use.
Q6: How do I know if my oil cooler needs internal cleaning?
A6: Signs your oil cooler needs internal cleaning include consistent engine oil overheating, even after external cleaning. You might also notice reduced oil flow or a sudden decrease in engine performance. If you are doing other engine work and find significant sludge in oil passages, it is a strong indicator that the oil cooler needs flushing too.
Conclusion
A well-maintained oil cooler radiator is vital for your engine’s health. Neglecting this component can lead to higher oil temperatures. This degrades engine oil and causes premature wear. Learning how to clean an oil cooler radiator properly helps prevent these issues. It ensures your engine runs efficiently. By following the steps outlined in this guide, you can effectively clean both the exterior and interior of your oil cooler. Regular maintenance extends its lifespan. It also helps your engine perform at its best.
Remember to prioritize safety. Use the right tools. Always replace old gaskets and O-rings during reassembly. This prevents leaks. A clean oil cooler directly contributes to a cooler, more reliable engine. Make regular oil cooler maintenance a part of your routine. Your vehicle will thank you for it with years of smooth, trouble-free operation. Take action today to keep your engine running cool and strong.
- oil cooler cleaning
- radiator maintenance
- engine cooling
- car repair
- automotive cleaning