· Home Maintenance · 19 min read
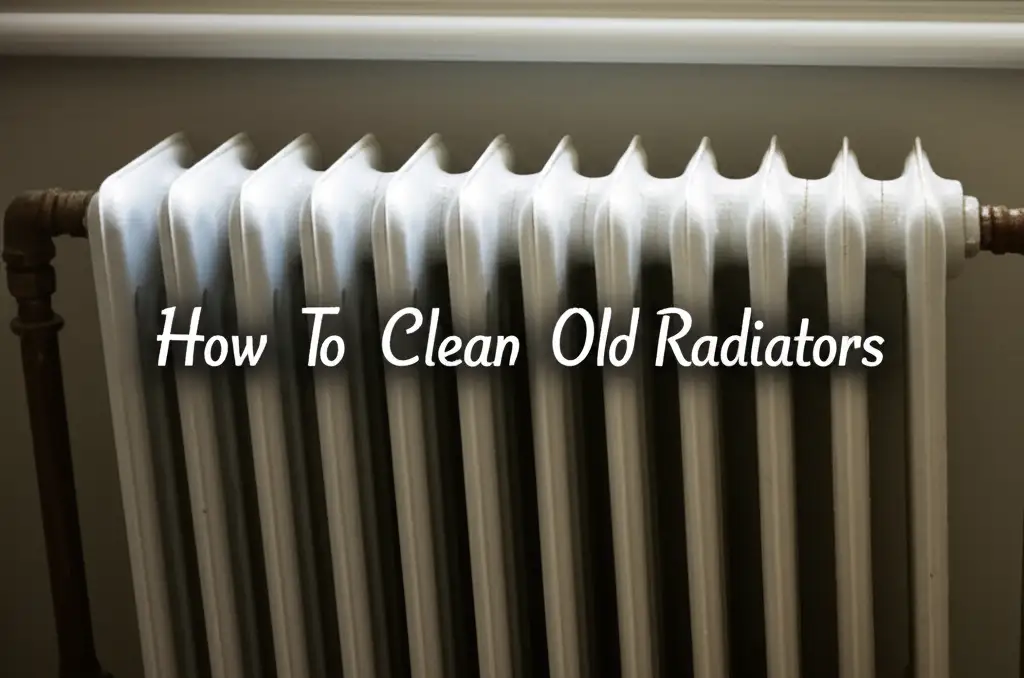
How To Clean Old Radiators

How to Clean Old Radiators for Better Heat
Imagine your home feeling cozy and warm. Now, picture your radiators – are they truly helping or hindering? Old radiators often gather dust, grime, and rust. This buildup can make them less efficient. It can also affect your home’s air quality. I understand the challenge of tackling these historic heating units. This guide will show you exactly how to clean old radiators properly. We will cover everything from basic dusting to deep cleaning methods. You will learn how to restore their beauty and improve their performance. This article ensures your old radiators work their best.
Takeaway
Cleaning old radiators improves home heating and air quality.
- Regular dusting removes surface dirt.
- Deep cleaning tackles stubborn grime and rust.
- Proper tools make the job easier and safer.
- Preventative care keeps radiators efficient long-term.
To clean old radiators effectively, turn them off and let them cool. Use a vacuum with a brush attachment to remove loose dust and cobwebs. For deeper grime, gently wipe surfaces with a damp cloth and mild detergent. Address rust spots with a wire brush and appropriate rust treatment. Finish by wiping everything dry.
Why Cleaning Your Old Radiators Matters
Old radiators are beautiful features in many homes. They add character and warmth. But over time, they collect a lot of dust. This dust settles in their fins and crevices. It also builds up on their surfaces. When radiators heat up, they circulate air. This air carries the dust with it. This means dirty radiators can spread dust throughout your home. Cleaning them is not just about looks. It significantly impacts your indoor air and your heating bills.
I always tell people that clean radiators work better. Think about it: a layer of dust acts like insulation. It traps heat on the radiator surface. This prevents the heat from reaching your room effectively. Your heating system then works harder to achieve the desired temperature. This uses more energy. More energy use means higher heating costs. A simple cleaning can help your radiators release heat more freely. This makes your home warmer with less effort. It truly makes a difference in comfort and savings.
Clean radiators also last longer. Dust and moisture can create rust. Rust weakens the metal over time. Regular cleaning removes these harmful elements. It protects the radiator’s surface. This helps preserve its original condition. It prevents costly repairs or replacements later on. You are investing in your home’s future by maintaining its heating system. I find that this small effort pays off in many ways.
Health and Air Quality Benefits
Dirty radiators are bad for your health. Dust mites and allergens thrive in dusty places. Radiators create warm, inviting spots for them. When your heating system turns on, it blows these particles into the air. This can worsen allergies or asthma symptoms. Breathing cleaner air is important for everyone in your household.
Cleaning removes these hidden dust traps. It significantly reduces airborne particles. Your family breathes easier. You will notice less dust settling on furniture too. I believe a clean home is a healthy home. Starting with your radiators is a great first step.
Improving Heating System Efficiency
Your radiator’s job is to transfer heat. Dust acts as a barrier. It blocks heat from radiating into your room. This means the radiator needs to stay hot longer. It uses more fuel to do its job. This wastes energy and money.
A clean radiator allows heat to escape freely. It becomes more efficient. Your home heats up faster. The heating system does not have to work as hard. This extends the life of your furnace or boiler. It also lowers your energy consumption. You get more heat for less money.
Preserving Radiator Longevity
Radiators are investments. They can last for many decades with proper care. Neglecting them leads to problems. Dust mixed with moisture causes corrosion. This can lead to leaks or weakened spots. These issues are expensive to fix.
Regular cleaning prevents this damage. It protects the metal from rust. It keeps the radiator structurally sound. You ensure your radiators provide reliable heat for many years. It is a simple way to protect a valuable part of your home.
Essential Tools and Supplies for Radiator Cleaning
Before you start cleaning old radiators, gather your tools. Having everything ready makes the job smoother. You will need a mix of basic cleaning items and some specialized tools. Proper supplies ensure you clean effectively without damaging the radiator. I always prepare my workspace first. This saves time and frustration during the cleaning process.
First, think about protection. Cleaning can get dusty and dirty. You will want to protect yourself and your home. Drop cloths or old towels are essential. They catch falling dust and water. Gloves protect your hands from dirt and cleaning solutions. A face mask is also a good idea. It prevents you from inhaling dust particles. Safety glasses protect your eyes, especially when using brushes.
Next, consider the cleaning agents. A mild all-purpose cleaner works for most surfaces. For tougher spots or rust, you might need something stronger. White vinegar is excellent for general cleaning and tackling light rust. Dish soap mixed with water also works well. Always test any cleaner in a small, hidden area first. This checks for discoloration or damage. I find a gentle approach is always best with old items.
Basic Dusting and Vacuuming Tools
Start with dry cleaning tools. A good vacuum cleaner is your best friend here. Make sure it has a hose attachment. A crevice tool is perfect for reaching narrow spaces between radiator fins. A brush attachment helps loosen stubborn dust. You might also need a long, thin radiator brush. These brushes are specially designed to reach deep into radiators. They can grab dust that vacuums miss.
For surface dust, use a microfiber cloth. These cloths pick up dust without just moving it around. A feather duster or an extendable duster can also help. They reach high or hard-to-access areas. I often use a combination of these tools for a thorough initial clean.
- Vacuum Cleaner: With hose, crevice tool, and brush attachment.
- Radiator Brush: Long and thin, designed for radiator fins.
- Microfiber Cloths: For wiping surfaces.
- Feather Duster/Extendable Duster: For light, surface dust and high spots.
Wet Cleaning Solutions
After dry cleaning, you might need wet cleaning. This is for sticky grime or stains. A spray bottle helps apply cleaning solutions evenly. You will need a bucket for mixing water and cleaner. Sponges or more microfiber cloths are great for wiping. Make sure they are clean. Old toothbrushes can clean small, intricate areas.
For deep cleaning, a gentle degreaser might be needed. This applies if there are oily marks. Remember, always dilute cleaners as directed. Too strong a solution can damage paint or metal. I prefer using natural cleaners when possible. Vinegar solutions are effective and safe for many surfaces. For general cleaning of surfaces, a solution similar to how to clean shower with vinegar can be adapted.
- Spray Bottle: For applying cleaning solutions.
- Bucket: For mixing water and cleaner.
- Sponges/Microfiber Cloths: For wiping.
- Old Toothbrush: For small, hard-to-reach areas.
- Mild All-Purpose Cleaner: Or dish soap, white vinegar.
- Gentle Degreaser (Optional): For oily marks.
Protection Gear
Protecting yourself is crucial. Dust can irritate your lungs. Cleaning solutions can irritate skin. Always wear the right gear. This makes the job safer and more comfortable. I never start a cleaning project without my protective items.
- Gloves: Protect your hands from dirt and chemicals.
- Face Mask: Prevents inhaling dust and cleaning fumes.
- Safety Glasses: Protect your eyes from splashes or flying debris.
- Drop Cloths/Old Towels: Protect your floors and walls.
- Old Clothes: Wear something you do not mind getting dirty.
With these tools, you are ready to tackle even the dirtiest old radiators. Preparation is key to a successful cleaning job.
Step-by-Step Guide to Dusting and Vacuuming Radiators
The first step in cleaning old radiators is always dry cleaning. This removes the bulk of loose dust and debris. It prevents turning dust into mud later when you introduce water. This dry phase is crucial for an effective and less messy clean. I always start here. It makes the entire process much easier.
Begin by turning off your heating system. Ensure the radiators are completely cool. Cleaning a hot radiator is dangerous. It can cause burns. Also, heat makes dust stick and can create fumes from cleaning products. Safety always comes first. Once cool, you can begin the preparation.
Preparing the Area
Lay down drop cloths or old towels. Place them directly under and around the radiator. This catches all the falling dust. Radiators are often incredibly dusty inside. You will be surprised how much dirt comes out. Protecting your floors saves you another cleaning job later. I also move any furniture away from the radiator. This gives me ample space to work. It prevents furniture from getting dusty too.
Vacuuming the Fins and Gaps
Now, grab your vacuum cleaner. Attach the hose and the crevice tool. This tool is narrow. It fits between the radiator fins. Push the crevice tool down into the gaps. Move it slowly from top to bottom. This sucks up trapped dust and cobwebs. Be thorough. Work your way across the entire radiator. For very deep radiators, you might need a long, thin radiator brush first. This brush loosens dust. Then, the vacuum can suck it up.
Next, switch to the brush attachment. Use it to vacuum the exterior surfaces. Go over the top, front, and sides. The soft bristles help dislodge surface dust. Move the brush along the curves and flat parts. This step ensures you capture all loose particles. I often do this twice. It really makes a difference.
- Turn off heating system and let radiators cool.
- Lay drop cloths or old towels under the radiator.
- Move nearby furniture.
- Use vacuum with crevice tool between fins, top to bottom.
- Use vacuum with brush attachment on all exterior surfaces.
- Consider a radiator brush for deeper dust removal before vacuuming.
Wiping Down Surfaces
After vacuuming, much of the dust is gone. But some fine dust might still cling to surfaces. This is where a microfiber cloth comes in handy. Dampen the cloth slightly with plain water. You do not want it dripping wet. Gently wipe down all accessible surfaces. This includes the top, front, and sides. The slightly damp cloth picks up any remaining dust. It leaves the surface clean and ready for deep cleaning if needed.
If you encounter any stubborn dry spots, a light spray of plain water can help. Then, wipe immediately. This step makes the radiator look much cleaner already. It also prepares it for any wet cleaning. This basic clean is often enough for regular maintenance. For older, very dirty radiators, the next step is crucial.
Deep Cleaning Old Radiators for Stubborn Grime
Once the initial dry dusting is complete, you might notice stubborn grime. Old radiators often have layers of dirt. This can include grease, old spills, or even rust. Deep cleaning addresses these tough spots. It makes your radiators truly shine. This phase requires a bit more effort and some liquid solutions. Always remember to wear gloves and protect your floors. I find this part very satisfying.
Start by mixing a gentle cleaning solution. For most grime, warm water with a few drops of dish soap works well. You can also use a diluted all-purpose cleaner. For natural cleaning, a mix of equal parts white vinegar and water is excellent. This vinegar solution is also useful for various household tasks, similar to how to clean shower with vinegar. Put your chosen solution in a spray bottle.
Spray a small section of the radiator at a time. Let the solution sit for a minute or two. This helps loosen the grime. Do not saturate the radiator. A damp sponge or microfiber cloth is your main tool here. Wipe the sprayed area firmly. For intricate details, use an old toothbrush. Its small bristles can reach into small nooks. Rinse your cloth frequently in a bucket of clean water. This prevents spreading dirt around.
Tackling Built-Up Dirt and Stains
Sometimes, dirt bakes onto the radiator surface. This happens over years of heating and cooling. For these stubborn areas, a slightly more aggressive approach is needed. Create a paste with baking soda and water. Apply this paste directly to the stain. Let it sit for about 10-15 minutes. The baking soda helps lift the grime.
After waiting, gently scrub the area with a soft brush or non-scratch scour pad. Rinse with a clean, damp cloth. Repeat if necessary. Avoid abrasive scrubbers that can scratch the paint. I have seen many radiators damaged by harsh scrubbing. Patience is key here. Your goal is to clean, not to strip the paint.
Addressing Rust and Corrosion
Rust is common on old metal radiators. It often appears where moisture has sat. Small rust spots can be treated. First, gently scrub the rust with a wire brush or fine-grade steel wool. This removes loose rust flakes. Be careful not to scratch the surrounding good paint. If you are cleaning old metal items, understanding processes like those used to clean old metal hinges or clean old door hardware can be helpful as they often involve similar rust issues.
After scrubbing, wipe the area clean. For light rust, a solution of white vinegar can work wonders. Apply it with a cloth. Let it sit for a short time. Then wipe away. For more significant rust, you might need a rust converter product. Follow the product’s instructions carefully. These products neutralize the rust and prepare the surface for painting. I always make sure the area is completely dry after treating rust.
Cleaning Underneath and Behind Radiators
Cleaning the visible parts is easy. But radiators often hide dirt underneath and behind them. This is especially true for wall-mounted units. Use a long-handled duster or a flexible brush to reach these areas. Push the dust towards you. Then, vacuum it up. For wet cleaning, use a very damp cloth wrapped around a stick or a long-handled mop. This helps reach those tight spots.
Sometimes, you might need to carefully move the radiator slightly. This provides better access. If you do this, be extremely careful. Radiators are heavy. They are usually connected to plumbing. Do not force them. A professional can help if the radiator cannot be moved safely. I always try to clean as much as possible without moving the unit.
After all wet cleaning, wipe the entire radiator dry. Use a clean, dry microfiber cloth. This prevents water spots and new rust formation. Ensure no moisture remains in crevices. This deep cleaning will significantly improve your radiator’s appearance and efficiency.
Dealing with Paint Issues and Discoloration
Even after a deep clean, your old radiator might still look tired. Years of heat and neglect can cause paint to yellow, chip, or discolor. Simple cleaning methods might not revive its appearance completely. This section covers what to do when your radiator needs more than just a scrub. Understanding these steps helps restore its original charm. I have seen many radiators transformed by proper care.
Discoloration is a common problem. White radiators often turn yellow over time. This happens due to heat and exposure to air. Sometimes, it is cigarette smoke or general grime staining the paint. Light cleaning can remove surface stains. But deep-seated yellowing might be permanent unless you repaint. Before deciding to repaint, ensure the radiator is truly clean. Sometimes, a thorough deep clean reveals the paint is in better shape than you thought.
Chipped or flaking paint is another issue. This occurs due to age, impact, or improper previous painting. Flaking paint needs attention. It exposes the metal underneath to moisture. This can lead to rust. Rust will spread if not addressed. You cannot just paint over flaking areas. The old paint needs preparation first. Ignoring flaking paint can lead to more serious damage later.
Safe Paint Cleaning Methods
For painted radiators, use gentle cleaners. Harsh chemicals can strip paint or leave streaks. A mild detergent mixed with warm water is usually sufficient. You can also use a mixture of white vinegar and water. Apply the solution with a soft cloth. Wipe gently. Avoid abrasive sponges or scrub brushes on painted surfaces. They can scratch or dull the finish.
If there are specific stains, try targeted cleaning. For grease marks, a tiny amount of gentle degreaser can work. Always rinse the area thoroughly with a clean, damp cloth after using any cleaner. Dry the surface immediately. Remember, the goal is to clean the paint, not damage it. My experience shows patience and a gentle touch yield the best results.
When to Repaint Your Radiator
Repainting is a big step. It is needed when the paint is severely chipped, flaking, or discolored. It is also an option if you want to change the color. Before repainting, prepare the surface well. This involves cleaning, sanding, and priming.
First, thoroughly clean the radiator as described earlier. Remove all dust, dirt, and grease. Next, address any rust spots. Lightly sand the entire surface. Use fine-grit sandpaper (around 180-220 grit). This helps the new paint adhere better. For flaking paint, scrape off all loose bits. Sand the edges smooth.
Apply a metal primer specifically designed for radiators. Priming creates a uniform surface. It also helps prevent future rust. Choose a primer that can withstand high temperatures. Once the primer dries, apply special radiator paint. This paint is formulated to resist heat and prevent yellowing. Apply thin, even coats. Multiple thin coats are better than one thick coat. Allow ample drying time between coats. Always read the paint manufacturer’s instructions. A well-painted radiator looks fantastic. It will also be protected for years to come.
Preventing Future Buildup in Your Radiators
Cleaning old radiators takes time and effort. You want to make that effort last. Preventing future dust and grime buildup is key. Regular, light maintenance keeps your radiators looking good. It also ensures they perform efficiently. A little effort often saves a lot of work later. I always suggest a proactive approach. This keeps your home cleaner and warmer.
Dust is the main enemy of radiators. It floats in the air and settles everywhere. Radiators, with their many fins and warm surfaces, are magnets for dust. Preventing dust accumulation is your primary goal. This involves routine cleaning habits and some simple environmental adjustments. A clean environment helps keep radiators clean.
Consider the air quality in your home. If you have pets or a lot of foot traffic, dust levels might be higher. Using air purifiers can help. They trap airborne particles before they settle. Regularly changing your furnace filter is also important. A dirty furnace filter circulates more dust through your heating system. A clean filter means cleaner air entering your radiators.
Regular Maintenance Schedule
Consistency is important for radiator care. I recommend a light cleaning schedule. This prevents dust from building up to problematic levels.
- Weekly Dusting: Use a feather duster or a damp microfiber cloth. Quickly dust the accessible surfaces. This takes only a few minutes. It stops dust from settling deep inside.
- Monthly Vacuuming: Use your vacuum’s brush attachment. Go over the radiator’s exterior. This captures dust that might have missed the weekly dusting.
- Quarterly Deep Dusting: Use the vacuum with the crevice tool. Get into the fins and gaps. This is a more thorough dry clean. Do this before heating season starts and periodically through winter.
- Annual Deep Clean: Once a year, perform a full deep clean. This includes wet wiping and addressing any rust or stains. Summer or early fall is a good time for this. The radiators are not in use. They are cool.
Following this schedule keeps your radiators in top condition. It prevents the need for major cleaning efforts. It also maintains their heating efficiency year-round.
Tips for Better Airflow
Good airflow around your radiators is vital. Obstructions block heat from spreading. This makes your radiators less effective.
- Keep Radiators Clear: Do not block radiators with furniture. Couches, bookshelves, or heavy curtains can trap heat. Ensure there is at least six inches of clear space around the radiator. This allows heat to circulate freely into the room.
- Reflective Panels: Install reflective foil panels behind your radiators. These panels bounce heat away from the wall. They direct it into the room. This improves efficiency. It prevents heat loss through the wall.
- Radiator Covers: If you use a radiator cover, choose one with good ventilation. Covers can reduce heat output if they are too enclosed. Ensure there are enough openings for air to flow. A well-designed cover can enhance aesthetics without sacrificing warmth.
- Maintain Humidity Levels: High humidity can contribute to rust on metal surfaces. Use a dehumidifier in very humid environments. This protects your radiators from moisture damage.
By taking these preventative steps, your old radiators will stay cleaner. They will heat your home more effectively. This means a more comfortable living space and lower energy bills. It is a win-win for your home.
Safety Precautions and Common Mistakes to Avoid
Cleaning old radiators can seem straightforward. But there are important safety measures to consider. Old radiators often deal with high temperatures and heavy metal. Ignoring safety can lead to injury or damage to your heating system. I always stress safety first. This section helps you avoid common pitfalls. You want a clean radiator, not a repair bill or an emergency.
Always ensure the radiator is cold before you touch it. I cannot emphasize this enough. Hot radiators can cause severe burns. Turn off your heating system completely. Allow plenty of time for the radiator to cool down. This might take an hour or more, depending on how long it was running. Do not rush this step.
Protect your hands. Wear sturdy gloves. Cleaning solutions can irritate skin. Dust can also be harsh. Gloves provide a barrier. They also give you a better grip. If you use any power tools, like a drill with a brush attachment, wear safety glasses. This protects your eyes from flying debris. Using protective gear is a simple step that makes a big difference.
Electrical and Heat Safety
Radiators are part of your home’s heating system. This system involves hot water or steam. It might also involve electrical components if it is a modern radiator.
- Turn Off Heat: Always turn off your furnace or boiler. Let the radiators cool completely. This prevents accidental burns. It also prevents water from entering the system while you are working.
- Check for Leaks: Before cleaning, check for any leaks. Even small drips can indicate a problem. Cleaning around a leak might spread water. Address leaks first.
- Avoid Submerging: Do not submerge parts of the radiator in water. Do not spray large amounts of water directly onto the radiator. Water can get into the internal components. This can cause rust or damage over time. Use damp cloths, not wet ones.
- Electrical Outlets: Keep water away from electrical outlets and wiring near the radiator. Water and electricity are a dangerous combination. Be aware of your surroundings.
- cleaning radiators
- radiator maintenance
- vintage heating
- home cleaning
- dust removal
- rust treatment
- heating efficiency


