· Kitchen Cleaning · 20 min read
How To Clean Oxo Pop Containers
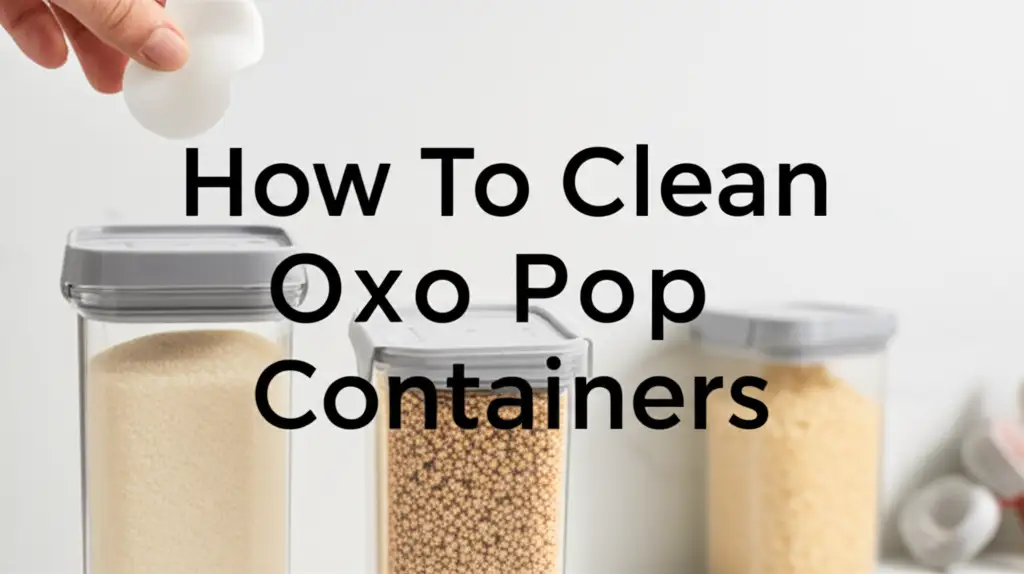
Mastering the Art: How to Clean Your OXO Pop Containers
Maintaining a clean kitchen is a top priority for many of us. Our food storage containers play a big role in this. OXO Pop containers are incredibly popular for their convenience and airtight seal. They keep food fresh and organized. However, these containers need regular and proper cleaning to stay hygienic and functional. Neglecting their cleaning can lead to lingering odors, food residue buildup, or even mold.
This article provides a complete guide on how to clean OXO Pop containers effectively. We will cover daily cleaning, deep cleaning methods, and specific instructions for their unique lids. You will learn about safe cleaning agents and proper drying techniques. Following these steps ensures your containers stay fresh, clean, and ready for use. We aim to help you extend the lifespan of your OXO Pop containers.
Takeaway:
- Regularly disassemble OXO Pop container lids for thorough cleaning of all parts.
- Hand washing is best for longevity, but some parts are dishwasher safe.
- Address sticky residue or odors promptly with appropriate cleaning solutions.
- Ensure all components are completely dry before reassembly to prevent mold.
To clean OXO Pop containers, disassemble the lid to separate the silicone gasket and button mechanism. Wash all parts—container, lid top, gasket, and button—with warm, soapy water. Use a soft brush for crevices. Rinse thoroughly, dry completely, then reassemble for optimal hygiene and performance.
Understanding Your OXO Pop Container Design
OXO Pop containers are known for their unique lid design. This design creates an airtight seal with a simple push button. This button is not just for sealing; it also allows you to take the lid apart for cleaning. Understanding how these parts work is the first step in effective cleaning. You cannot clean them thoroughly without taking the lid apart.
The container base is usually clear plastic. The lid has several components. There is the main lid body, a silicone gasket that creates the seal, and the button mechanism. Food particles or moisture can get trapped under the gasket or inside the button assembly. This trapped debris can lead to odors or mold growth. This design makes it crucial to clean each part individually. Simply washing the container with the lid on is not enough. Proper disassembly ensures you reach every hidden spot. It is a simple process once you know how to do it. We will guide you through this process step by step.
Daily Cleaning of OXO Pop Containers
Regular cleaning keeps your OXO Pop containers fresh and prevents buildup. This daily routine is quick and easy. It is essential after each use, especially if you stored fresh food. Daily cleaning prevents food residues from hardening or sticking. This makes deep cleaning less frequent and easier.
Hand Washing the Container Base
Hand washing is gentle on the plastic and helps extend the container’s life. I find it is the safest method for preventing scratches or cloudiness.
- Empty the container: Remove all food contents. Scrape out any sticky bits.
- Rinse with warm water: This helps loosen remaining food particles.
- Prepare soapy water: Fill a basin or sink with warm water and a few drops of dish soap. Use a mild dish soap.
- Wash the container: Use a soft sponge or cloth to scrub the inside and outside of the container. Pay attention to corners where food might hide.
- Rinse thoroughly: Rinse under running warm water until all soap residue is gone. Soap residue can leave a film.
- Air dry or towel dry: Place the container upside down on a drying rack. Allow it to air dry completely. You can also use a clean dishtowel. Complete drying prevents water spots and inhibits mold.
Basic Lid Cleaning
The lid needs more attention due to its multiple parts. Even for daily cleaning, a quick disassembly is often necessary.
- Remove the lid from the container: Press the button down to release the seal. Lift the lid off.
- Disassemble the lid:
- Flip the lid over.
- Find the tab on the underside of the button mechanism.
- Pull this tab to release the button assembly. It should pop out easily.
- Carefully remove the silicone gasket from the lid frame. It usually pulls off with a gentle tug.
- Wash the lid parts:
- Wash the main lid body, the button assembly, and the silicone gasket in warm, soapy water.
- Use a small brush, like a bottle brush or an old toothbrush, to clean small crevices in the button assembly.
- Gently scrub the silicone gasket to remove any grease or residue. Silicone can become sticky if not cleaned properly.
- Rinse thoroughly: Rinse all lid parts under running warm water. Make sure no soap remains.
- Dry completely: Shake off excess water. Place all lid parts on a clean towel or drying rack. Allow them to air dry completely before reassembly. This is a critical step for preventing mold growth.
Deep Cleaning Your OXO Pop Containers
Sometimes, daily cleaning is not enough. You might notice stubborn stains, lingering odors, or even a hint of mold. Deep cleaning addresses these issues effectively. This process uses stronger cleaning agents but still keeps your containers safe.
Addressing Stubborn Stains and Odors
Food like tomato sauce or curry can leave behind tough stains. Strong-smelling foods like garlic or onions can leave odors.
- Baking Soda Paste:
- Mix baking soda with a little water to form a thick paste.
- Apply the paste directly to the stain or inside the container for odors.
- Let it sit for 15-30 minutes, or longer for tough stains (up to a few hours).
- Scrub with a soft sponge or brush.
- Rinse thoroughly. Baking soda is a natural deodorizer and mild abrasive.
- Vinegar Soak:
- For odors, fill the container with equal parts white vinegar and water.
- Let it soak for a few hours or overnight.
- For light stains, you can also add a splash of vinegar to the wash water.
- Rinse well. Vinegar is great for cutting grease and neutralizing odors. If you are cleaning other kitchen items with vinegar, like your dishwasher, you know its power. Learn more about how to clean dishwasher with vinegar.
- Sunlight Exposure:
- After washing, if stains persist, place the clean, dry container in direct sunlight.
- Sunlight’s UV rays can help bleach out some stains naturally. This method is effective for plastic containers.
Removing Mold from OXO Pop Containers
Mold can appear in damp, dark environments, especially in the silicone gasket or inside the lid mechanism if moisture gets trapped. Cleaning mold quickly is important for health and hygiene.
- Disassemble all lid parts: This is crucial. Mold often hides where parts meet.
- Prepare a vinegar solution: Mix equal parts white vinegar and water in a bowl.
- Soak affected parts: Place the moldy silicone gasket and button mechanism into the vinegar solution. Let them soak for at least 30 minutes. For severe mold, soak overnight. Vinegar is a natural fungicide and safe for most materials. You can find more details on how to clean mold with vinegar.
- Scrub gently: After soaking, use a small brush (like an old toothbrush) to scrub the mold away. Pay special attention to edges and crevices.
- Rinse thoroughly: Rinse all parts under strong running water. Ensure all mold traces and vinegar smell are gone.
- Sanitize (optional): For extra peace of mind, you can briefly immerse the silicone gasket in boiling water for a minute or two. Be careful handling hot water.
- Dry completely: This step is vital to prevent mold from returning. Let all parts air dry completely on a rack. Do not reassemble until everything is bone dry.
Dishwasher Cleaning for OXO Pop Containers
Many OXO Pop container components are dishwasher safe. This can save time, but some care is still needed. Always check the specific product instructions or the OXO website. Generally, the clear container bases are top-rack dishwasher safe. The lid components, including the button assembly and silicone gasket, also have dishwasher compatibility.
Dishwasher Safe Components
- Container Bases: Most clear plastic bases are safe for the top rack of your dishwasher. Place them securely to prevent them from flipping over and filling with water.
- Lid Components: The lid frame, button assembly, and silicone gasket are also generally top-rack dishwasher safe. Always disassemble the lid completely before placing its parts in the dishwasher. This ensures water and detergent can reach all surfaces.
Best Practices for Dishwasher Use
- Disassemble the lid: Do not put the entire lid assembly in the dishwasher. Take it apart first. Separate the main lid, the button assembly, and the silicone gasket.
- Top Rack Placement: Always place container bases and lid components on the top rack. The bottom rack can have higher heat, which might warp or damage plastic over time.
- Avoid High-Heat Cycles: While dishwasher safe, prolonged exposure to very high heat can still affect plastic. Use a standard or eco-friendly cycle rather than an intense or sanitizing cycle, if possible.
- Use a gentle detergent: Harsh detergents can sometimes etch plastic. Use your regular mild dishwashing detergent.
- Check for complete drying: After the cycle finishes, inspect all parts. Sometimes plastic items do not dry completely in the dishwasher. If any water remains, air dry them thoroughly before reassembly. Trapped moisture leads to problems. Ensure your dishwasher’s filter is clean for optimal results, as a dirty filter can impact cleaning performance. You can learn how to clean filter in dishwasher.
- Frequency: While convenient, relying solely on the dishwasher might not provide the same deep clean as hand washing, especially for intricate lid parts. Consider hand washing every few uses or for deep cleaning.
Special Care for OXO Pop Lids and Gaskets
The lid is the most complex part of your OXO Pop container. It is also where most cleaning issues arise. The silicone gasket and the push-button mechanism require specific attention. These parts are vital for the airtight seal. Proper care of these components ensures your containers stay functional and hygienic.
Cleaning the Silicone Gasket
The silicone gasket provides the airtight seal. It can attract grease, dust, and food particles. It is also prone to mold if not dried properly.
- Regular Removal: Always remove the gasket from the lid frame for cleaning. It pulls off easily.
- Wash Separately: Wash the gasket with warm, soapy water. Use your fingers to rub off any slime or residue.
- Check for Stickiness: If the gasket feels sticky, it has grease buildup. A solution of warm water and a little vinegar helps cut grease. Soak it for 15 minutes, then scrub.
- Inspect for Mold: Look closely for any dark spots. If mold is present, refer to the “Removing Mold” section for a more intensive vinegar treatment.
- Dry Completely: This is the most crucial step for the gasket. Silicone can hold onto moisture. Ensure it is completely dry before putting it back on the lid. Hang it on a drying rack or lay it flat.
Maintaining the Push-Button Mechanism
The push-button mechanism also disassembles for cleaning. This part has internal components where residue can accumulate.
- Disassembly is Key: You must remove the button assembly from the lid frame. Find the tab on the underside and pull it.
- Brush Cleaning: Use a small brush, like a toothbrush or a specialized cleaning brush, to clean inside the button assembly. Pay attention to the plunger area and any springs or small parts. Food dust or sugar can become sticky here.
- Rinse Thoroughly: Rinse under running water. Move the button up and down to help water flow through the mechanism.
- Shake and Air Dry: Shake out as much water as possible. Place the assembly on a drying rack. It needs ample time to dry internally. You might even gently dab it with a cloth.
- Reassembly: Only reassemble once all parts are thoroughly dry. Reinsert the button assembly back into the lid frame until it clicks into place. Then stretch the silicone gasket back onto the lid frame, ensuring it sits snugly in its groove.
Essential Cleaning Products and Tools
Having the right cleaning supplies makes the task of cleaning your OXO Pop containers much easier and more effective. You do not need a lot of specialized products. Common household items often work best. Choosing the right tools also helps protect your containers from damage.
Recommended Cleaning Agents
- Mild Dish Soap: This is your primary cleaning agent for daily use. A gentle, unscented dish soap is ideal. It effectively cuts grease and washes away food residues without leaving strong odors or harsh chemicals.
- White Vinegar: An incredibly versatile and natural cleaner. Vinegar is excellent for deodorizing, cutting through grease, and tackling mold and mildew. Its mild acidity helps break down mineral deposits and stains. It is safe for plastic and silicone. I personally use vinegar for many cleaning tasks around my home.
- Baking Soda: Another natural powerhouse. Baking soda is a mild abrasive that helps scrub away stubborn stains without scratching surfaces. It is also a fantastic deodorizer, absorbing unpleasant smells. You can use it as a paste or sprinkle it into containers.
- Warm Water: Always use warm water for cleaning. It helps dissolve soap, loosen food particles, and cut through grease more effectively than cold water.
Useful Cleaning Tools
- Soft Sponge or Microfiber Cloth: For general washing of the container bases and lid frames. A soft material prevents scratches on the clear plastic.
- Small Bristle Brush (e.g., Toothbrush, Bottle Brush): Absolutely essential for cleaning the intricate parts of the lid. A small brush can reach into crevices, around the button mechanism, and under the gasket where a sponge cannot. An old, clean toothbrush works perfectly.
- Drying Rack or Clean Towels: Proper drying is key to preventing mold and water spots. A drying rack allows air to circulate around all parts, ensuring complete drying. Clean towels are also useful for initial drying and polishing.
By using these simple products and tools, you can ensure your OXO Pop containers are always spotless and hygienic. Remember, prevention is better than cure. Regular, thorough cleaning with these items will keep your containers in top condition for years.
Advanced Tips for OXO Pop Container Longevity
Beyond basic cleaning, a few advanced tips can significantly extend the life and appearance of your OXO Pop containers. These practices help prevent common issues and maintain their functionality. Longevity is about more than just cleanliness; it is about preserving the materials and the airtight seal.
Preventing Scratches and Cloudiness
Clear plastic containers are prone to scratches and can become cloudy over time. This reduces their appeal and makes it harder to see contents.
- Avoid Abrasive Cleaners: Never use abrasive scrubbers, harsh scouring pads, or powdered cleansers on your OXO containers. These can scratch the plastic surface, making it look dull.
- Gentle Washing: Always use a soft sponge or cloth for hand washing. If using a dishwasher, place containers on the top rack.
- Separate Washing: If possible, wash plastic containers separately from metal utensils in the dishwasher. Metal can scratch plastic during the wash cycle.
- Air Dry Often: While towel drying is fine, air drying reduces friction on the plastic. This helps prevent micro-scratches.
Maintaining the Airtight Seal
The airtight seal is the core feature of OXO Pop containers. If the silicone gasket or the lid mechanism gets damaged, the seal weakens.
- Proper Gasket Reassembly: When putting the silicone gasket back on the lid, ensure it sits perfectly in its groove all around the lid. A twisted or improperly seated gasket will not form a seal.
- Handle Button with Care: Avoid forcing the push button. It should operate smoothly. If it feels stiff, it might need a thorough cleaning to remove residue from inside the mechanism.
- Avoid Extreme Temperatures: Do not expose the containers or lids to extreme temperatures beyond their intended use. For example, do not put hot food directly into a chilled container or vice versa without allowing it to cool slightly. Avoid placing them in the freezer if not specified as freezer-safe, as extreme cold can make plastic brittle.
Storage Practices
How you store your containers matters. Proper storage keeps them clean and prevents damage.
- Store Dry: Always ensure containers and lids are completely dry before stacking or storing. Storing damp containers is a primary cause of mold and mildew growth.
- Lids Off or Ajar: For long-term storage, consider storing containers with lids off or slightly ajar. This allows for air circulation and prevents stale odors from developing inside. This is especially true if you live in a humid environment.
- Organized Storage: Stack containers neatly to prevent them from falling and breaking. Use inserts or organizers if needed.
By implementing these advanced tips, your OXO Pop containers will not only stay clean but will also maintain their pristine condition and functionality for many years of faithful service in your kitchen.
Troubleshooting Common OXO Pop Container Issues
Even with regular cleaning, you might encounter specific issues with your OXO Pop containers. Knowing how to troubleshoot these problems can save you from replacing them prematurely. Many common problems have simple solutions.
Lid Not Sealing Properly
A faulty seal means your food is not staying fresh. This issue usually points to a problem with the lid components.
- Check Gasket Placement: The most common cause is the silicone gasket being out of place or twisted. Remove the gasket and reattach it, ensuring it is snug and flat all the way around the lid’s rim.
- Inspect Gasket for Damage: Over time, silicone can tear or lose elasticity. Examine the gasket for any cracks, rips, or signs of wear. If damaged, you might need a replacement gasket from OXO.
- Clean Button Mechanism: Food debris or sticky residue inside the button assembly can hinder its movement. Disassemble the lid completely and thoroughly clean the button mechanism. Ensure it moves freely after cleaning and drying.
- Container Rim Integrity: Check the rim of the clear container base. Any chips or deformities can prevent a proper seal.
Container Smells Like Old Food or Plastic
Persistent odors are unpleasant and can transfer to new food. This often indicates trapped smells.
- Deep Clean with Baking Soda and Vinegar: As mentioned, a baking soda paste or a vinegar soak is highly effective. Let them sit for an extended period, possibly overnight. Rinse thoroughly afterward.
- Sunlight Exposure: Place the clean, dry container (without the lid) in direct sunlight for a few hours. UV rays help neutralize odors.
- Crumpled Newspaper Trick: For stubborn smells, place crumpled newspaper inside the container and seal it with the lid for a few days. The newspaper absorbs odors. Then wash thoroughly.
- Activated Charcoal: A small sachet of activated charcoal (used for odor absorption) placed inside a sealed container for a few days can also help.
Cloudiness or Discoloration
Plastic containers can become cloudy or discolored over time due to mineral deposits from hard water or certain food types.
- Vinegar Soak for Cloudiness: Fill the container with undiluted white vinegar and let it sit for a few hours or overnight. Vinegar helps dissolve mineral buildup. Scrub and rinse.
- Baking Soda Paste for Discoloration: For food-related discoloration (like from tomato sauce), make a paste of baking soda and a little water. Apply it to the stained areas. Let it sit for an hour, then scrub and rinse.
- Sunlight for Stains: Direct sunlight can help bleach out some food stains naturally after cleaning.
- Prevention: Rinse containers immediately after emptying. Avoid storing highly pigmented foods for extended periods without lining the container. Use filtered water for washing if your tap water is very hard.
By systematically addressing these common issues, you can keep your OXO Pop containers performing their best. Regular maintenance and knowing these quick fixes will ensure they remain a valuable part of your kitchen organization system.
When to Replace Your OXO Pop Containers
While OXO Pop containers are durable, they do not last forever. Knowing when to replace them is important for food safety and optimal performance. Holding onto damaged containers can compromise food freshness and hygiene.
Signs of Wear and Tear
- Cracked or Chipped Plastic: Any cracks, especially in the container base or lid, compromise the airtight seal. They also create crevices where bacteria and mold can hide, making cleaning impossible. Replace cracked containers immediately.
- Permanent Cloudiness or Scratches: While minor cloudiness can sometimes be resolved, if your containers are heavily scratched or perpetually cloudy despite cleaning, it is time for new ones. Deep scratches harbor germs and affect the container’s appearance.
- Distorted Shape: Exposure to excessive heat (e.g., leaving it near a hot stove burner or improper dishwasher use) can warp plastic. A warped container will not seal correctly.
- Lid Components Not Functioning: If the push-button mechanism no longer pops smoothly, sticks, or does not create a strong seal even after thorough cleaning, the lid is likely faulty. Replacement lids are often available from OXO, which is a more sustainable option than replacing the whole container.
- Damaged or Degraded Gasket: The silicone gasket is crucial for the airtight seal. If it is torn, stretched out, brittle, or permanently sticky even after washing, it needs replacing. A compromised gasket means your food is exposed to air.
Odors That Won’t Go Away
You have tried all the deep-cleaning methods: baking soda, vinegar, sunlight, even newspaper. If a strong, unpleasant odor persists in the plastic, it means the smell has permeated the material. This often happens with very potent foods (like garlic or certain spices) or if food has spoiled inside for an extended period. At this point, the container is no longer suitable for food storage. The odor will transfer to new food items.
Visible Mold or Stains That Cannot Be Removed
If you have tried every mold removal technique and still see black spots or permanent staining embedded in the plastic or silicone, especially within tiny crevices you cannot reach, it is time to discard that container. Mold can penetrate porous materials, making it impossible to truly sanitize. Food safety is paramount, and lingering mold poses health risks.
Replacing containers when they show these signs ensures you maintain a hygienic kitchen and keep your food fresher for longer. Investing in new OXO Pop containers when needed is a smart decision for your health and food quality.
FAQs About Cleaning OXO Pop Containers
Q1: Can I put OXO Pop containers in the dishwasher?
A1: Yes, most OXO Pop container bases and lid components are top-rack dishwasher safe. Always disassemble the lid first. Separate the main lid, button assembly, and silicone gasket. Place all parts securely on the top rack. High heat on the bottom rack can warp plastic.
Q2: How do I remove the silicone gasket from the OXO Pop lid for cleaning?
A2: To remove the silicone gasket, first press the button to release the seal. Then, flip the lid over. Gently pull the silicone gasket away from the groove it sits in around the lid’s edge. It should detach easily.
Q3: My OXO Pop container lid button is sticky. How do I fix it?
A3: A sticky button usually means food residue or grease is trapped inside the mechanism. Disassemble the lid by pulling the tab under the button. Wash the button assembly thoroughly with warm, soapy water and a small brush. Rinse well and ensure it is completely dry before reassembling.
Q4: How can I get rid of food odors in my OXO Pop containers?
A4: For persistent odors, try a baking soda paste. Mix baking soda with a little water, spread it inside the container, and let it sit for a few hours or overnight. Alternatively, fill the container with equal parts white vinegar and water and soak it. Rinse thoroughly afterward.
Q5: Is it safe to use bleach to clean my OXO Pop containers?
A5: It is generally not recommended to use bleach on OXO Pop containers. Bleach can degrade plastic and silicone over time, leading to damage or discoloration. Natural alternatives like white vinegar and baking soda are safer and effective for cleaning and sanitizing.
Q6: How often should I deep clean my OXO Pop containers?
A6: Daily or after each use, perform a basic wash. For deep cleaning, including full lid disassembly, aim for every few uses or monthly. If you notice odors, sticky residue, or mold, deep clean immediately. Regular deep cleaning prevents buildup and maintains hygiene.
Conclusion
Cleaning your OXO Pop containers properly ensures they stay hygienic, functional, and ready for your next meal prep or storage task. We have covered everything from simple daily washes to tackling stubborn stains, mold, and odors. Remember, the key to a long-lasting and effective OXO Pop container lies in consistently cleaning all its parts, especially the intricate lid components.
By following these straightforward steps, you prevent common issues like sticky buttons or lingering smells. You also extend the lifespan of your containers. Whether you choose hand washing or the convenience of a dishwasher, always prioritize thorough drying before reassembly. A clean container means fresh food and a happy kitchen. Embrace these cleaning habits, and your OXO Pop containers will continue to serve you well for years to come. Start cleaning your OXO Pop containers today and enjoy the peace of mind that comes with a perfectly organized and sanitary kitchen.
- OXO Pop cleaning
- food storage hygiene
- kitchen container care