· RV Maintenance · 17 min read
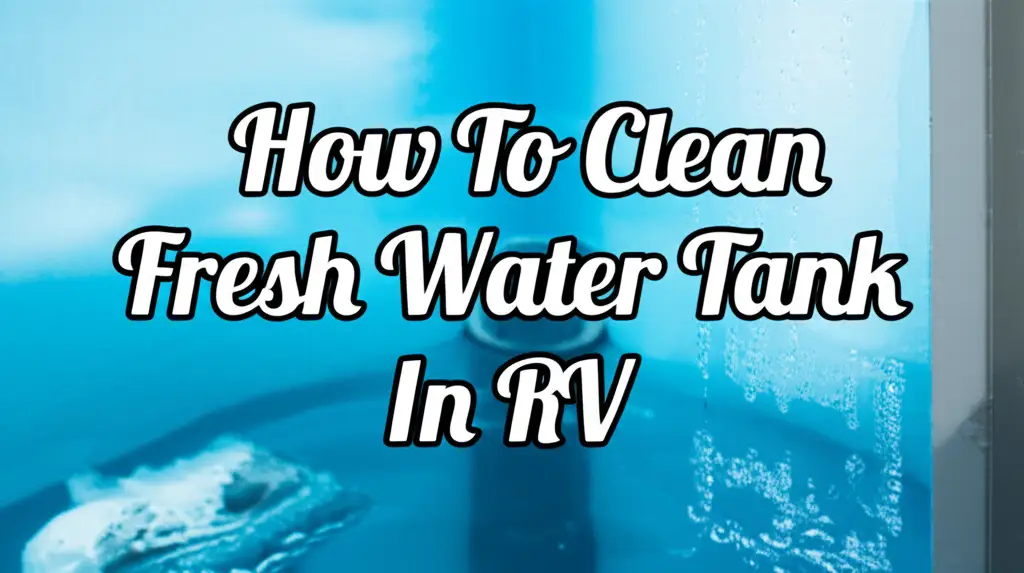
How To Clean Rv Water Lines
Keep Your RV Water Fresh: How to Clean RV Water Lines
Imagine setting out on an incredible RV adventure. The open road calls, new sights await, and you feel a sense of freedom. But what about the water you drink, shower with, or use for cooking? Unseen contaminants can build up in your RV’s water lines over time. This makes proper water system maintenance crucial for health and enjoyment.
Cleaning your RV water lines ensures clean, fresh-tasting water for every trip. It helps prevent bacteria, mold, and algae from growing. A well-maintained system also prolongs the life of your RV’s plumbing components. This guide provides a comprehensive overview of how to clean RV water lines. We cover why it matters, when to do it, and step-by-step methods using common materials. We also discuss maintaining filters and water heaters.
Takeaway
- Sanitize Annually: Clean your RV water lines at least once a year. Do this before your first trip of the season or after long storage.
- Use Bleach or Vinegar: Both methods effectively kill bacteria and remove buildup. Choose the one that suits your preference and system.
- Flush Thoroughly: Always flush your system multiple times after cleaning. This removes all cleaning agents.
- Maintain Filters & Heater: Replace or clean filters regularly. Drain and flush your water heater. These steps complete your system’s sanitation.
How do you clean RV water lines?
Cleaning RV water lines involves flushing the system with a sanitizing solution. You use either a diluted bleach mixture or a vinegar solution. This process kills bacteria and removes mineral deposits. Afterward, you thoroughly flush the lines with fresh water to remove all cleaning agents. This ensures clean and safe drinking water for your travels.
Why Cleaning Your RV Water Lines is Essential for Health and Taste
Keeping your RV water lines clean is not just about taste. It is vital for your health. Over time, sediment, bacteria, and algae can accumulate inside your RV’s water system. These contaminants lead to unpleasant odors and tastes. They also pose serious health risks. Ignoring this crucial maintenance task can turn your refreshing water into a source of illness.
Think about the journey water takes inside your RV. It enters the fresh water tank, moves through pumps and filters, and travels through many feet of tubing. Each part of this journey offers a chance for buildup. Stagnant water, warm temperatures, and impurities from various water sources create a perfect breeding ground. Bacteria like Legionella or E. coli can thrive in these conditions. They can cause gastrointestinal issues or worse. Regular cleaning eliminates these harmful microorganisms. It also removes the biofilm they create. This biofilm sticks to pipe walls and protects bacteria. It makes them harder to remove with simple flushing.
Beyond health concerns, clean water simply tastes better. Who wants to drink water that smells like sulfur or tastes metallic? These off-flavors often signal mineral deposits or bacterial growth. A sanitized system delivers crisp, clean-tasting water. This makes cooking, making coffee, and drinking much more enjoyable. It also prevents clogs in your faucets and showerheads. Sediment and mineral scale can restrict water flow over time. They can even damage your water pump. Regular maintenance protects your entire plumbing system. It saves you from costly repairs down the road. Cleaning your RV water lines ensures peace of mind. It allows you to focus on the joy of your travels, knowing your water is safe.
When and How Often to Sanitize Your RV Water System
Knowing when to clean your RV water lines is just as important as knowing how. Proper timing ensures your water system remains safe and fresh. It also prevents problems before they start. The general rule is to sanitize your RV water system at least once a year. This annual cleaning should occur before your first trip of the season. It is especially important if your RV has been in storage for months.
You should also clean your RV water lines any time the RV sits unused for an extended period. This means periods longer than a few weeks. Stagnant water encourages bacterial growth. If you notice any unusual smells or tastes from your water, clean the lines immediately. This applies even if you just cleaned them. These signs indicate potential contamination or biofilm buildup. Another critical time to sanitize is after purchasing a used RV. You do not know the previous owner’s maintenance habits. A thorough cleaning ensures you start with a fresh, safe system.
Consider sanitizing more often if you frequently use your RV in various climates. Hot and humid conditions accelerate bacterial growth. If you fill your tank from questionable water sources, an extra cleaning is a good idea. Some RVers choose to sanitize every few months. They do this if they travel full-time. This provides extra assurance for continuous fresh water supply. Always clean your water system before preparing your RV for winterization. This prevents mold and mildew from growing during storage. It also ensures a clean start for the next spring. Remember, consistent cleaning habits lead to a healthier and more enjoyable RV experience.
Essential Tools and Supplies for RV Water Line Cleaning
Before you begin the process of cleaning your RV water lines, gather all necessary tools and supplies. Having everything ready streamlines the task. It ensures a smooth and effective cleaning session. You likely have many of these items around your home already. This makes RV water system maintenance accessible to everyone.
Your primary cleaning agent will be either household bleach or white vinegar. For bleach, choose regular household bleach (5-6% sodium hypochlorite) without added scents. Do not use splashless or concentrated versions. These may contain ingredients that damage your RV’s plumbing. You will need a measuring cup to ensure accurate dilution. A funnel helps pour the solution into your fresh water tank without spills. You also need a dedicated drinking water hose. Never use a garden hose for drinking water. Garden hoses can contain harmful chemicals.
Here is a list of what you will need:
- Regular Household Bleach: (5-6% sodium hypochlorite, unscented) or White Vinegar.
- Measuring Cup: For accurate dilution.
- Funnel: To pour the cleaning solution into the fresh water tank.
- Dedicated Drinking Water Hose: At least 25 feet long.
- Water Source: A spigot or city water connection.
- Non-toxic RV Antifreeze: If you plan to winterize immediately after cleaning.
- Basic Tool Kit: Wrenches for drain plugs, if needed.
- Personal Protective Equipment: Gloves and eye protection, especially when handling bleach.
- Bucket: For mixing solutions or catching water.
- Cleaning Rags: For spills or wiping down connections.
Ensure your fresh water tank is empty before starting. Also, bypass your hot water heater during the cleaning process. This prevents filling it with the cleaning solution. Your RV manual provides specific instructions for bypassing the water heater. Having these items ready saves time. It makes the cleaning process much more efficient. With your supplies gathered, you are ready to give your RV water lines the thorough cleaning they deserve.
Step-by-Step Guide to Cleaning RV Water Lines with Bleach
Cleaning your RV water lines using bleach is a proven and effective method. It kills bacteria and sanitizes your entire water system. I always use this method at least once a year. It gives me peace of mind for my travels. This process ensures your water is fresh and safe for drinking and cooking. Follow these steps carefully for the best results.
First, prepare your RV. Empty your fresh water tank completely. Drain all water from the hot water heater and bypass it. You do not want bleach in your water heater. Remove any inline water filters, including your external filter. You will replace them later. Make sure all faucets are closed. Now, calculate your bleach amount. For every 15 gallons of fresh water tank capacity, use one ounce of regular household bleach. For example, a 60-gallon tank needs 4 ounces of bleach.
Next, create your bleach solution. Mix the measured bleach with a gallon of fresh water in a clean bucket. This dilutes the bleach first. It ensures it mixes well when added to the tank. Use a funnel to pour this mixture directly into your RV’s fresh water fill connection. Be careful not to spill. Then, fill your fresh water tank completely with potable water from a reliable source. Turn on your water pump. Open each hot and cold water faucet one at a time. Let water run until you smell the bleach solution. This ensures the solution fills all the lines. Close the faucets after you detect the bleach smell. Do not forget the toilet, shower, and any outdoor shower connections.
Allow the bleach solution to sit in the system for at least four hours. For heavy contamination, let it sit for up to twelve hours. During this time, the bleach kills bacteria and breaks down biofilm. After the sitting period, drain your entire fresh water system. Open all faucets and drain plugs. Let the water run out. Now, flush your system thoroughly. Refill your fresh water tank completely with fresh water. Turn on the pump and open all faucets. Run water through each until you no longer smell or taste bleach. This can take several tank refills and flushes. Patience is key here. I sometimes refill and flush my system three or four times to ensure all traces are gone. For more detailed insights on maintaining your RV’s water quality, consider learning how to clean fresh water tank in RV as well. This ensures your tank is just as clean as your lines.
Finally, replace any water filters you removed earlier. Your RV water system is now clean and ready for your next adventure. This process is simple yet vital for healthy travels.
Alternative Cleaning Method: Vinegar for RV Water Lines
While bleach is a powerful disinfectant, some RV owners prefer using white vinegar to clean their RV water lines. Vinegar offers a natural, non-toxic alternative. It is particularly effective at dissolving mineral deposits and calcium buildup. If you have hard water issues, the vinegar method might be a great choice for you. I find it leaves my system smelling fresh, without any chemical odor.
The process begins similarly to the bleach method. First, completely drain your RV’s fresh water tank. Also, bypass your hot water heater and remove any inline water filters. You want an empty system before you start. Now, prepare your vinegar solution. A common ratio is one gallon of white vinegar for every 15 gallons of fresh water tank capacity. So, for a 60-gallon tank, you would need four gallons of vinegar.
Pour the required amount of white vinegar directly into your fresh water tank via the fill connection. After adding the vinegar, fill the remainder of your fresh water tank with potable water. This dilutes the vinegar and allows it to spread throughout the system. Turn on your RV’s water pump. Systematically open each hot and cold water faucet inside and outside the RV. Let the water run until you smell the distinct odor of vinegar coming from the tap. This confirms the solution has reached that part of the line. Close the faucets once the vinegar smell is present. Do not forget the toilet flush, shower, and outdoor spray ports.
Allow the vinegar solution to sit in the lines for several hours, or even overnight. Many RVers let it sit for 6 to 12 hours. The longer dwell time helps the vinegar dissolve stubborn mineral deposits. After the soaking period, drain the entire system. Open all faucets and drain plugs until the tank and lines are empty. Now, the crucial flushing stage begins. Refill your fresh water tank with clean, potable water. Turn on the pump and open all faucets. Run water through the lines until the vinegar smell is completely gone. This may require refilling and flushing the tank two or three times. Be patient and thorough. For additional methods on handling deposits, you might find information on how to clean sediment from water lines useful, as some principles apply to RVs. Once the water is clear and odorless, replace your water filters. Your RV water system is now clean and ready for use.
Don’t Forget Filters and Water Heater in Your RV System
Cleaning your RV water lines is only part of the full sanitation process. You must also pay attention to your water filters and hot water heater. These components are integral parts of your RV’s water system. They can harbor contaminants if not properly maintained. I always ensure these elements get attention during my annual cleaning.
Your RV likely has one or more water filters. Many RVs have an inline water filter, often located near the fresh water tank or pump. Some also have under-sink filters for drinking water or filters in the refrigerator. These filters trap sediment, rust, and sometimes even microorganisms. Over time, these filters become saturated with debris. They lose effectiveness and can even become a breeding ground for bacteria. When cleaning your water lines, you should always remove these filters beforehand. This prevents the cleaning solution from damaging them. After the entire system flush, replace them with new filters. Regularly changing your filters, as recommended by the manufacturer, ensures continuous clean water. You can also learn how to clean an under sink water filter for a more in-depth approach to specific filter types.
The hot water heater is another critical component often overlooked during sanitation. Even though you bypass it during the bleach or vinegar flush, it needs its own care. Sediment can build up at the bottom of the water heater tank. This reduces efficiency and creates a breeding ground for bacteria that cause sulfur smells (rotten egg smell). At least once a year, drain your hot water heater. Remove the drain plug. Use a flushing wand to rinse out any sediment. This can be surprising how much buildup comes out. After flushing, replace the drain plug. Fill the water heater with fresh water before turning it back on. This simple step vastly improves the quality and smell of your hot water. For a deeper dive into maintaining this component, review resources on how to clean sediment from a water heater. You might also find it beneficial to understand how to clean hot water heaters in general. This helps ensure overall system health.
By cleaning and maintaining your filters and hot water heater, you ensure comprehensive sanitation. Your entire RV water system provides safe, clean, and great-tasting water. This combined effort protects your health and enhances your RV experience.
Maintaining Clean RV Water Lines for Future Adventures
Cleaning your RV water lines is not a one-time event. It is an ongoing commitment to ensure safe and pleasant water for all your adventures. After performing a thorough sanitation, adopting good habits keeps your system clean longer. I find that consistent small actions prevent major problems down the road. This approach saves time and effort in the long run.
First, always use a dedicated drinking water hose when connecting to a water source. Never use a standard garden hose. Garden hoses often contain chemicals that can leach into your water, contaminating it. Store your drinking water hose properly. Coil it neatly and keep it in a clean, designated compartment. This prevents dirt and grime from entering the hose. You should also consider using an external water filter when filling your fresh water tank or connecting to city water. These filters remove sediment and impurities before they enter your RV’s system. This reduces the burden on your internal filters and lines.
When storing your RV, especially for extended periods, drain your fresh water tank and lines completely. Stagnant water encourages bacterial and algae growth. If you are winterizing, follow the proper steps to ensure all water is removed. This prevents freezing damage. During shorter storage periods, or between trips, consider adding a fresh water tank additive. These additives often contain mild sanitizers or conditioners. They help prevent growth and keep water fresh for longer. Always choose products designed for potable water systems.
Regularly check your RV’s water system components. Look for any leaks, drips, or unusual wear on hoses and connections. Address these issues promptly. A small leak can lead to bigger problems, including water damage or mold growth. Taste your water periodically. If you detect any off-flavors or odors, it is a sign your system needs another flush or sanitation. Don’t wait for visible mold or slime. Proactive maintenance ensures you always have clean, safe water. It lets you fully enjoy the freedom of RV travel without worrying about your water supply. These simple steps contribute significantly to a healthier and happier RV experience.
Frequently Asked Questions About Cleaning RV Water Lines
How often should I sanitize my RV water system?
You should sanitize your RV water system at least once a year. Do this before your first trip of the season, especially after winter storage. Sanitize more often if you notice strange smells or tastes in your water. Also, clean the system after buying a used RV or if it sits unused for more than a few weeks.
Can I use regular household bleach to clean RV water lines?
Yes, you can use regular, unscented household bleach (5-6% sodium hypochlorite) to clean RV water lines. Do not use splashless or scented bleaches, as they contain additives that can harm your system. Always dilute bleach properly: one ounce per 15 gallons of tank capacity.
What are common signs my RV water lines need cleaning?
Common signs include a foul odor from your water, often described as rotten eggs. You might also notice a strange taste, cloudy water, or visible slime/biofilm inside clear hoses or fixtures. Reduced water flow due to sediment buildup can also indicate a need for cleaning.
Is vinegar as effective as bleach for RV water line sanitation?
Vinegar is effective for cleaning and removing mineral buildup. It kills some bacteria and leaves no chemical residue. However, bleach is generally considered more powerful for killing a wider range of bacteria and viruses. Many RVers use bleach for sanitation and vinegar for descaling or as a periodic refresh.
What can I do to prevent mold and algae growth in RV water lines?
To prevent mold and algae, always drain your fresh water tank and lines when storing your RV. Use a dedicated drinking water hose. Consider external water filters. Periodically flush your system, even if not fully sanitizing. Some RVers also use fresh water tank additives designed to inhibit growth.
Should I clean my RV water heater when cleaning water lines?
Yes, absolutely. While you bypass the water heater during the main line sanitation, it needs separate attention. Drain and flush your RV water heater annually. This removes sediment buildup. Sediment can reduce efficiency and cause foul odors. A clean water heater completes your system’s overall hygiene.
Enjoy Pristine Water on Every RV Journey
Cleaning your RV water lines is a fundamental aspect of responsible RV ownership. It extends beyond simply maintaining your vehicle. It directly impacts your health and the overall quality of your travel experiences. We have covered why this task is crucial. We also looked at when to perform it and how to execute it thoroughly using both bleach and vinegar methods. Remember the importance of filters and your water heater in the complete sanitation picture.
By consistently maintaining a clean RV water system, you ensure a continuous supply of fresh, safe, and great-tasting water. This peace of mind allows you to fully immerse yourself in the freedom and joy of RV travel. No more worries about strange smells or off-flavors. You can simply enjoy every sip and every shower. Make cleaning your RV water lines a regular part of your RV maintenance routine. Your health and your taste buds will thank you. Ready to explore more ways to keep your RV in top shape? Dive into our other comprehensive cleaning guides for an even smoother journey.
- RV water system
- RV plumbing
- water line maintenance