· Window Care · 18 min read
How To Clean Screens Window

Clean Screens Window: A Complete Guide to Sparkling Views
Imagine looking out your window, but your view is blurry. A thick layer of dust, pollen, and grime covers your window screens. This is a common sight in many homes, blocking natural light and fresh air. Dirty screens make your windows look less inviting.
Cleaning window screens might seem like a small task. However, it greatly improves your home’s appearance. It also allows more light and fresh air inside. Regular cleaning extends the life of your screens. This article will show you exactly how to clean screens window, step-by-step. We cover different screen types, tools you need, and effective methods.
We will explain how to remove screens for a deep clean. We also provide tips for cleaning screens still in their frames. You will learn how to tackle tough stains like mold and pollen. Finally, we discuss how often to clean screens for lasting results. By the end, you will have all the knowledge to make your window screens shine.
Takeaway:
- Regularly clean window screens to improve home aesthetics and air quality.
- Match cleaning methods to your specific screen material for best results.
- Always remove loose dirt before applying water or cleaning solutions.
- Ensure screens are completely dry before reinstalling to prevent mold.
- Consider cleaning screens at least twice a year, more if you live in dusty or high-pollen areas.
How To Clean Screens Window: Quick Answer
You can clean window screens by first removing loose dirt with a vacuum or brush. Then, wash them with warm, soapy water using a soft brush or sponge. Rinse thoroughly with a hose. Allow the screens to air dry completely before putting them back in place. For screens you cannot remove, wipe them down with a damp cloth.
Understanding Your Window Screens: Types and Materials
Window screens keep bugs out while letting air in. They are exposed to the elements all year. This means they collect dust, pollen, dirt, and sometimes even mold. Understanding the material of your screens helps you choose the best cleaning method. Different materials require slightly different care.
I always check the screen type before starting any cleaning project. This prevents accidental damage. Knowing your screen material helps you select the right tools and cleaning solutions. It ensures a safe and effective clean.
Fiberglass Screens
Fiberglass is the most common screen material. It is durable and flexible. Fiberglass screens do not crease easily. They are also resistant to corrosion. This material is easy to clean. You can use mild soap and water on fiberglass screens. They withstand a good scrub without much fuss. However, they can tear if handled roughly. Always be gentle, even though they are strong.
Aluminum Screens
Aluminum screens are very strong and long-lasting. They resist rust and hold their shape well. Aluminum mesh is thinner than fiberglass. This can make them feel more rigid. These screens are excellent for durability. You can clean aluminum screens with soap and water. Be careful not to bend them too much. Bends can be hard to remove from aluminum. Aluminum screens are a good choice for high-traffic areas. They stand up to a lot of use.
Pet-Resistant Screens
Pet-resistant screens are much thicker than standard screens. They are made from a heavy-duty polyester material. These screens resist tears and punctures from pets. They are an excellent investment if you have cats or dogs. Cleaning pet-resistant screens is similar to fiberglass. They can handle a bit more scrubbing pressure. Their robust nature makes them forgiving during the cleaning process. These screens also block more light due to their thickness.
Solar Screens
Solar screens are designed to block sunlight and heat. They are made from a denser weave, often polyester coated with PVC. This material effectively reduces glare. Solar screens help keep your home cooler in hot climates. When cleaning solar screens, be gentle. Their tighter weave can trap dirt more easily. Use soft brushes and mild solutions. Avoid harsh chemicals that might damage the coating. These screens are excellent for energy efficiency.
Gathering Your Cleaning Arsenal: Essential Tools and Supplies
Before you begin cleaning, gather all your supplies. Having everything ready saves time. It also makes the cleaning process smoother. I always make sure I have my tools within reach. This helps me work efficiently.
You do not need many special tools to clean window screens. Most items are common household products. Choose gentle cleaners to protect your screens. Harsh chemicals can damage the mesh or frame. Always read labels if you use a commercial cleaner.
Here is a list of essential items you will need:
- Vacuum Cleaner with Brush Attachment: This is perfect for removing loose dust. It helps prevent mud when you add water. A soft brush attachment protects the screen mesh.
- Soft Bristle Brush or Microfiber Cloth: For scrubbing away dirt. A car wash brush works well for large screens. A soft cloth is good for gentle wiping.
- Two Buckets: One for soapy water and one for clean rinse water. This keeps your cleaning solution fresh.
- Mild Dish Soap or All-Purpose Cleaner: Gentle soap is best. Avoid strong detergents. A few drops are usually enough.
- Garden Hose with Spray Nozzle: For rinsing screens thoroughly. A powerful but gentle spray is ideal.
- Large, Clean Towels or Old Sheets: For drying screens or protecting surfaces.
- Rubber Gloves: To protect your hands from dirt and cleaning solutions.
- Protective Eyewear: Always a good idea when spraying water or cleaning solutions.
- Ladder (if needed): For reaching high windows safely. Make sure it is stable.
I prefer to use eco-friendly cleaning solutions whenever possible. A mix of white vinegar and water can also be effective for light dirt. Always test any new cleaning solution on a small, hidden area first. This ensures it does not damage or discolor the screen material. Your screens will look their best with the right tools.
Step-by-Step Guide to Removing and Deep Cleaning Window Screens
Deep cleaning your window screens starts with removing them. This allows you to wash them thoroughly. You can reach all parts of the screen. Removing screens also lets you clean the window frames and tracks. It is a more effective way to clean screens.
I find that cleaning screens outdoors is easiest. You can use a hose without worrying about water spills inside. This process works well for most screen types.
Here are the steps for a deep clean:
Carefully Remove Screens from Windows:
- Most window screens have small clips or plungers on the side.
- Push the plungers in or lift the clips.
- Tilt the screen and pull it out gently.
- Be slow and steady. Do not force the screen.
- Some screens might be held by screws; you may need a screwdriver.
- As you remove each screen, mark it with tape. Write down which window it belongs to (e.g., “Living Room North”). This makes reinstallation easy.
- While the screens are out, it is a great time to clean the window tracks. Dust and debris collect there. A clean track helps your windows slide smoothly. Learn how to clean window tracks for a complete window refresh. Also, consider cleaning the window sills for a truly spotless look.
Remove Loose Dirt:
- Lay the screen flat on a clean, hard surface. A driveway or patio works well.
- Use a vacuum cleaner with a soft brush attachment.
- Vacuum both sides of the screen. This picks up loose dust, cobwebs, and pollen.
- You can also use a soft, dry brush or broom. Gently brush off the dirt.
- Removing loose dirt prevents mud from forming when you add water. This makes the washing step much more effective.
Prepare Cleaning Solution:
- Fill one bucket with warm water.
- Add a few drops of mild dish soap to the water. Mix gently until suds form.
- Fill the second bucket with clean, plain water for rinsing.
Wash the Screens:
- Wet the screen thoroughly with your garden hose. Use a gentle spray.
- Dip your soft brush or sponge into the soapy water.
- Gently scrub the screen, working in small sections.
- Apply light pressure. Scrub both sides of the screen.
- Pay attention to corners and edges. Dirt often builds up there.
- For very dirty areas, let the soapy water sit for a minute or two. This helps loosen grime.
Rinse Thoroughly:
- Rinse the screen with the garden hose. Use a steady, gentle stream of water.
- Start from the top and work your way down.
- Ensure all soap residue is gone. Soap left on screens can attract more dirt later.
- Rinse both sides completely. You want the water to run clear.
Allow to Air Dry Completely:
- Stand the screens upright in a sunny, well-ventilated area.
- Lean them against a fence or wall. Make sure they are stable.
- Air drying prevents water spots. It also ensures no moisture is trapped.
- Do not reinstall screens until they are bone dry. This prevents mold and mildew growth.
- Drying might take a few hours depending on the weather. Be patient.
This deep cleaning method leaves your screens remarkably clean. They will look almost new. You will notice a big difference in light and air quality inside your home.
Cleaning Window Screens While Still in the Frame: Quick Methods
Sometimes, removing window screens is not practical. They might be too high, or too difficult to detach. You can still clean them effectively without removal. These methods are great for routine maintenance. They are also helpful for quick touch-ups.
I often use these methods for my upper-level windows. It saves a lot of time and effort. While not as thorough as a deep clean, they make a significant difference.
Here are a few ways to clean screens still in their frames:
Vacuuming with a Brush Attachment:
- This is the easiest first step for screens still in place.
- Attach a soft brush nozzle to your vacuum cleaner.
- Gently vacuum both sides of the screen. Work from top to bottom.
- This removes loose dust, cobwebs, and pollen.
- Vacuuming regularly keeps screens cleaner for longer. It also prepares them for a damp wipe.
Damp Cloth Wipe Down:
- Mix a small amount of mild dish soap with warm water in a bucket.
- Dip a clean microfiber cloth into the solution. Wring it out well. The cloth should be damp, not dripping.
- Wipe down both sides of the screen. Use gentle, even strokes.
- Rinse your cloth often in clean water. Re-wet with soapy water as needed.
- Follow with a second cloth dampened with plain water. This removes any soap residue.
- This method is good for light dirt and smudges.
Lint Roller Method:
- For very light dust and pet hair, a lint roller works wonders.
- Roll the lint roller over the screen. It picks up surface debris.
- This is a quick fix for minor dust build-up. It is not suitable for heavy grime.
Using a Window Screen Cleaner Tool:
- Specialized screen cleaning tools exist. Some are designed for in-frame cleaning.
- These tools often combine a brush and a microfiber pad.
- They typically use plain water or a mild cleaning solution.
- Follow the manufacturer’s instructions for best results.
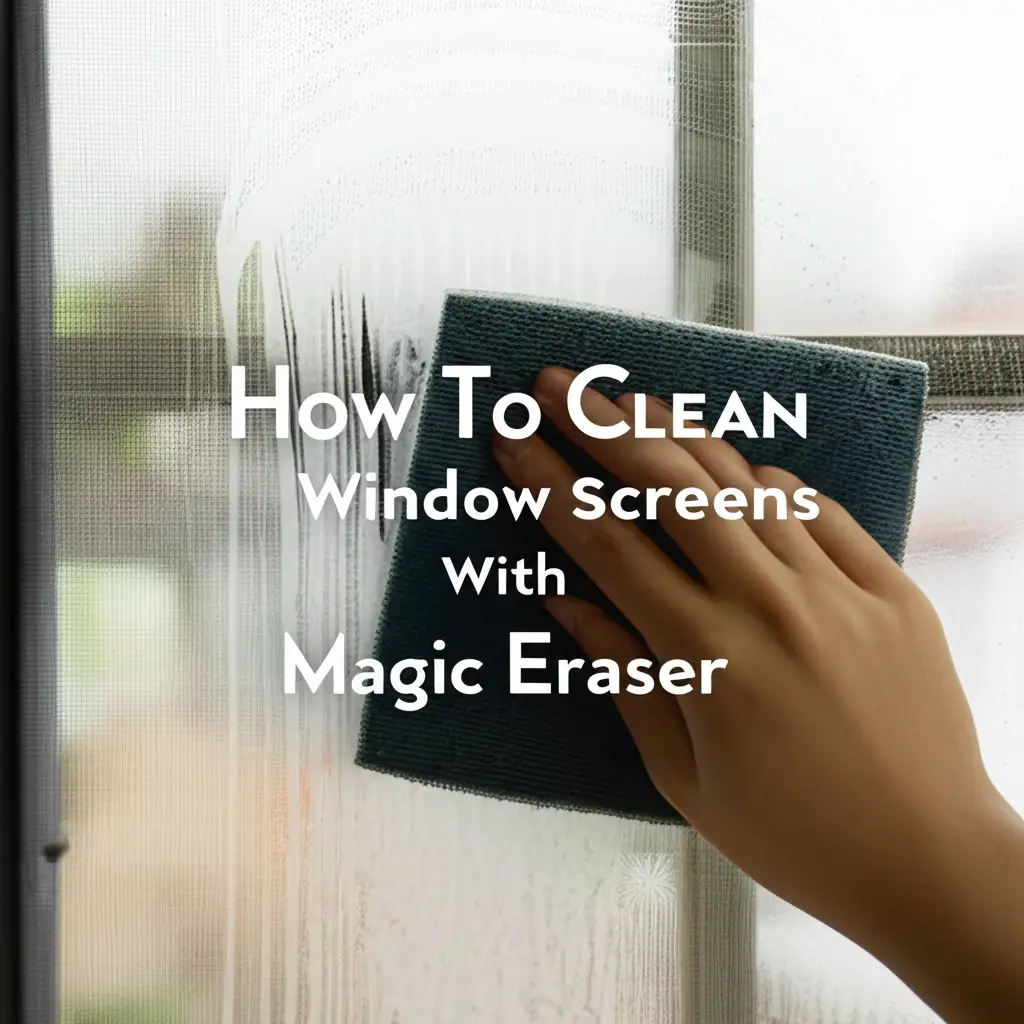
The Magic Eraser Technique:
- A Magic Eraser (melamine foam sponge) can be surprisingly effective.
- Slightly dampen a Magic Eraser with water.
- Gently wipe the screen in small sections.
- The abrasive nature of the Magic Eraser lifts dirt.
- Be cautious not to scrub too hard. This could damage delicate mesh.
- I have found this method great for stubborn spots on the screen. It works particularly well for isolated marks. For more detailed instructions, you can read about how to clean window screens with Magic Eraser. This method is quick and often avoids the need for heavy scrubbing or water.
These in-frame cleaning methods are perfect for regular upkeep. They help maintain your views without the hassle of screen removal. You can keep your windows looking fresh with minimal effort.
Tackling Stubborn Stains and Grime: Advanced Screen Cleaning Tips
Sometimes, regular cleaning is not enough. Window screens can develop stubborn stains. Mold, mildew, pollen, and grease require special attention. These tougher issues need more targeted solutions. Addressing them properly ensures your screens are truly clean.
I have dealt with many types of screen stains. It takes a bit more effort, but the results are worth it. Always test any strong solution on a small, hidden area first. This prevents damage to your screen.
Here are ways to handle challenging screen problems:
Mold and Mildew:
- Mold often appears as black or green spots. It grows in damp, shaded areas.
- For light mold, a mix of equal parts white vinegar and water works well. Spray it on the moldy area. Let it sit for 10-15 minutes. Then scrub with a soft brush and rinse.
- For tougher mold, you might need a mild bleach solution. Mix one part bleach with three parts water. Apply carefully with a sponge or spray bottle. Let it sit for 5-10 minutes. Rinse thoroughly. Be very careful with bleach near plants or colored frames.
- It is crucial to wear gloves and eye protection when using bleach.
- Mold can also grow on nearby window components. If you find mold on your window sills, you can find a guide on how to clean mold off window sills. This ensures a completely clean window area.
Heavy Pollen Build-up:
- Pollen creates a yellow or green film. It is especially bad during allergy season.
- Start by thoroughly vacuuming the screen. This removes the loose pollen.
- Then, use a strong stream from your garden hose to blast the remaining pollen.
- A soft brush with soapy water will help dislodge sticky pollen. Rinse very well.
- Pollen can be stubborn. You might need to repeat the washing and rinsing steps.
Grease and Oily Residue:
- Screens near kitchens or barbecue areas can accumulate grease.
- Use a degreasing dish soap solution. Dawn dish soap is very effective for grease.
- Apply the soapy water generously with a sponge. Let it sit for a few minutes to break down the grease.
- Scrub gently but firmly.
- Rinse with hot water from the hose. Hot water helps melt and wash away grease.
- Repeat if necessary until the greasy film is gone.
Preventative Measures for Tough Stains:
- Regular, light cleaning prevents heavy build-up.
- If you live in a high-pollen area, clean screens more often.
- Consider applying a protective spray. Some products repel dirt and water.
- Ensure proper ventilation around windows. This reduces moisture that leads to mold.
- Cleaning other window parts regularly helps too. For example, if you have aluminum window frames, keeping them clean prevents dirt transfer to screens.
Tackling these tough stains requires patience and the right approach. But once they are clean, your screens will look brand new. Your views will be clearer than ever.
Drying and Reinstalling Your Clean Window Screens
Drying your screens correctly is just as important as cleaning them. Improper drying can lead to new problems. Trapped moisture can cause mold or mildew to grow. It can also leave water spots that mar your clean screens. Reinstalling them correctly ensures they function properly.
I always allow ample time for screens to dry completely. This step prevents many future headaches. Patience here pays off in the long run.
Here are the key steps for drying and reinstalling:
Ensure Complete Drying:
- After rinsing, stand the screens upright. Lean them against a wall, fence, or sturdy object.
- Choose a sunny, well-ventilated area. Sunlight helps speed up drying.
- Allow the screens to air dry completely. This can take several hours.
- Run your hand over the mesh. It should feel completely dry to the touch.
- Check all edges and corners. Water can hide in the frame channels.
- Do not rush this step. Reinstalling a damp screen invites mold.
Check for Damage:
- While the screens are drying, inspect them closely.
- Look for any tears, holes, or frayed edges.
- Check the frames for bends or broken corners.
- Now is the best time to do minor repairs. Small holes can be patched with screen repair kits. Larger damage might require re-screening.
Clean Window Frames and Tracks:
- With the screens removed, this is the perfect opportunity.
- Wipe down window frames with a damp cloth.
- Vacuum or wipe out window tracks. Dust and debris accumulate heavily here.
- Clean any dirt or debris from the window sills as well. This ensures a truly clean window unit.
Reinstall Screens Carefully:
- Refer to the labels you made when removing them. Match each screen to its correct window opening.
- Align the screen with the window frame.
- Gently push the screen into the track.
- Engage any clips or plungers to secure it.
- Ensure the screen sits snugly in the frame. It should not wobble or leave gaps.
- If the screen is screw-mounted, re-attach the screws. Do not overtighten.
- A properly reinstalled screen keeps insects out effectively. It also looks much better.
Taking these final steps ensures your hard work pays off. Your screens will not only be clean but also ready to provide clear views and fresh air.
Maintenance and Frequency: Keeping Screens Pristine Year-Round
Cleaning your window screens is not a one-time job. Regular maintenance keeps them looking good. It also extends their lifespan. The frequency of cleaning depends on several factors. These include your location, the season, and local environment.
I find that a consistent cleaning schedule saves a lot of effort. It prevents heavy build-up from happening. Proactive care makes future cleaning easier.
Here are some tips for maintaining your screens year-round:
General Cleaning Frequency:
- For most homes, cleaning window screens twice a year is sufficient.
- A good time is in the spring. This removes winter grime and prepares for open-window weather.
- Another good time is in the fall, before closing up windows for winter. This removes summer pollen and dust.
- In dusty environments, you might need to clean more often.
- Homes near construction sites or busy roads collect more dirt.
Seasonal Considerations:
- Spring: Pollen is a major culprit. Focus on removing yellow or green pollen film.
- Summer: Dirt and dust from open windows. Also, insect residue.
- Fall: Leaves, seeds, and outdoor debris. Prepare for cooler weather.
- Winter: Less active cleaning. However, check for any persistent grime before the cold sets in.
Quick Dusting for Prevention:
- Between deep cleans, use a soft brush or vacuum attachment weekly or monthly.
- This removes loose dust and cobwebs. It stops dirt from embedding in the mesh.
- You can also use a leaf blower on a low setting. Blow off screens from a distance. This is a quick way to remove dry debris.
Protecting Screens from Damage:
- Be gentle when opening and closing windows.
- Teach children not to push on screens.
- If you have pets, consider pet-resistant screens.
- Store removable screens safely during winter if you take them down. Keep them flat in a garage or shed. This protects them from damage and dirt.
Addressing Specific Issues Promptly:
- If you notice mold, clean it immediately. Mold spreads quickly.
- Wipe off any sticky sap or bird droppings right away. They become harder to remove later.
By adopting a regular maintenance routine, your window screens will stay clean. They will continue to provide clear views and fresh air. This proactive approach saves you time and effort in the long run. It also helps preserve the integrity of your screens for many years.
FAQ Section
Q1: How often should I clean my window screens?
You should clean window screens at least twice a year. The best times are in the spring, to remove winter grime and pollen. Another good time is in the fall, to clear summer dust before winter. If you live in a very dusty area, near construction, or in a high-pollen region, you might need to clean them more frequently for optimal results.
Q2: Can I use a pressure washer on window screens?
No, you should not use a high-pressure washer on window screens. The force of a pressure washer can easily damage or tear the delicate mesh of most screens. It can also bend or warp the screen frame. Always use a gentle stream from a standard garden hose for rinsing. This protects the screen material from harm.
Q3: What’s the best way to clean very dirty, neglected screens?
For very dirty screens, start by vacuuming thoroughly to remove loose debris. Then, lay the screen flat and pre-soak it with a hose. Apply a solution of warm water and mild dish soap. Use a soft scrub brush to work the soap into the grime. Allow it to sit for a few minutes before rinsing extensively with a garden hose. Repeat if needed.
Q4: How do I prevent mold on my window screens?
To prevent mold, ensure screens dry completely after cleaning. Avoid leaving them in damp conditions. Good air circulation around windows helps. You can also occasionally spray screens with a diluted white vinegar solution. Vinegar acts as a natural mold inhibitor. Regularly removing dust and debris also reduces surfaces where mold can grow.
Q5: Is it safe to use harsh chemicals on window screens?
No, it is generally not safe to use harsh chemicals. Strong cleaners can damage the screen material, especially fiberglass or aluminum. They can discolor frames or leave residues that attract more dirt. Stick to mild dish soap and water. For tough stains like mold, use diluted white vinegar or a very diluted bleach solution sparingly and rinse thoroughly.
Q6: Can I clean window screens without removing them?
Yes, you can clean window screens without removing them. For light dirt, use a vacuum cleaner with a brush attachment. For more embedded grime, wipe them down with a damp microfiber cloth soaked in mild soapy water. Rinse the cloth often. A Magic Eraser can also be effective for stubborn spots on the screen, just be gentle.
Conclusion
Cleaning your window screens might seem like a chore. However, it offers big rewards. You get clearer views, more natural light, and better airflow in your home. It also helps your screens last longer. This guide gave you all the steps to clean screens window, whether you remove them or clean them in place. We covered tools, materials, and even how to handle tough stains.
You now have the knowledge to make your screens sparkle. Regular maintenance makes a big difference. It is an easy way to boost your home’s appearance and comfort. Start with a vacuum, then apply gentle soap and water. Always remember to dry screens completely. Take pride in your clear windows. Enjoy the fresh air and bright views that clean screens provide. Make screen cleaning a regular part of your home care routine.
- window screen cleaning
- screen maintenance
- home cleaning tips
- mesh cleaning
- DIY cleaning


