· Home Cleaning · 13 min read
How To Clean Shark Vacuum
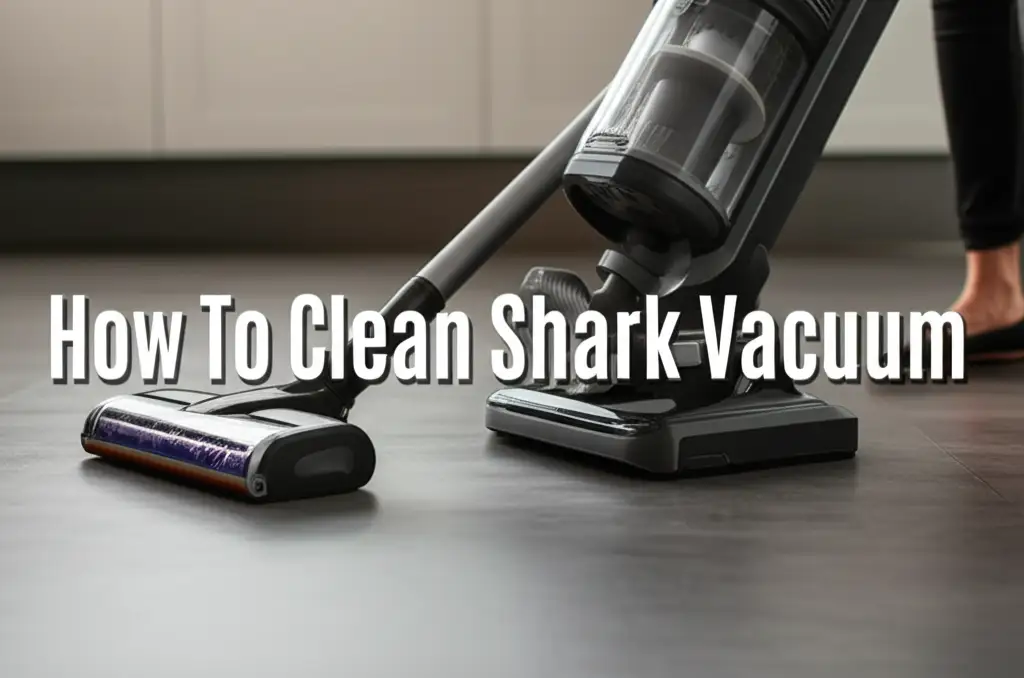
Maintain Your Shark Vacuum: A Complete Cleaning Guide
Having a clean home feels great. Your Shark vacuum is a vital tool in achieving this. Over time, dirt, dust, and hair build up inside the vacuum. This buildup reduces suction power and makes your vacuum less effective. Learning how to clean your Shark vacuum properly extends its life. It also ensures it performs at its best every time you use it. This article will guide you through each step of cleaning your Shark vacuum. We cover everything from emptying the dust cup to deep cleaning filters and brush rolls.
Takeaway
Keeping your Shark vacuum clean makes it work better. Regular maintenance prevents clogs and poor suction. Follow these steps for a long-lasting, powerful vacuum:
- Empty the dust cup often.
- Wash pre-motor filters monthly.
- Clean post-motor and HEPA filters annually.
- Remove tangled hair from the brush roll.
- Check hoses and nozzles for blockages.
Clear Answer to the Main Query
To clean a Shark vacuum, regularly empty the dust cup and wash filters with water. Remove hair from the brush roll and check all hoses for clogs. Allow all parts to dry completely before reassembly to maintain strong suction and prevent damage.
Why Regular Shark Vacuum Cleaning Matters for Performance
A Shark vacuum helps keep your floors spotless. It removes dust, dirt, and pet hair from your home. Over time, these collected items can start to affect your vacuum itself. They build up inside filters, hoses, and brush rolls. This buildup causes problems for the machine.
A dirty vacuum loses suction power. This means it picks up less debris from your floors. You might notice it leaves behind crumbs or pet hair. Regular cleaning prevents this decrease in performance. It helps your vacuum work efficiently, like new.
Cleaning also extends the life of your Shark vacuum. Dirt and hair can strain the motor. This makes the motor work harder. A strained motor can overheat or wear out faster. Simple cleaning steps protect your investment.
Keeping your vacuum clean improves air quality too. Dirty filters can release dust back into the air. This happens instead of trapping it. A clean filter ensures the air leaving your vacuum is fresh. It traps allergens and fine particles effectively.
Finally, a clean vacuum smells better. Old dirt and pet dander can create unpleasant odors. These smells spread through your home as you vacuum. Regular cleaning eliminates these bad smells. It keeps your home and your vacuum smelling fresh.
Essential Tools and Safety First for Cleaning Your Shark Vacuum
Before you start cleaning your Shark vacuum, gather a few simple tools. Having everything ready makes the process smoother. You probably have most of these items around your house. Prepare a soft cloth, a small pair of scissors, and a stiff brush. You will also need warm water and mild dish soap for washing some parts. A long, thin object like a broom handle or a ruler can help clear deeper clogs.
Safety is very important when cleaning any electrical appliance. Always unplug your Shark vacuum before you begin any cleaning task. This prevents accidental starts. It also protects you from electric shock. Never submerge the vacuum motor or main body in water. Water can damage the electrical components.
Wear gloves if you prefer, especially when dealing with dusty or dirty parts. Consider doing the cleaning outdoors or in a garage. This helps contain dust and debris. If you clean indoors, place a large sheet or newspaper down. This keeps your floor clean during the process.
Take your time with each step. Forcing parts or rushing can cause damage. Refer to your Shark vacuum manual if you have specific model questions. Different Shark models might have slightly different disassembly steps. For instance, cleaning a Shark Rocket vacuum might differ from an upright model in some details. Always put safety first to avoid injury or damage to your valuable vacuum.
Step-by-Step Guide to Cleaning Your Shark Vacuum’s Dust Cup and Filters
The dust cup and filters are the first line of defense against dirt. Cleaning them regularly is crucial for your Shark vacuum’s suction power. This section provides clear steps for each component. Proper filter maintenance keeps your air cleaner and your vacuum working.
Emptying and Washing the Dust Cup
Your Shark vacuum’s dust cup collects all the debris from your floors. You should empty it after every use. A full dust cup reduces suction immediately. To empty, simply unclip it from the main vacuum body. Most Shark models have a button or lever to release the cup.
Take the dust cup to a trash can. Press the release button on the bottom to open the flap. Let all the dirt fall out. Gently tap the sides to remove stubborn dust. For a deeper clean, you can rinse the dust cup with water. Use cool water and mild dish soap if needed.
Make sure to dry the dust cup completely before putting it back. Water can cause mold or damage vacuum components. Leave it air dry for at least 24 hours. A fully dry dust cup prevents odors and keeps your vacuum ready for use.
Cleaning the Pre-Motor Filters (Foam and Felt)
Shark vacuums typically have two pre-motor filters: a foam filter and a felt filter. These filters sit under the dust cup. They catch larger particles before they reach the motor. You should clean these filters once a month, or more often with heavy use.
First, remove the dust cup. Then lift out the foam and felt filters. Rinse them under cool, running water. Squeeze them gently to remove dirt. Continue rinsing and squeezing until the water runs clear. Do not twist or wring them out.
Allow these filters to air dry completely. This takes at least 24 hours. Placing them near a fan can speed up drying. Never put wet filters back into your vacuum. This can cause severe damage. Cleaning Shark vacuum filters is a simple task that makes a big difference.
Addressing the Post-Motor and HEPA Filters
Your Shark vacuum also contains a post-motor filter, sometimes a HEPA filter. This filter captures very fine dust and allergens. It is usually located near the motor or exhaust vent. Check your manual for its exact location. Many Shark vacuums feature a HEPA filter.
These filters need cleaning less often, usually once a year. Some HEPA filters are sealed and cannot be washed. Always consult your vacuum’s user manual first. If your filter is washable, tap it gently over a trash can to remove loose dust.
Rinse washable post-motor filters under cool water. Do not use soap. Continue rinsing until the water runs clear. Allow it to air dry for at least 24 hours, or even 48 hours for thick HEPA filters. Never put a damp filter back. Replace non-washable filters as recommended by Shark.
Keeping the Brush Roll and Nozzle Clean for Optimal Suction
The brush roll and nozzle are critical for picking up debris from your floors. Hair, strings, and other small objects can easily tangle around the brush roll. This reduces its effectiveness. Clogs can also form in the nozzle or hose, blocking airflow. Regular cleaning of these parts maintains your Shark vacuum’s powerful suction.
Removing Hair and Debris from the Brush Roll
The brush roll, also known as the brush bar, spins rapidly to agitate carpet fibers and sweep up dirt. Hair, pet fur, and thread frequently wrap around it. This can prevent the brush roll from spinning properly. It also decreases cleaning performance. You should check the brush roll regularly, especially if you have pets.
First, turn off and unplug your Shark vacuum. Lay the vacuum flat on its back or remove the floor nozzle, depending on your model. Use a pair of small scissors to carefully cut through any tangled hair or fibers. Be careful not to cut the bristles or the belt. Slide the scissors under the hair and snip along the length of the brush roll.
After cutting, pull the hair and debris off the brush roll by hand. You might need to use a stiff brush to remove any remaining stubborn bits. Some Shark models have a removable brush roll for easier cleaning. For specific models like the Shark Navigator, cleaning the brush roll on a Shark Navigator involves similar steps. Ensure the brush roll spins freely before reassembling the vacuum.
Clearing Clogs from the Hose and Nozzle
Clogs in the hose or nozzle are a common cause of lost suction. Large pieces of debris can get stuck, blocking the airflow. This prevents your vacuum from picking up dirt. You should check these areas if your vacuum’s suction feels weak.
Start by detaching the hose from the vacuum body. Also, remove the floor nozzle if it separates. Look through each end of the hose for visible blockages. You can use a broom handle or a long, thin stick to push out any clogs. Be gentle to avoid puncturing the hose.
Inspect the opening of the floor nozzle as well. Debris can pack tightly into this area. Use your fingers or a thin object to clear any obstructions. Ensure air can pass freely through all sections. Once clear, reattach the hose and nozzle securely. This helps restore full suction power.
Deep Cleaning and Advanced Maintenance Tips for Your Shark Vacuum
Basic cleaning keeps your Shark vacuum working well day-to-day. However, periodic deep cleaning ensures its longevity and peak performance. This involves looking beyond the easily accessible parts. Consider these advanced tips for comprehensive maintenance. A thorough deep clean can restore a vacuum that feels sluggish.
Start by disassembling your Shark vacuum as much as possible. This varies by model. Remove the dust cup, filters, hose, and attachments. Wipe down all accessible surfaces with a damp cloth. Use a micro-fiber cloth to pick up fine dust. Avoid harsh chemicals.
Inspect the wheels and axles. Hair and debris can wrap around them. This makes the vacuum harder to push. Use scissors to cut away any tangled material. Clean the wheel wells with a small brush or a cotton swab. Smooth-rolling wheels improve maneuverability.
Check all vacuum attachments. These include crevice tools and upholstery brushes. They can collect dirt and lint. Wash them with warm water and mild soap if they are not electronic. Let them air dry completely before storage. Clean attachments perform better.
For Shark models with motorized attachments, clean the internal mechanisms carefully. Remove any visible hair or debris from the small brush rolls. Some attachments may have small doors or screws for access. Always consult your user manual for specific instructions. Proper care of attachments enhances their effectiveness.
Consider replacing filters periodically, even washable ones. Over time, filter material can degrade or lose effectiveness. Shark recommends replacing foam and felt filters every 3-6 months. Replace HEPA filters every 12-24 months. New filters ensure maximum air filtration and suction.
Troubleshooting Common Shark Vacuum Cleaning Issues
Even with regular cleaning, you might encounter issues with your Shark vacuum. Low suction, strange noises, or bad smells are common. Knowing how to troubleshoot these problems helps you fix them quickly. Most issues relate to blockages or dirty components.
If your Shark vacuum has low suction, the first step is always to check for clogs. Detach the hose and look inside. Use a flashlight to see clearly. Also, inspect the openings on the floor nozzle and any attachments. A blocked path means air cannot flow. This stops dirt from reaching the dust cup.
Next, examine your filters. Dirty filters are a primary cause of weak suction. Remove all filters and clean them thoroughly, following the instructions above. Ensure they are completely dry before putting them back. A damp filter will block airflow and can damage the vacuum.
Strange noises like rattling or grinding often mean something is stuck. Check the brush roll for large debris like coins, paper clips, or hairpins. These items can hit the floor or casing, creating noise. If the brush roll sounds like it is struggling, it likely has tangled hair or a damaged belt. Clean the brush roll carefully.
Bad smells coming from your vacuum indicate accumulated dirt or moisture. This is common if you vacuum up pet accidents or spilled liquids. Empty and wash the dust cup thoroughly. Clean all filters. If the smell persists, there might be debris stuck deeper inside the vacuum’s body or hose. Consider a more extensive cleaning.
If you have a Shark robot vacuum, troubleshooting steps are slightly different. Robot vacuums have smaller parts and different sensors. Always refer to your specific model’s manual for precise troubleshooting. Often, clearing brushes and charging contacts solves many robot vacuum issues.
Establishing a Regular Shark Vacuum Cleaning Schedule
Consistent cleaning is the key to maintaining your Shark vacuum’s performance. Developing a regular schedule ensures your vacuum always works its best. It also prevents small issues from becoming big problems. Here is a simple cleaning schedule you can follow. This helps you remember what to clean and when.
After Every Use:
- Empty the dust cup: This prevents dirt from accumulating and ensures maximum suction for your next cleaning session. A full dust cup immediately lowers performance.
Monthly (or more often with heavy use/pets):
- Wash pre-motor filters (foam and felt): These filters catch most of the dirt. Cleaning them monthly maintains strong airflow and protects the motor.
- Check and clean the brush roll: Remove any tangled hair, strings, or debris. A clean brush roll spins freely and picks up dirt effectively.
- Inspect hose and nozzle for clogs: This is a quick check that can prevent significant loss of suction. Clear any visible blockages.
- Wipe down the exterior of the vacuum: Use a damp cloth to clean the outside casing. This keeps your vacuum looking neat.
Annually:
- Clean or replace the post-motor/HEPA filter: This filter captures fine dust and allergens. Consult your manual to see if it’s washable or needs replacement.
- Perform a deep clean of all accessible parts: Disassemble components, clean wheels, and check all attachments. This ensures every part is functioning optimally.
- Check the power cord for damage: Look for cuts, fraying, or exposed wires. Replace the cord if any damage is present. Safety is crucial.
Sticking to this schedule will make cleaning your Shark vacuum a routine task. It becomes less daunting when done regularly. Consistent maintenance will significantly extend the life of your vacuum. It will also ensure your home remains truly clean. A small effort each month saves you time and money in the long run.
Conclusion
Keeping your Shark vacuum clean is a straightforward process. It does not require special tools or skills. Regular maintenance ensures your vacuum performs at its peak. You will enjoy a cleaner home and a longer-lasting appliance. Remember to clean the dust cup after every use. Wash the pre-motor filters monthly. Inspect the brush roll and clear any clogs.
These simple steps make a big difference. They prevent suction loss and protect your vacuum’s motor. A well-maintained Shark vacuum is a powerful cleaning partner. Take the time to care for your vacuum, and it will continue to care for your home. You now know how to clean your Shark vacuum effectively. Start your cleaning routine today.
- Shark Vacuum
- Vacuum Cleaning
- Home Cleaning
- Appliance Maintenance
- Filter Cleaning
- Brush Roll Cleaning
- Vacuum Care
- Shark Maintenance