· Laptop Care & Cleaning · 19 min read
How To Clean Sticker Residue Off Laptop
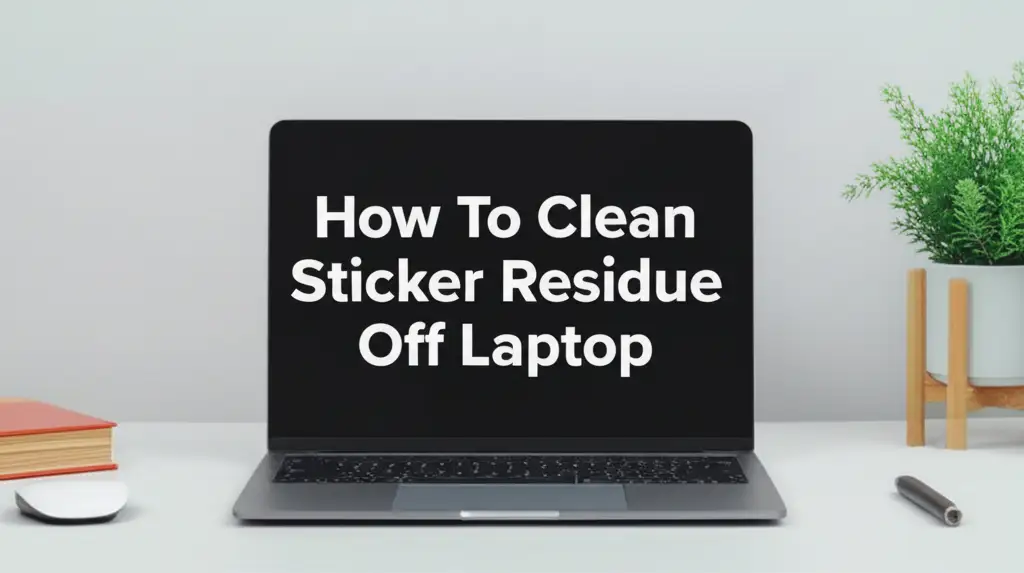
How to Clean Sticker Residue Off Your Laptop Safely
Sticker residue on a laptop can be annoying. It attracts dust and looks messy. You might wonder how to remove it without harming your device. Cleaning sticker residue off a laptop requires care and the right approach. Using wrong products can damage the screen, finish, or internal components. This guide provides clear steps to help you clean sticker residue effectively. We will discuss essential tools, safe cleaning agents, and important precautions. You will learn how to restore your laptop’s clean appearance. This article ensures you achieve a spotless laptop safely.
Takeaway:
- Always power down and unplug your laptop before cleaning.
- Use gentle cleaning agents like isopropyl alcohol or distilled water.
- Apply liquids to a microfiber cloth, not directly to the laptop.
- Test any cleaning method on a small, hidden area first.
- Use soft tools like a credit card for stubborn spots, never sharp objects.
You can clean sticker residue off a laptop using isopropyl alcohol (IPA) or distilled water applied to a microfiber cloth. First, power off the laptop. Gently rub the affected area to loosen the adhesive. For stubborn residue, use a plastic tool like an old credit card to scrape carefully. Always ensure no liquid enters ports or vents.
Why Sticker Residue is a Problem for Your Laptop
Sticker residue on your laptop poses several issues. It can make your device look old and uncared for. This sticky mess attracts dirt, dust, and lint easily. Over time, these particles build up on the adhesive. This creates a grimy, dark patch on your laptop’s surface. A dirty laptop can impact your sense of professionalism. A clean laptop surface presents a much better impression.
Beyond aesthetics, residue can hinder proper laptop function. If residue is near vents, it can trap dust. This accumulation might block airflow. Blocked vents lead to overheating. Overheating reduces your laptop’s performance. It can also shorten the lifespan of internal components. Removing this residue helps maintain good air circulation. It protects your laptop from potential heat damage.
Sticker residue also feels unpleasant to the touch. Your fingers may stick to the surface. This can make typing or carrying your laptop uncomfortable. The sticky surface can transfer residue to your hands or other surfaces. This spreads the mess further. Proper cleaning improves the tactile experience of using your laptop. It keeps your hands clean too.
Leaving residue on your laptop for too long makes it harder to remove. The adhesive can dry and harden over time. It bonds more strongly to the laptop’s material. Fresh residue is often much easier to wipe away. Old, dried residue needs more effort and specific techniques. Addressing it quickly saves you time and prevents frustration later.
In summary, sticker residue is more than just an eyesore. It impacts hygiene, performance, and the longevity of your device. Taking the time to clean it correctly protects your investment. It ensures your laptop stays in top condition. We will explore safe and effective methods to tackle this common problem.
Essential Tools and Materials for Safe Residue Removal
Gathering the right tools before you start is important. Using the correct items prevents damage to your laptop. It also makes the cleaning process much easier. You do not need many special tools. Most items are common household supplies. Always choose materials that are soft and non-abrasive. This protects your laptop’s delicate surfaces.
First, you will need several microfiber cloths. These cloths are gentle on surfaces. They do not leave behind lint or scratches. Cotton balls can leave fibers, so microfiber is better. Have at least two cloths ready. One cloth is for applying the cleaner. The other is for drying and buffing. Ensure your cloths are clean and dry before use.
Isopropyl alcohol (IPA) is a key cleaning agent. Use a concentration of 70% or 90%. IPA evaporates quickly. This reduces the risk of moisture damage to electronics. It is effective at dissolving most adhesive types. Avoid concentrations higher than 90%, as they can dry too quickly. This leaves a film. Do not spray IPA directly onto the laptop.
Distilled water is another useful agent. It is good for very light residue. It is also safe for cleaning laptop screens. Tap water contains minerals. These minerals can leave streaks or deposits. Distilled water is pure. It ensures a spot-free finish. You can also use it to dilute IPA if needed.
Cotton swabs (Q-tips) are helpful for small areas. They allow precise application of cleaning solution. Use them for corners or around ports. They absorb liquid well. This prevents oversaturation of delicate spots. Make sure they are not overly wet.
A plastic pry tool or an old credit card can assist with stubborn residue. These tools are firm but won’t scratch the laptop surface. Use them to gently scrape away softened adhesive. Never use metal tools or anything sharp. These can cause permanent damage to your laptop. The goal is to lift the residue, not to gouge it.
Optional tools include a hair dryer set on low heat. Warmth can soften some adhesives. This makes them easier to peel off. Use it cautiously and keep it moving. Too much heat can damage plastic components. You might also consider a specialized electronic cleaner. Ensure it is designed for electronics and non-abrasive. Always check its ingredients. These specialized cleaners are often non-toxic and quick-drying.
Having these items ready before you begin saves time. It also ensures a safe and effective cleaning process. Prepare your workspace and gather everything beforehand. This systematic approach is critical for good results.
Preparing Your Laptop for Cleaning: Safety First
Before you touch your laptop with any cleaning solution, prioritize safety. Proper preparation prevents electrical hazards and potential damage. Skipping these steps can lead to serious problems. Take a few moments to set up your cleaning environment safely. This ensures a smooth and worry-free cleaning experience.
First, power down your laptop completely. Do not just put it to sleep. A full shutdown is essential. This cuts off all power to internal components. It prevents accidental short circuits during cleaning. Press and hold the power button until the laptop turns off. Confirm it is fully shut down before proceeding.
Next, unplug the power adapter. Remove any external peripherals. This includes USB drives, external mice, or keyboards. Disconnect charging cables and data cables. A completely disconnected laptop is safer to handle. This also prevents accidental tugs on wires.
If your laptop has a removable battery, take out the battery. This provides an extra layer of safety. Many newer laptops have non-removable batteries. If yours does, just ensure it is powered off. Do not try to force a non-removable battery out. Check your laptop manual if you are unsure.
Clear your workspace. Work on a clean, flat, and stable surface. A desk or table is ideal. Avoid cleaning on a bed or carpet. These surfaces can generate static electricity. They also make it easier for small parts to get lost. Ensure the area is well-lit. Good lighting helps you see the residue clearly. It also helps you spot any remaining gunk.
Finally, test your cleaning method on an inconspicuous area. Every laptop surface can react differently. Apply a tiny amount of your chosen cleaner to a hidden spot. This might be on the bottom cover or inside a flap. Wait a few minutes. Check for discoloration or damage. If no adverse reaction occurs, it is safe to proceed. This test is crucial. It prevents irreversible harm to your laptop’s finish. This testing step is similar to how you might test a cleaner on general tape residue off glass surfaces, ensuring the solution does not mar the material.
These preparation steps are not optional. They are vital for protecting your valuable electronics. Following them ensures a safe and successful cleaning process. You are now ready to tackle the sticker residue.
Step-by-Step Guide to Cleaning Sticker Residue Off Laptop Surfaces
Now that your laptop is prepared and tools are ready, let’s start cleaning. This process needs patience and gentle handling. Work slowly and methodically for the best results. Each step builds on the previous one. This ensures thorough removal of the adhesive.
Initial Residue Softening and Peeling
Start by attempting to remove as much residue as possible without cleaners. You can often peel off the bulk of the sticker.
- Warm the Sticker: If the sticker is still mostly intact, apply low heat. Use a hairdryer set to its lowest heat setting. Hold it about 6-8 inches away from the sticker. Move it constantly. Warm the sticker for about 30 seconds to one minute. This softens the adhesive.
- Gently Peel: Immediately after warming, try to peel the sticker slowly. Start from a corner. Pull it back at a sharp angle, close to the surface. Do this very slowly. If it rips, re-warm and try again. This method removes the most significant part.
Applying the Cleaning Agent
Once the main sticker is gone, you will deal with the remaining sticky film.
- Prepare Your Cloth: Dampen a microfiber cloth with your chosen cleaning agent. For most laptop surfaces, isopropyl alcohol (IPA) at 70% or 90% is best. For screens, use distilled water or a dedicated screen cleaner. Never spray liquid directly onto the laptop. The cloth should be damp, not dripping wet. Excess liquid can seep into components.
- Gentle Rubbing: Lightly rub the dampened cloth over the residue. Use small, circular motions. Do not scrub aggressively. The goal is to dissolve the adhesive slowly. Apply gentle pressure. You will see the residue start to lift onto the cloth. Continue until the area feels less sticky. This method works well for general adhesive removal. The principle is similar to removing tape residue off glass, where gentle solvent application is key.
Dealing with Stubborn Spots
Some residue might be more persistent.
- Reapply and Let Sit: For very stubborn spots, dampen a cotton swab with IPA. Place it on the residue for a few seconds. This allows the IPA to soak into and break down the adhesive. Do not let it sit for too long.
- Scrape Carefully: Use a plastic pry tool or an old credit card. Hold it at a low angle. Gently push and scrape the softened residue. Do not apply much pressure. The plastic edge will lift the loosened adhesive. Work slowly. Wipe the scraped residue onto your microfiber cloth immediately.
Specific Surface Considerations
Different parts of your laptop need different care.
- Laptop Casing (Plastic/Metal): These surfaces are generally more durable. IPA works very well here. You can use slightly more pressure. Always test first, as some finishes might react.
- Laptop Screen: Never use IPA or strong chemicals on your laptop screen. Screens have special coatings that can be damaged. Only use distilled water or a dedicated, alcohol-free screen cleaner. Lightly dampen a separate, clean microfiber cloth. Wipe gently in one direction, then buff dry. Avoid pressing hard.
- Keyboard and Trackpad: Be extra careful around keys and trackpad edges. Use a cotton swab with minimal dampness. Avoid liquid dripping into the gaps. A light touch is key here.
Finishing Touches
After removing all residue, ensure no cleaner remains.
- Wipe Dry: Use a second, clean, dry microfiber cloth. Gently wipe down the entire cleaned area. This removes any streaks or leftover cleaner. Buff the surface until it is completely dry and shiny.
- Inspect: Shine a light on the cleaned area from different angles. This helps you spot any remaining residue or streaks. If you find more, repeat the process.
This methodical approach ensures that your laptop is clean and undamaged. Patience is your best friend when removing stubborn adhesive. Take your time, and your laptop will look as good as new.
Choosing the Right Cleaning Agent: What Works and What Doesn’t
Selecting the correct cleaning agent is vital. The wrong choice can permanently damage your laptop. Electronic devices are sensitive to many common household cleaners. Understanding what works and what to avoid protects your investment. This section guides you through safe and effective options.
Isopropyl Alcohol (IPA): Your Best Bet Isopropyl alcohol (IPA), especially at 70% or 90% concentration, is highly recommended. It dissolves most adhesives effectively. IPA evaporates very quickly. This quick evaporation means less moisture remains on your laptop. Less moisture reduces the risk of electrical damage. It also prevents water spots. Apply IPA to a microfiber cloth, not directly to the device. This controls the amount of liquid. It prevents it from seeping into internal components. Always choose pharmaceutical-grade IPA for purity.
Distilled Water: For Light Residue and Screens Distilled water is ideal for very light, fresh residue. It is also the safest option for laptop screens. Distilled water lacks minerals found in tap water. These minerals can leave streaks or mineral deposits. Use it sparingly on a microfiber cloth. For screens, distilled water is often enough to remove smudges and light stickiness. It is gentle and poses minimal risk to delicate coatings.
Specialized Electronic Cleaners/Adhesive Removers: Use with Caution Some products are marketed as specialized electronic cleaners or adhesive removers. If you choose one, read the label carefully. Ensure it is specifically safe for electronics. It should state it is non-abrasive and non-corrosive. Check for ingredients like citrus solvents or d-limonene. These can be effective. Always test these products on a small, hidden area first. Some may contain oils or chemicals that leave a residue or damage certain plastics. Look for products that evaporate cleanly.
What to AVOID at All Costs:
- Acetone (Nail Polish Remover): Acetone is a very strong solvent. It can dissolve certain plastics. It will certainly ruin your laptop’s finish. It can also damage screen coatings permanently. Never use acetone on any part of your laptop.
- Ammonia-Based Cleaners (Window Cleaners): Ammonia is corrosive. It can strip anti-glare coatings from screens. It can also damage plastic surfaces. Avoid products like Windex.
- Harsh Household Cleaners: Products like bleach, multi-surface cleaners, or kitchen degreasers are too aggressive. They contain strong chemicals. These can discolor, corrode, or degrade laptop materials. Using them will cause irreversible damage.
- Abrasive Cleaners or Scouring Pads: Anything with grit or a rough texture will scratch your laptop. This includes paper towels. Use only soft microfiber cloths.
- Solvents like Paint Thinner, Benzene, Toluene: These are extremely strong. They will melt or dissolve laptop plastics and finishes. They also emit harmful fumes. Keep them far away from your laptop.
- Vinegar and Baking Soda: While great for general cleaning, like some bathroom surfaces or even dissolving soap scum off a shower with baking soda, these common household cleaners are generally not recommended for sensitive electronics. Vinegar is acidic and can damage delicate coatings or finishes. Baking soda is abrasive and can scratch surfaces. Stick to solutions specifically designed for electronics.
By choosing the right cleaning agents, you can effectively remove sticker residue. You also protect your laptop from unnecessary harm. Always err on the side of caution.
Advanced Tips for Stubborn Sticker Residue and Prevention
Sometimes, sticker residue is incredibly persistent. Old, dried-on adhesive can be very challenging to remove. If the standard methods don’t fully work, some advanced tips can help. Prevention is also a key strategy. Stopping the problem before it starts saves you effort.
Dealing with Tough Residue
- Patience and Repeat Applications: For very stubborn residue, a single application may not be enough. Apply your chosen cleaner (IPA or electronic adhesive remover) to a microfiber cloth again. Lay the damp cloth over the residue for a minute or two. The moisture helps to soften the adhesive further. Then, gently rub and scrape again. Repeat this process several times if necessary. Do not increase pressure. Just increase the number of applications.
- Non-Abrasive Scraper Technique: If rubbing does not work, carefully use a plastic tool. An old credit card, a guitar pick, or a plastic phone opening tool works well. Hold the tool almost flat against the laptop surface. Push it slowly and firmly underneath the edge of the residue. The goal is to lift the adhesive. Do not dig or pry. Work in small sections. Wipe the lifted residue immediately onto your cloth. This technique is effective but requires a very light hand. Remember, you are trying to push the softened adhesive off, not scratch it.
- Using a Rubber Eraser: For small, slightly sticky spots, a clean rubber eraser (like those found on the end of pencils) can sometimes work. Gently rub the eraser over the residue. The friction can ball up the adhesive. Use an eraser that is clean and does not leave color marks. This method is surprisingly effective for light, fresh residue. Afterwards, wipe away any eraser bits and remaining stickiness with a damp microfiber cloth.
Prevention is Key
The best way to deal with sticker residue is to avoid it altogether.
- Avoid Applying Stickers: The simplest solution is not to put stickers on your laptop. If you must personalize your device, consider non-adhesive options. Laptop skins or cases are good alternatives. They provide protection and customization without direct adhesion.
- Use Removable Adhesives: If you have to use a sticker, choose ones labeled as “removable” or “repositionable.” These stickers use less aggressive adhesives. They are designed to come off cleanly. Examples include vinyl decals or static cling stickers.
- Protective Films or Cases: Apply a clear protective film to your laptop’s surface first. Then, place your stickers on the film. When you remove the film, the stickers come off with it. This keeps your laptop surface pristine. Hard-shell cases also offer a great surface for stickers. You can stick them to the case instead of the laptop itself.
By following these advanced tips, you can tackle even the toughest residue. More importantly, preventive measures can save you the hassle of cleaning altogether. A little foresight goes a long way in maintaining your laptop’s appearance.
Maintaining a Clean Laptop: Beyond Sticker Residue
Cleaning sticker residue is just one part of laptop care. A laptop accumulates dirt, dust, and grime over time. Regular cleaning keeps your device performing well. It also makes it look new. Maintaining cleanliness extends your laptop’s lifespan. It ensures a healthier user experience. This section covers general cleaning practices.
Regular Dust Removal
Dust is a laptop’s enemy. It collects on the surface and inside components.
- Exterior Dusting: Use a dry, clean microfiber cloth daily or weekly. Wipe down the screen, keyboard, and casing. This prevents dust buildup. A soft brush can remove dust from between keyboard keys.
- Vents and Ports: Use compressed air to clear dust from vents and ports. Hold the can upright. Use short bursts. Do not spray too close. This prevents dust from settling inside. Dust can block airflow. Blocked airflow leads to overheating. Overheating hurts performance and components.
Screen Care
The laptop screen is delicate. It needs special attention.
- Gentle Cleaning: Use a dedicated screen cleaner or distilled water. Spray the liquid onto a clean microfiber cloth. Never spray directly onto the screen. Wipe the screen gently in one direction. Then, buff with a dry part of the cloth. Avoid circular motions. They can leave streaks.
- Fingerprints: For fingerprints, a very slightly damp microfiber cloth often works. Use light pressure.
Keyboard and Trackpad Hygiene
Keyboards collect dirt, oils, and crumbs.
- Key Cleaning: Dampen a cotton swab with IPA. Gently wipe the surface of each key. Avoid excessive moisture. Use compressed air to dislodge crumbs from underneath keys.
- Trackpad Cleaning: The trackpad accumulates finger oils. Wipe it with a slightly damp microfiber cloth. Ensure it dries completely. A sticky trackpad can impair navigation.
Exterior Casing
The outer shell of your laptop can show smudges and dirt.
- General Wiping: Use a microfiber cloth slightly dampened with IPA. Wipe down the top cover and bottom shell. This removes smudges and dirt. Ensure no liquid enters ports or openings.
- Stubborn Marks: For tougher marks, use the same sticker residue methods. Test on a hidden area first.
Interior Cleaning (Advanced)
For advanced users, occasional interior cleaning might be needed.
- Fan Cleaning: If your laptop gets hot, the fan might be dirty. This usually requires opening the laptop. Consult a professional or your laptop’s manual. Doing this incorrectly can damage components. This is not for beginners.
Regular cleaning habits save you money and headaches. A clean laptop works better. It also looks more appealing. Make laptop cleaning a routine. It is a small effort with big rewards.
FAQ Section
Q1: Can I use rubbing alcohol to clean my laptop screen? No, you should not use rubbing alcohol directly on your laptop screen. Most laptop screens have special anti-glare or protective coatings. Alcohol can strip or damage these coatings permanently. For screens, use only distilled water or a dedicated, alcohol-free screen cleaner. Apply the cleaner to a microfiber cloth, then gently wipe the screen.
Q2: What should I do if the sticker residue is very old and dried? For very old and dried sticker residue, patience is key. Start by applying a small amount of isopropyl alcohol (70% or 90%) to a microfiber cloth. Lay the damp cloth over the residue for a minute to soften it. Then, gently rub or use a plastic tool like an old credit card to scrape it off. Repeat this process multiple times if needed. Do not use excessive force.
Q3: Is it safe to use a hairdryer to loosen sticker residue on my laptop? Yes, you can use a hairdryer, but with extreme caution. Set the hairdryer to its lowest heat setting. Hold it at least 6-8 inches away from the sticker. Keep the hairdryer moving constantly. Do not focus heat on one spot for too long. Excessive heat can damage your laptop’s plastic components or internal electronics. Use heat only briefly to soften the adhesive, then peel carefully.
Q4: How can I prevent sticker residue from appearing on my laptop in the future? The best way to prevent sticker residue is to avoid putting stickers directly on your laptop. If you want to customize your device, consider using laptop skins or hard-shell cases. You can apply stickers to these accessories instead. This keeps your laptop’s original surface clean. If you must use stickers, choose those labeled as “removable” or “repositionable” for easier future removal.
Q5: What household items should I absolutely avoid using to clean laptop sticker residue? You must avoid harsh chemicals and abrasive materials. Never use acetone (nail polish remover), ammonia-based cleaners (window cleaner), bleach, or kitchen degreasers. These can corrode or dissolve laptop plastics and coatings. Also, avoid abrasive scouring pads or paper towels, as they can scratch surfaces. Stick to isopropyl alcohol, distilled water, or specialized electronic cleaners applied with microfiber cloths.
Q6: Can I use water to clean sticker residue off my laptop’s case? You can use a small amount of distilled water for very light, fresh residue on the laptop’s case. However, isopropyl alcohol is generally more effective for most adhesives. If using water, ensure the cloth is only slightly damp, not wet. Immediately dry the area afterwards. Avoid any water getting into vents, ports, or seams to prevent internal damage.
Conclusion
Cleaning sticker residue off your laptop ensures it looks professional and performs well. This task requires a gentle touch and the right materials. We discussed the importance of safety. Always power down your device completely. We also covered essential tools like microfiber cloths and isopropyl alcohol. These are your best friends in the cleaning process. You learned to apply solutions carefully. You now know to always wipe with a damp
- laptop cleaning
- sticker removal
- adhesive residue
- safe laptop cleaning
- tech maintenance