· Home Cleaning · 15 min read
How To Clean Stove Coils
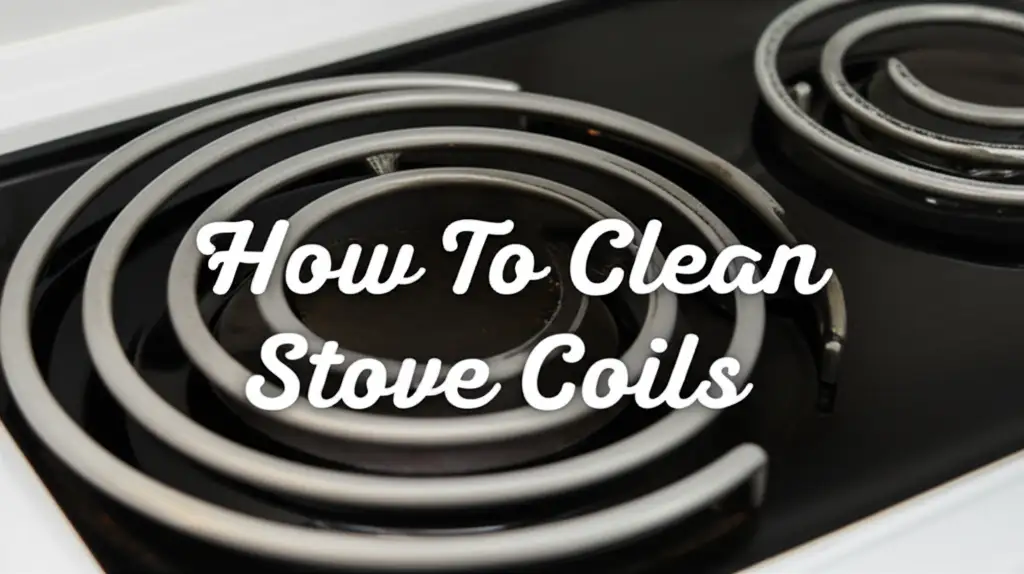
Restore Your Stove: How To Clean Stove Coils for Safety and Shine
Stove coils work hard. They heat your food and make cooking possible. Over time, spills, grease, and food debris build up on them. This buildup makes coils look dirty and reduces their heating power. Learning how to clean stove coils properly saves you energy and keeps your kitchen safe.
Dirty coils can cause smoke, bad smells, and even fire hazards. Regular cleaning keeps your stove working well. It also makes your kitchen look much cleaner. This article provides simple steps to clean your stove coils. We will discuss methods for different levels of dirt. You will find tips to keep them clean for a long time. Get ready to make your stove coils shine again.
Takeaway
Cleaning stove coils helps your stove work better and look clean. Follow these simple steps:
- Always unplug the stove first for safety.
- Remove coils and drip pans.
- Use warm, soapy water for light dirt.
- Apply baking soda paste for tougher stains.
- Ensure all parts are completely dry before putting them back.
- Clean up spills right away to prevent buildup.
How do you clean stove coils?
To clean stove coils, first unplug the stove. Remove the coils and drip pans. Wash them with warm, soapy water or a baking soda paste for tougher grime. Rinse well and dry completely before reinstalling them. This simple process improves stove performance and safety.
Why Cleaning Stove Coils Matters for Your Home
Keeping your stove coils clean is important for many reasons. Dirty coils affect how your stove cooks food. They also create potential dangers in your kitchen. I always tell my friends that a clean kitchen is a safe kitchen.
Dirty stove coils can lead to safety risks. Food spills and grease on the coils can smoke or even catch fire when heated. This creates a fire hazard in your home. Regular cleaning stops these dangerous buildups from happening. It helps protect your family and your property.
Clean coils work better and use less energy. When coils are covered in burnt-on food, they cannot heat as efficiently. This means your stove takes longer to heat up. It also uses more electricity to reach the desired temperature. By cleaning them, you ensure your stove heats properly. This saves you money on your energy bills over time.
Cleaning stove coils also extends their lifespan. Constant buildup can damage the heating elements. This can make them burn out faster. Taking care of your coils helps them last longer. This means you do not have to buy new ones as often. Keeping them clean also makes your whole stove look better. A clean stove improves the overall appearance of your kitchen.
Tools and Materials You Need for Cleaning Stove Coils
Before you start cleaning your stove coils, gather all your supplies. Having everything ready makes the job easier. You probably have most of these items in your home already. I always prepare my cleaning station first.
You will need some basic cleaning agents. Dish soap is excellent for everyday grime. It cuts through grease effectively. Baking soda is another fantastic tool. It is abrasive enough to tackle stubborn stains without scratching surfaces. White vinegar also works well with baking soda to create a fizzing action that lifts dirt. For a powerful clean, you might consider a specialized oven cleaner. Use these with caution and follow instructions.
You also need cleaning tools. A soft cloth or sponge is good for general wiping. A non-abrasive scrubber, like a nylon brush, helps with tougher spots. Avoid steel wool or harsh scrubbers, as these can damage the coils. A spray bottle can help apply solutions evenly. You will need a bucket or sink for soaking the drip pans.
Safety gear is important too. Rubber gloves protect your hands from cleaning solutions. If using strong cleaners, consider eye protection. Good ventilation is also a must. Open a window or turn on your kitchen fan. Make sure the stove is unplugged before you begin. This prevents electric shock. Once you have these items, you are ready to start the cleaning process.
Step-by-Step Guide to Cleaning Electric Stove Coils Safely
Cleaning electric stove coils is a simple process. You just need to follow a few steps carefully. Safety is the first priority when dealing with any appliance. I always start by ensuring the power is off.
Disconnect Power and Remove Coils
First, unplug your electric stove from the wall outlet. If you cannot reach the outlet, turn off the circuit breaker for your stove. This step is critical for your safety. Never clean an appliance that is still connected to power. It poses a serious risk of electric shock.
Once the power is off, you can safely remove the coils. Most electric stove coils simply pull up and out. Gently lift the coil and pull it away from the electrical receptacle. Set the coils aside on a protected surface, like an old towel or newspaper. Also, remove the drip pans located underneath each coil. These pans often collect spills and crumbs. You will clean these separately.
Initial Wipe-Down and Soaking Drip Pans
Begin by wiping down the coils and drip pans. Use a dry cloth or paper towel to remove loose crumbs and food debris. This makes the deeper cleaning much easier. Just get rid of the surface mess.
Next, focus on the drip pans. These are usually the dirtiest parts. Fill a sink or large bucket with hot, soapy water. Use a good amount of dish soap to help cut through grease. Place the drip pans in the soapy water and let them soak for at least 15-30 minutes. Soaking helps loosen burnt-on food and grease. This prepares them for scrubbing. For truly stubborn grease on your stove, you might find some great tips on how to clean greasy stove.
Cleaning Coils and Drip Pans
After soaking, scrub the drip pans. Use a non-abrasive sponge or brush. The hot water and soap should have softened most of the grime. Rinse them thoroughly under running water. Make sure all soap residue is gone.
For the coils themselves, avoid submerging the electrical connection. This is the part that plugs into the stove. You can gently wipe the coils with a damp cloth and a little dish soap. For tougher spots, make a paste with baking soda and a little water. Apply the paste to the dirty areas on the coil. Let it sit for 5-10 minutes. Then, gently scrub with a soft brush or cloth. Wipe away the paste with a clean, damp cloth. Remember not to get the electrical prongs wet.
Drying and Reassembling
Drying is a very important step. All parts must be completely dry before reassembly. This prevents electrical issues and damage. You can air-dry the coils and drip pans. Placing them in a well-ventilated area helps. You can also use a clean towel to dry them. Ensure there is no moisture left, especially on the electrical prongs of the coils.
Once everything is dry, place the drip pans back into their slots. Then, carefully reinsert the coils into their receptacles. Make sure they are seated correctly and firmly. Plug your stove back into the outlet or turn the circuit breaker back on. Your stove coils are now clean and ready to use. This same careful attention also applies if you are wondering how to clean oven coils, as both use similar heating elements.
Tackling Stubborn Grease and Burnt-On Residue
Sometimes, your stove coils have more than just light dust. Burnt-on food and layers of grease can build up. These require a stronger approach. Do not worry, there are effective ways to make them clean again. I have faced these tough spots myself many times.
Baking Soda and Vinegar Method
For persistent grime, a baking soda and vinegar paste works wonders. This combination creates a powerful cleaning reaction. First, remove the coils as described earlier. Sprinkle a generous amount of baking soda over the dirty sections of the coil. Make sure to avoid the electrical prongs. Then, spray white vinegar directly onto the baking soda. You will see it fizz and bubble. This reaction helps break down the burnt-on residue.
Let the mixture sit for 15-30 minutes. This gives it time to work on the grime. After soaking, gently scrub the coils with a non-abrasive brush or sponge. The loosened dirt should come off more easily. Rinse the coils with a damp cloth, making sure to wipe away all residue. Again, be careful not to get the electrical connections wet.
Using Commercial Cleaners (with Caution)
For extremely stubborn stains, you might consider commercial oven or stove top cleaners. These cleaners are powerful and can dissolve tough grease and burnt food. However, use them with extreme caution. Read the product instructions carefully before applying. Some cleaners are very strong and require gloves and good ventilation.
Apply the cleaner only to the coil and drip pan surfaces. Avoid spraying it directly on the electrical prongs or inside the stove’s wiring. Let the cleaner sit for the recommended time. Then, wipe it away thoroughly with a clean, damp cloth. Ensure no chemical residue remains. Always rinse the coils and drip pans very well. Completely dry them before placing them back into the stove. If you have an electric stove top without exposed coils, different cleaning methods apply. This approach helps you maintain your coil-based stove effectively.
Cleaning the Area Under and Around Stove Coils
Cleaning the coils is only part of the job. The area surrounding them also gets very dirty. Crumbs, spills, and grease collect in the drip pans and on the stove top. A complete clean includes these spots. I always feel better when the entire stove area is spotless.
Drip Pans: The Hidden Catchers
The drip pans sit directly under your stove coils. Their job is to catch spills and boil-overs. Over time, these pans become covered in burnt-on food and grease. You removed them earlier with the coils. Now it is time to give them a thorough cleaning.
After soaking the drip pans in hot, soapy water, most of the grime should be soft. Use a sturdy brush or scrubber to remove all residue. For really tough spots, you can make a baking soda paste and apply it. Let it sit, then scrub. Some drip pans are porcelain or enamel coated. Be gentle to avoid scratching them. Rinse the drip pans completely. Ensure no soap or cleaner residue remains. They must be completely dry before you put them back. Just like with oven racks, sometimes you might also need to consider how to clean stove racks to get the whole appliance sparkling.
The Stove Top Surface
After the coils and drip pans are clean, turn your attention to the stove top itself. Lift the entire burner assembly if possible. This reveals the area beneath. You will likely find a collection of crumbs, grease splatters, and food particles. Use a vacuum cleaner attachment or a damp cloth to remove these loose debris.
For the greasy areas on the stove top, a general kitchen degreaser or a warm, soapy cloth works well. Wipe down the entire surface, including around the burner openings. You can use a baking soda paste for any stuck-on spots. Apply, let sit, then scrub gently. Wipe down the surface with a clean, damp cloth. Then, dry it with another clean cloth to prevent streaks. This comprehensive cleaning ensures your entire cooking area is hygienic. If your stove has integrated grills, knowing how to clean stove grills can be a helpful skill as well.
Maintenance Tips for Long-Lasting Stove Coils
Regular maintenance helps your stove coils stay clean. It also ensures they work well for a long time. Preventing buildup is easier than removing it. I find that quick, consistent efforts save a lot of work later.
Wipe Up Spills Immediately
The best way to prevent burnt-on residue is to clean spills right away. When something boils over or splatters, turn off the burner. Let the coil cool down completely. Once it is cool, wipe up the spill with a damp cloth. If you let spills bake onto the coil, they become much harder to remove. A quick wipe prevents a big cleaning job later.
Use Proper Cookware
Using cookware that fits your coils helps prevent spills. Pots and pans that are too small or too large can cause food to overflow. Ensure your cookware has a flat bottom. This makes sure the heat distributes evenly. It also stops rocking, which can lead to spills. Matching your pan size to the coil size improves cooking efficiency and reduces mess.
Regular Light Cleaning
Perform light cleaning regularly. This means wiping down your coils and drip pans after each use. You do not need to remove them every time. A quick wipe with a damp cloth after they cool can make a big difference. This stops grease and food particles from accumulating. A weekly quick clean ensures your coils stay in good shape. It prevents the need for deep cleaning as often.
Check for Wear and Tear
Periodically inspect your coils for signs of wear. Look for any cracks, breaks, or excessive discoloration. If a coil looks damaged, it might not heat properly. It could even be a safety risk. Damaged coils need replacement. Regular checks help you identify issues early. This keeps your stove safe and functional. My family always appreciates when our appliances work properly.
Common Mistakes to Avoid When Cleaning Stove Coils
Cleaning stove coils can seem straightforward. However, some common mistakes can damage your coils or make the job harder. Avoiding these pitfalls ensures a safe and effective clean. I have learned these lessons over time.
Submerging Electrical Connections
This is perhaps the biggest mistake you can make. Never submerge the electrical prongs or connections of the coils in water. These parts are not designed to get wet. Water can cause rust, short circuits, or even electric shock when you plug the coil back in. Always clean these parts with a barely damp cloth, or simply wipe them dry. Focus your wet cleaning efforts only on the coil’s heating element itself.
Using Abrasive Cleaners or Tools
While you want to remove tough grime, using the wrong tools can scratch or damage the coil’s protective coating. Steel wool, abrasive scouring pads, or harsh chemical cleaners can ruin the coils. Scratches can make the coils more prone to sticking food. They can also affect how evenly the coil heats. Stick to soft cloths, sponges, or non-abrasive brushes. For cleaning stubborn stains, consider natural solutions like baking soda.
Not Drying Coils Completely
Putting wet coils back into your stove is another dangerous mistake. Any moisture left on the electrical connections can cause a short circuit. This can damage your stove or create a fire hazard. After cleaning, ensure the coils and drip pans are absolutely dry. Let them air dry for several hours, or even overnight. You can also use a clean towel to dry them thoroughly. Double-check the electrical prongs for any dampness before reinserting.
Forgetting to Unplug the Stove
I cannot stress this enough. Always, always unplug your stove before you start cleaning. Even if you are just wiping down the coils quickly. An electric stove coil carries current. Touching it while it is plugged in can result in a severe electric shock. Safety comes first. Make it a habit to disconnect power every single time you clean.
FAQ Section
Can I put stove coils in the dishwasher?
No, you should not put stove coils in the dishwasher. The dishwasher’s intense heat and water can damage the electrical components and wiring inside the coils. This can lead to malfunction or safety hazards. Clean stove coils by hand, focusing on the heating elements and avoiding the electrical prongs.
How often should stove coils be cleaned?
For optimal performance and safety, clean your stove coils after major spills or at least once a month. Regular light cleaning, such as wiping them down after use, helps prevent heavy buildup. A deep clean every few months keeps them in top condition and extends their lifespan.
What if my stove coils are not removable?
Some older or specific stove models may have non-removable coils. For these, cleaning requires more care. Ensure the stove is unplugged or the breaker is off. Use a damp cloth with mild soap or a baking soda paste. Carefully wipe the coils, avoiding excessive water. Use a toothbrush for crevices. Wipe dry immediately.
Why are my stove coils not heating up after cleaning?
If your coils do not heat after cleaning, check if they are fully dry and properly reinserted. The electrical prongs must be firmly seated in their receptacles. If they are loose or wet, they will not conduct power. Ensure the stove is fully plugged in or the circuit breaker is on. If the problem persists, the coil might be damaged and needs replacement.
Can dirty stove coils cause a fire?
Yes, dirty stove coils can cause a fire. Accumulated grease, food crumbs, and burnt-on spills on the heating elements can ignite when the coils get hot. This creates a significant fire hazard in your kitchen. Regular cleaning reduces this risk, making your cooking area much safer.
Conclusion
Taking the time to learn how to clean stove coils is a smart move for any home. It goes beyond just making your kitchen look good. A clean stove works better, heats food more efficiently, and helps keep your energy bills lower. More importantly, it dramatically reduces the risk of kitchen fires caused by burnt-on grease and food debris.
By following the simple steps we discussed, you can easily remove grime and maintain your stove’s performance. Remember to always prioritize safety by unplugging the stove. Use the right tools and cleaning solutions. Regular maintenance, such as wiping up spills quickly, will keep your coils sparkling. Keep them dry and free from damage. Give your stove coils the care they deserve. Enjoy a cleaner, safer, and more efficient cooking experience starting today. Your kitchen will thank you!
- electric stove coils
- deep cleaning stove
- kitchen safety
- appliance maintenance