· Tech Care & Maintenance · 20 min read
How To Clean Surface Pro Keyboard
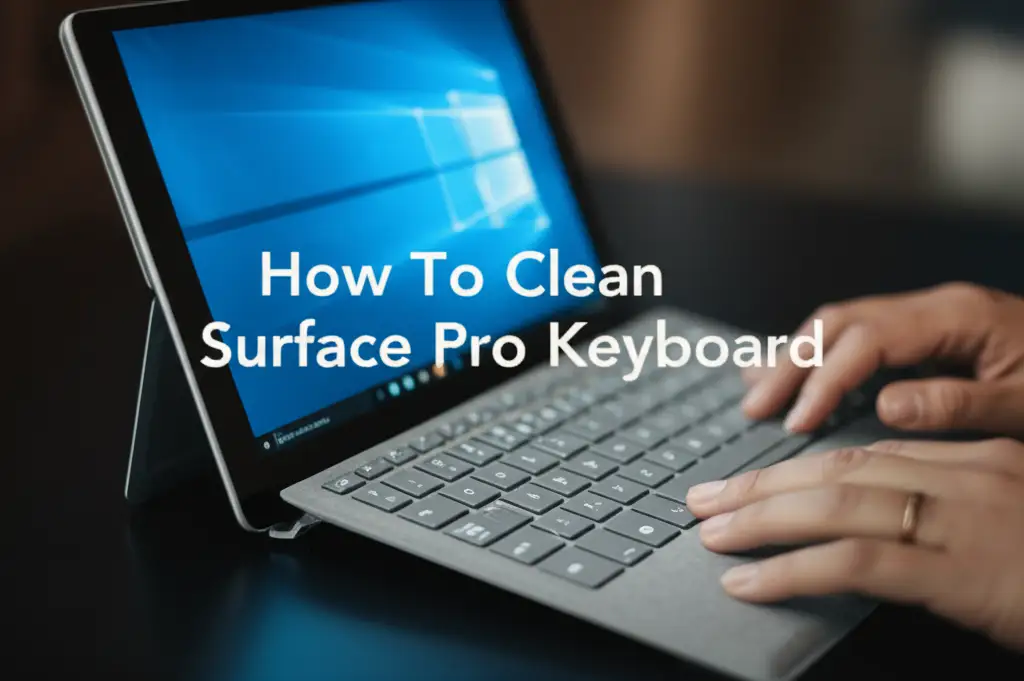
Keep Your Surface Pro Keyboard Spotless: A Cleaning Guide
My Surface Pro is my daily workhorse. It helps me write, connect, and stay productive. But over time, I noticed something: my keyboard, the very tool I use constantly, started collecting dust, crumbs, and smudges. I knew I needed to learn how to clean Surface Pro keyboard properly. A dirty keyboard not only looks bad but also harbors germs and can affect performance. It can lead to sticky keys or even reduce the lifespan of your device.
This article will guide you through the process. We will cover the essential tools you need for cleaning. We will also provide step-by-step instructions for routine maintenance. You will learn how to handle tough stains and spills. We will discuss specific care for the unique fabric on some Surface Pro keyboards. Finally, we will offer tips to keep your keyboard clean for a longer time. Let’s make your Surface Pro keyboard look new again.
Takeaway
- Clean your Surface Pro keyboard regularly for hygiene and proper function.
- Use specific tools like microfiber cloths, isopropyl alcohol, and compressed air.
- Address spills immediately to prevent permanent damage.
- Follow gentle cleaning steps tailored to the keyboard’s materials.
- Protect your keyboard from future dirt with good habits.
To clean your Surface Pro keyboard, detach it from the tablet. Use compressed air to remove loose debris. Wipe surfaces with a microfiber cloth dampened with a 70% isopropyl alcohol solution. For fabric areas, use a very lightly dampened cloth, avoiding oversaturation. Always power off your device before cleaning.
Why Your Surface Pro Keyboard Needs Regular Cleaning
My Surface Pro keyboard sees a lot of action every day. Just like any frequently used item, it collects dirt. Think about it: our hands touch the keys constantly. Dust settles between the keys. Tiny food crumbs and skin cells find their way into the crevices. This buildup is more than just unsightly.
The accumulation of dirt can lead to several problems. Keys might become sticky or less responsive. Dust can interfere with the keyboard’s internal mechanisms. Over time, this constant grime can even shorten the lifespan of your keyboard. Regular cleaning protects your investment. It also ensures your typing experience remains smooth and accurate.
The Hidden Grime on Your Keys
You might not see it, but dirt lurks everywhere on your keyboard. Each press transfers oils, dirt, and bacteria from your fingertips to the keys. Food particles easily fall into the small gaps. Over time, these small bits combine to form a sticky film. This film can make your keys feel greasy or sluggish. This is why learning how to clean Surface Pro keyboard effectively is important.
I once saw a friend’s keyboard that was clearly neglected. The keys had a visible sheen of grime. It made me realize how important routine cleaning is. A clean keyboard improves its look. It also improves its tactile feel. It just feels better to type on. Keeping your keys clean also contributes to better personal hygiene. You touch these keys, then you touch your face or food. A clean keyboard reduces germ transfer.
Extending Keyboard Lifespan
Regular cleaning helps your Surface Pro keyboard last longer. Dust and debris can get trapped under the keys. This can cause physical wear and tear when you press them. Liquids, even small spills, can corrode internal components if not cleaned promptly. The fabric material on many Surface Pro Type Covers also needs care. Dirt and oils can degrade the fabric over time.
By regularly removing contaminants, you reduce stress on the keyboard’s parts. This prevents premature failure. It keeps the keys moving freely. It also maintains the integrity of the unique materials. Think of it like changing the oil in a car. Small, regular maintenance prevents bigger, more expensive problems later. Cleaning your keyboard now saves you from buying a new one sooner.
Essential Tools for Cleaning Your Surface Pro Keyboard
Before you start cleaning, gather the right tools. Using the wrong products can damage your keyboard. My goal is always to clean effectively without causing harm. These tools are generally inexpensive and easy to find. Having them ready makes the cleaning process simple and stress-free.
Must-Have Cleaning Supplies
Here is a list of items I always keep handy for keyboard cleaning:
- Microfiber cloths: These are soft and lint-free. They will not scratch surfaces. They are excellent for wiping down keys and the trackpad. I use separate cloths for different stages of cleaning.
- 70% Isopropyl Alcohol: This is a safe and effective disinfectant for electronics. It evaporates quickly, leaving no residue. Do not use higher concentrations, as they can be too harsh. Do not use rubbing alcohol that contains lotions or other additives.
- Compressed air can: This helps blow out loose dust and crumbs from under and between keys. Make sure to use it with the can upright to prevent propellant discharge.
- Cotton swabs: These are perfect for reaching small gaps and cleaning around individual keys. They are great for precision work.
- Soft-bristle brush: A clean, soft toothbrush or a dedicated keyboard cleaning brush works well. It helps loosen stuck debris without scratching.
- Distilled water: For very light dampening of cloths when cleaning fabric areas, especially if you prefer not to use alcohol on fabric.
Safety First: What to Avoid
Using the wrong cleaning agents or methods can permanently damage your Surface Pro keyboard. I learned this the hard way with a different device. Always be cautious.
- Do not use harsh chemicals: Avoid ammonia-based cleaners, bleach, abrasive cleaners, or window cleaner. These can strip coatings, damage key legends, or degrade the fabric.
- Do not spray liquid directly: Never spray alcohol or water directly onto the keyboard. Always dampen your cloth or cotton swab first. Excess liquid can seep into the electronics. This causes shorts or corrosion.
- Do not over-saturate cloths: Your cleaning cloth should be damp, not wet. If you can wring liquid from it, it is too wet. Squeeze out all excess liquid before wiping.
- Do not use paper towels: Paper products can be abrasive. They can leave lint behind, which defeats the purpose of cleaning. Stick to microfiber.
- Do not use sharp objects: Do not use knives or other sharp tools to pry up keys or scrape away dirt. You can easily damage the keys or the keyboard membrane. For general key cleaning without removing keys, consider these tips: how to clean keyboard without removing keys.
Always turn off your Surface Pro and detach the keyboard before cleaning. This prevents accidental key presses and protects the device from electrical damage.
Step-by-Step Guide: Basic Cleaning for Your Surface Pro Keyboard
A basic cleaning routine is essential for maintaining your Surface Pro keyboard. I perform this routine weekly to keep things tidy. It helps prevent major dirt buildup. This process is straightforward and does not take much time. It focuses on removing surface dust and light grime.
Detaching the Keyboard
The first step is always to disconnect the keyboard. This prevents accidental input. It also allows you to clean all parts of the keyboard thoroughly.
- Power off your Surface Pro: Go to Start > Power > Shut down. Do not just put it to sleep. A fully powered-off device is safer.
- Detach the keyboard: Gently pull the keyboard away from the magnetic connector at the bottom of your Surface Pro screen. Place the Surface Pro tablet in a safe spot.
Now you have the keyboard as a separate unit. This makes it easier to handle and clean without worrying about the tablet itself. This method is similar to cleaning other laptop keyboards, like a MacBook Pro: how to clean macbook pro keyboard.
Removing Loose Debris
Loose debris like crumbs and dust are the easiest to remove. This step should always come first.
- Shake out crumbs: Hold the keyboard upside down over a trash can. Gently shake it to dislodge any larger crumbs or debris stuck between the keys. You might be surprised at what falls out!
- Use compressed air: Hold the compressed air can upright. Use short bursts to blow air across the keyboard surface. Focus on the gaps between keys. Angle the keyboard to help dislodge dust. Sweep the air across the keys from one side to the other. Do not spray too close or for too long in one spot. This can cause moisture buildup or damage.
- Brush away stubborn bits: If some dust or lint remains, use a soft-bristle brush. Gently brush along the key gaps. This helps lift anything the compressed air missed.
This initial sweep ensures you remove the bulk of the loose dirt. It prepares the surface for wiping.
Wiping Down Surfaces
Now it is time to clean the keys and other surfaces. This removes oils, smudges, and fine dust.
- Prepare your cleaning solution: Dampen a clean microfiber cloth with 70% isopropyl alcohol. Remember, it should be damp, not dripping wet. Squeeze out any excess liquid.
- Wipe the keys: Gently wipe the top and sides of each key. Work in sections. Make sure to clean the spaces between the keys as well. The alcohol will quickly evaporate. It will leave the keys clean and disinfected.
- Clean the trackpad: Use a separate, lightly dampened part of the microfiber cloth. Gently wipe the trackpad surface. Pay attention to the edges where dirt often accumulates. The trackpad can get very oily from finger use.
- Wipe the plastic/metal areas: If your keyboard has plastic or metal sections, wipe them down with the same alcohol-dampened cloth. This includes the area around the trackpad and the back of the keyboard.
For more detailed guidance on cleaning individual keys, you might find this article helpful: how to clean keys on keyboard. After wiping, let the keyboard air dry completely for a few minutes before reattaching it to your Surface Pro. This basic cleaning keeps your keyboard looking good and feeling fresh.
Tackling Stubborn Stains and Sticky Keys on Your Surface Pro
Sometimes, basic cleaning is not enough. We all have those moments: a spilled drink, a greasy snack, or just years of accumulated grime. These situations require a more focused approach. Sticky keys or visible stains can be frustrating. They often signal a need for deeper cleaning. I’ve had to deal with a few sticky situations myself. The key is knowing what to do without causing damage.
Dealing with Sticky Residue
Sticky keys often happen because of sugary drinks or food particles. They make typing feel awful. The good news is, you can fix this.
- Identify the sticky keys: Press each key to find which ones are stiff or do not spring back quickly.
- Target with isopropyl alcohol: Dampen a cotton swab with 70% isopropyl alcohol. It should be just barely wet.
- Clean around the key: Gently rub the cotton swab around the edges of the sticky key. Apply light pressure. The alcohol helps dissolve the sticky residue.
- Press and release: Press the sticky key multiple times. This helps the alcohol work its way under the keycap. Continue rubbing with the cotton swab as you press. Repeat until the key moves freely.
- Wipe excess: Use a dry part of your microfiber cloth to wipe away any excess alcohol or dissolved grime.
Be patient with this process. It might take a few attempts to fully free a very sticky key. Avoid forcing the key or drenching it. Too much liquid can seep into the keyboard’s circuitry.
Deep Cleaning Keys and Gaps
Sometimes, a general wipe isn’t enough to get rid of deeply embedded dirt or grime. This is where a more detailed approach for how to clean Surface Pro keyboard comes in.
- Isolate the area: If you see visible grime in a specific area, focus your efforts there.
- Use a soft brush: Take your soft-bristle brush. Gently brush along the gaps between the keys. This helps to dislodge stubborn, dry dirt that compressed air might have missed.
- Cotton swab precision: Dip a fresh cotton swab in 70% isopropyl alcohol. Squeeze out all excess liquid. Use the slightly damp swab to meticulously clean the tiny spaces between the keys. You can also clean the sides of the keys. Roll the swab as you go to pick up dirt.
- Check corners: Pay extra attention to the corners of the keyboard and the edges of the trackpad. These areas often collect a lot of dirt.
- Final wipe: After cleaning specific dirty spots, give the entire keyboard another light wipe with a clean, dry microfiber cloth. This removes any residue that might have been lifted during the deep cleaning.
This deep cleaning takes more time but yields excellent results. It removes grime that makes your keyboard look and feel old. Remember, prevention is also important. For spills on a laptop keyboard, act fast: how to clean laptop keyboard after spill.
Special Care for Your Surface Pro Keyboard’s Fabric (Alcantara) Surface
Many Surface Pro Type Covers feature a beautiful Alcantara fabric finish. This material feels premium and adds a unique touch. However, Alcantara requires special care. It is not like cleaning plastic or metal. If you want to know how to clean Surface Pro keyboard with fabric, you need a different approach. Using the wrong cleaning method can damage or stain the fabric permanently. I always treat this part of my keyboard with extra caution.
Understanding Alcantara Fabric
Alcantara is a synthetic suede-like material. It is known for its softness, durability, and luxurious feel. It is also quite resistant to stains when properly maintained. However, because it is a fabric, it can absorb liquids and oils. This absorption makes it prone to showing spots if not cleaned correctly. It can also trap dust and dirt within its fibers. This is why a gentle and precise cleaning method is crucial.
Unlike hard surfaces, you cannot scrub Alcantara. Harsh chemicals can discolor it or damage its texture. Excess moisture can leave watermarks. The goal is to lift dirt without soaking the material. Think of it more like spot cleaning upholstery than wiping down a table. Its unique properties demand respect and a tailored cleaning strategy.
Gentle Cleaning for Fabric Areas
Cleaning the Alcantara fabric requires a light touch and minimal moisture. My preferred method focuses on lifting dirt rather than saturating the fabric.
- Dry brushing: First, use a soft, clean, dry brush (like a new toothbrush or a fabric brush). Gently brush the Alcantara surface in one direction. This helps to lift loose dust and fibers. It also restores the nap of the fabric.
- Lightly dampen a microfiber cloth: Take a fresh microfiber cloth. Dampen it very lightly with distilled water or a highly diluted isopropyl alcohol solution (e.g., 50/50 alcohol and distilled water). The cloth should feel barely damp, not wet. Wring it out extremely well. You can also try just plain water first.
- Blot, do not rub: Gently blot the stained or dirty areas of the Alcantara. Do not rub vigorously. Rubbing can push the dirt deeper into the fabric or damage the fibers. For general cleaning, lightly blot the entire fabric surface. Work in small sections.
- For stubborn spots: If there is a stubborn spot, you can try blotting repeatedly with the slightly damp cloth. For very specific, small marks, a cotton swab very lightly dampened with the diluted alcohol solution can be used. Again, blot, do not rub.
- Air dry completely: After cleaning, let the keyboard air dry naturally in a well-ventilated area. Do not use heat sources like hair dryers. This can damage the fabric or the keyboard’s internal components. Make sure the fabric is completely dry before reattaching the keyboard or closing your Surface Pro.
Remember, less is more when cleaning Alcantara. Patience and gentleness will ensure your Surface Pro keyboard’s fabric stays looking its best.
Preventing Future Dirt and Damage to Your Surface Pro Keyboard
Cleaning your Surface Pro keyboard is important, but preventing it from getting dirty in the first place is even better. I found that adopting a few simple habits has significantly reduced how often I need to do deep cleaning. Preventing damage also means your keyboard lasts longer. These tips are easy to incorporate into your daily routine. They help maintain your keyboard’s cleanliness and functionality.
Daily Habits for a Cleaner Keyboard
Small changes in your daily behavior can make a big difference. These are the things I make sure to do:
- Wash your hands: Always wash your hands before using your Surface Pro keyboard. Our hands carry oils, dirt, and food particles. Clean hands mean less grime transferred to the keys. This is the simplest yet most effective prevention method.
- Avoid eating and drinking near your keyboard: This is probably the biggest culprit for sticky keys and crumbs. If you must eat, do so away from your device. If you drink, use a spill-proof cup. I try to create a “no-food zone” around my workspace.
- Light, daily wipe-down: Keep a clean, dry microfiber cloth nearby. At the end of each day, or after heavy use, give your keyboard a quick wipe. This removes surface dust and finger smudges before they accumulate. It takes only seconds.
- Regular compressed air bursts: Once a week, give your keyboard a quick blast with compressed air. This helps dislodge any newly settled dust or crumbs. It stops them from getting embedded.
These small habits reduce the need for intensive cleaning. They help keep your Surface Pro keyboard in pristine condition day-to-day.
Protective Measures
Beyond daily habits, some protective measures can also extend the life and cleanliness of your keyboard.
- Keyboard covers: Consider using a thin, transparent silicone keyboard cover. These covers fit over your keys. They protect against spills, dust, and crumbs. They are easy to remove and wash. While they might slightly change the typing feel, they offer excellent protection.
- Proper storage: When you are not using your Surface Pro, close the Type Cover. This protects the keys from dust accumulation. If you transport your Surface Pro, use a protective sleeve or case. This prevents scratches and impact damage to the keyboard.
- Mindful usage: Be aware of where you place your Surface Pro. Avoid dirty surfaces. Do not use it in dusty environments if possible. If you are in a high-dust area, consider closing the lid or covering the keyboard when not actively typing.
By combining good habits with protective measures, you will significantly reduce the wear and tear on your Surface Pro keyboard. This ensures it stays clean, functional, and looking new for a much longer time. It saves you time and effort on deep cleaning sessions.
Troubleshooting Common Surface Pro Keyboard Cleaning Issues
Even with the best cleaning efforts, you might encounter specific problems. Sometimes, a key still feels sticky. Or perhaps you are worried about moisture exposure. Knowing how to react to these issues is crucial. My experience taught me that quick and correct action can prevent minor issues from becoming major repairs. This section addresses common cleaning-related concerns.
What to Do If Keys Still Stick
You have cleaned your Surface Pro keyboard, but a key remains sticky. This can be frustrating. It often means some residue is deeply embedded or dried.
- Re-evaluate the source: Try to remember if a spill occurred. Knowing the substance helps. Sugary liquids dry hard.
- Targeted alcohol application: Power off and detach the keyboard. Get a new cotton swab. Dip it in 70% isopropyl alcohol. Squeeze it so it is almost dry.
- Work the key: Carefully rub the swab around all four edges of the sticky key. Gently press the key repeatedly while rubbing. The alcohol needs to get under the keycap to dissolve the residue. Do this for a minute or two.
- Allow to dry: Let the keyboard air dry completely for at least 15-30 minutes. The alcohol needs to evaporate fully.
- Repeat if necessary: If the key is still sticky, repeat the process. Stubborn residue might need a few rounds. Be patient. Avoid forcing the key. If the key is truly damaged, it might need professional repair. You generally cannot remove Surface Pro keycaps easily without breaking them.
Dealing with Moisture Damage
Accidental spills are a fear for any electronics owner. If water or liquid gets onto your keyboard, immediate action is vital. This is the most important part of how to clean Surface Pro keyboard after a spill.
- Act immediately: If liquid spills, detach the keyboard from the Surface Pro tablet right away. Do not hesitate.
- Power off: Turn off your Surface Pro tablet immediately. Do not just close the lid. Hold the power button until it shuts down completely.
- Absorb liquid: Turn the keyboard upside down. Gently tap it to drain any liquid. Use a dry microfiber cloth to blot up as much visible liquid as possible. Do not rub, just blot.
- Air dry extensively: Place the keyboard in a well-ventilated area. Position it so liquid can drain out. You can prop it up. Allow it to air dry for at least 24-48 hours. Do not use rice; it does not help and can introduce more dust. Do not use heat.
- Test cautiously: After drying, reconnect the keyboard and test it. If it works, great. If not, or if some keys are unresponsive, it might have permanent damage. In this case, professional help or replacement is the next step.
Remember, prevention is the best approach. But if a spill happens, acting fast is your best chance to save your keyboard.
FAQ Section
Q: Can I use water to clean my Surface Pro keyboard?
A: You can use distilled water very sparingly on a barely damp microfiber cloth for fabric areas. However, avoid spraying water directly or using excessive amounts. Water can cause short circuits or damage internal components. For keys and plastic, 70% isopropyl alcohol is safer because it evaporates quickly and disinfects. Use water only for very light blotting on Alcantara.
Q: How often should I clean my Surface Pro keyboard?
A: For basic cleaning, I recommend a quick wipe-down daily or every few days. Use compressed air weekly to clear dust. A deeper clean, involving alcohol wipes for keys and careful fabric treatment, should happen once a month. If you eat or drink near your keyboard, you might need to clean more frequently.
Q: Is it safe to use compressed air on my Surface Pro keyboard?
A: Yes, compressed air is safe and effective for removing loose debris. Always hold the can upright. Use short, controlled bursts. Do not spray too close to the keys. This prevents moisture from the propellant building up. It also protects the delicate components underneath the keys.
Q: What if I spill liquid on my Surface Pro keyboard?
A: Act fast. Immediately disconnect the keyboard from your Surface Pro tablet. Power off your Surface Pro completely. Turn the keyboard upside down to drain liquid. Blot with a dry microfiber cloth. Allow it to air dry for at least 24-48 hours in a well-ventilated area. Do not use heat to dry it.
Q: Can I clean the Alcantara fabric with soap?
A: No, avoid using soap or strong detergents on Alcantara fabric. Soaps can leave residue, stain the material, or alter its texture. Stick to dry brushing, or a very lightly dampened microfiber cloth with distilled water. You can also use a diluted isopropyl alcohol solution if needed. Always blot, do not rub, the fabric.
Q: Will cleaning void my warranty?
A: Proper cleaning using recommended methods and solutions should not void your warranty. However, causing damage due to improper cleaning, using harsh chemicals, or excessive liquid can be considered user-induced damage. Such damage is typically not covered under warranty. Always follow manufacturer guidelines and use caution.
Conclusion
Keeping your Surface Pro keyboard clean is simple. It is a vital part of maintaining your device. My journey in learning how to clean Surface Pro keyboard effectively has shown me its importance. Regular cleaning keeps your keyboard hygienic. It also extends its lifespan. This ensures your typing experience remains smooth and enjoyable.
- Surface Pro cleaning
- keyboard maintenance
- tech cleaning tips
- Type Cover care

