· Gaming Peripherals Maintenance · 19 min read
How To Clean Xbox Controller
Master Your Xbox Controller: A Comprehensive Cleaning Guide
Do you remember the day you unboxed your new Xbox controller? It felt so pristine. Now, after countless hours of intense gaming sessions, it might look a little less than perfect. Grime, sweat, and snack crumbs can build up, making your controller feel sticky and less responsive. Cleaning your Xbox controller is not just about aesthetics; it helps maintain its performance and extends its lifespan.
A clean controller ensures every button press and joystick movement registers accurately. This guide will walk you through a simple, effective process to make your Xbox controller feel new again. We will cover everything from basic surface cleaning to tackling stubborn sticky buttons and keeping your controller in top shape. Get ready to revitalize your gaming experience!
Takeaway
- Gather the right tools: microfiber cloths, cotton swabs, isopropyl alcohol, compressed air.
- Perform regular surface wipes to prevent grime buildup.
- Target sticky buttons and analog sticks with precision cleaning.
- Prioritize safety by disconnecting power and avoiding harsh chemicals.
Main Query Answer
To effectively clean your Xbox controller, use a microfiber cloth dampened with isopropyl alcohol for the exterior, cotton swabs for crevices, and compressed air for vents. This removes dirt, grime, and sticky residues, ensuring smooth operation and a hygienic gaming experience.
Why Cleaning Your Xbox Controller Matters
Your Xbox controller is more than just a piece of plastic; it is your direct link to the gaming world. Over time, constant use leads to a buildup of various substances. We touch our controllers with hands that might not always be perfectly clean. This results in fingerprints, sweat, skin oils, and food particles settling into every crevice.
This accumulation does not just look unsightly. It can also cause practical problems. Buttons can become sticky, joysticks might lose their smooth movement, and even the controller’s overall responsiveness can decline. A dirty controller can also harbor germs, which is not good for your health, especially if multiple people use it. Regular cleaning improves your gaming performance and helps keep you healthy. It also protects your investment, ensuring your controller lasts longer.
Essential Tools and Cleaning Supplies for Your Xbox Controller
Before you begin cleaning your Xbox controller, gather all necessary tools. Having everything ready saves time and ensures a smooth cleaning process. You do not need many specialized items; most can be found around your home or at a local store. Picking the right supplies is key to a safe and effective clean.
Here is what you will need:
- Microfiber Cloths: These are soft and non-abrasive. They will not scratch your controller’s surface. Use one cloth for applying cleaner and another dry one for polishing.
- Cotton Swabs (Q-tips): Perfect for reaching into small gaps and around buttons. They pick up dirt from tight spots.
- Isopropyl Alcohol (IPA): A concentration of 70% or 90% is ideal. This evaporates quickly and is safe for electronics. It disinfects surfaces and cuts through grime.
- Compressed Air: Use a can of compressed air with a thin nozzle. This helps blow dust and crumbs out of cracks and vents.
- Small Soft Brush (optional): A clean, soft-bristled toothbrush or a detailing brush can dislodge stubborn dirt.
- Toothpicks (optional): Useful for carefully scraping out dried grime from very narrow seams. Be gentle.
Avoid using harsh chemical cleaners like window cleaner, bleach, or abrasive scrubs. These can damage the plastic, ruin the finish, or even seep into the internal components. Water should also be used sparingly, if at all, as excess moisture can cause severe damage to electronics. Stick to isopropyl alcohol for best results.
Step-by-Step Guide: Cleaning the Exterior of Your Xbox Controller
Cleaning the outside of your Xbox controller is the first and most frequent step you should take. This general cleaning helps prevent grime from building up and keeps your controller looking good. It is a quick process that makes a big difference. Performing this simple clean regularly will keep your controller feeling fresh.
Follow these steps for a thorough exterior clean:
- Remove Power Source: Always start by removing any batteries from the controller. If you use a wired controller, unplug it from your Xbox or PC. This step is crucial for safety.
- Initial Wipe Down: Take a clean, dry microfiber cloth. Wipe down the entire surface of the controller. This removes loose dust, crumbs, and light smudges. Pay attention to the handles and the back of the controller where hands rest.
- Dampen Cloth with Isopropyl Alcohol: Lightly dampen another microfiber cloth with isopropyl alcohol. The cloth should be damp, not dripping wet. Alcohol is great for dissolving oils and grime.
- Wipe All Surfaces: Gently wipe all external plastic surfaces of the controller. Include the front, back, and sides. Be careful around buttons and analog sticks. The alcohol will evaporate quickly, leaving no residue.
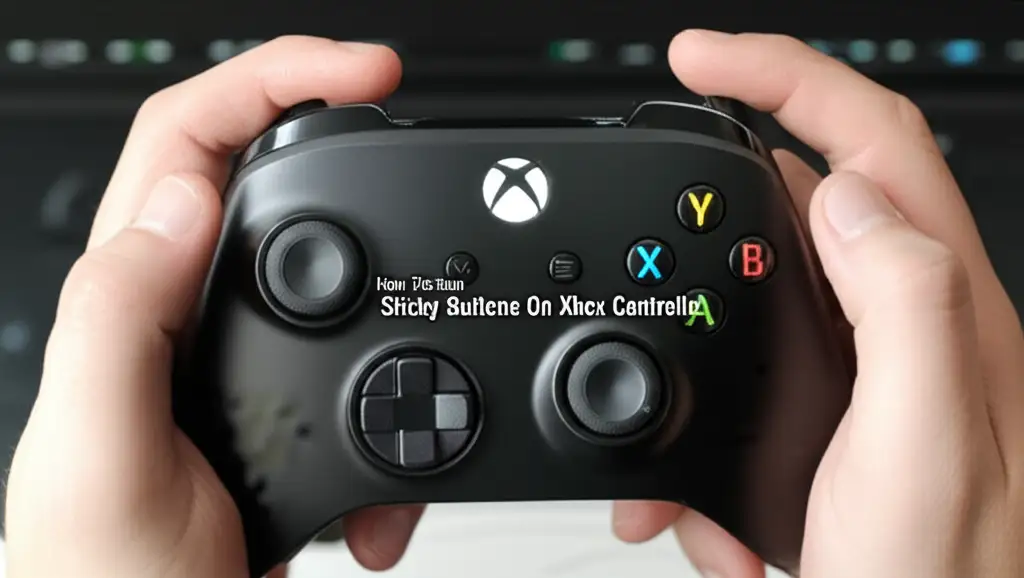
- Clean the Buttons and D-Pad: Use a cotton swab lightly dipped in isopropyl alcohol. Carefully clean around each button, the D-pad, and the Xbox guide button. The cotton swab can get into the small gaps and lift dirt. For more targeted cleaning of specific button issues, check out our guide on how to clean sticky buttons on Xbox controller.
- Clean Analog Sticks and Triggers: Use a clean cotton swab and isopropyl alcohol to clean the base of the analog sticks. Rotate the sticks gently to expose all sides of the base for cleaning. Wipe the triggers and shoulder buttons.
- Use Compressed Air: Hold the controller upside down. Use short bursts of compressed air to blow out dust and debris from around the buttons, D-pad, and analog sticks. Direct the air into the seams and vents. This pushes out trapped particles.
- Final Polish: Take a dry microfiber cloth and give the entire controller a final wipe. This removes any lingering alcohol residue and polishes the surface. Your controller should now look and feel much cleaner.
This routine exterior cleaning can be done frequently, perhaps once a week or every few days, depending on your usage. It is the easiest way to maintain your controller’s condition.
Tackling Sticky Buttons and Analog Sticks on Your Xbox Controller
Sticky buttons and sluggish analog sticks are common problems for Xbox controllers. They can make gaming frustrating and lead to input errors. This stickiness often comes from spilled drinks, food residue, or just accumulated skin oils and dust. Addressing these issues requires a bit more focus than a general wipe-down.
Here is how you can effectively clean sticky buttons and analog sticks without disassembling your controller:
- Identify the Problem Areas: Press each button and move each analog stick. Note which ones feel sluggish, sticky, or do not spring back properly. This helps you focus your efforts.
- Prepare Your Cotton Swab and Alcohol: Dip a cotton swab into isopropyl alcohol (70% or 90% concentration). Make sure it is damp, but not dripping wet. Excess liquid can seep inside and cause damage.
- Cleaning Sticky Buttons:
- For a sticky face button (A, B, X, Y), press the button down.
- While holding it down, use the damp cotton swab to clean around the edges of the button. Swab firmly but gently.
- Release the button and clean the top surface.
- Repeat this process several times for each sticky button. The alcohol helps dissolve the sticky residue.
- You might need a fresh cotton swab if the first one becomes too dirty.
- Cleaning the D-Pad: The D-pad can also get sticky. Use the same technique as the face buttons. Press one direction down and clean around its edges with an alcohol-dampened cotton swab. Work your way around all directions.
- Cleaning Sticky Analog Sticks:
- Gently push an analog stick to one side. This creates a small gap at the base.
- Use an alcohol-dampened cotton swab to clean the exposed part of the stick’s base.
- Rotate the stick around its full range of motion. Clean the base from all angles.
- The alcohol helps loosen and remove the gunk that restricts movement.
- You can also try gently rotating the stick while pressing down slightly and applying the swab.
- Apply Compressed Air (Carefully): After cleaning with alcohol, use short bursts of compressed air around the sticky buttons and analog sticks. This helps to dislodge any loosened particles and ensures the alcohol evaporates fully. Hold the can upright and use quick, controlled bursts. Avoid spraying continuously, as this can release propellant.
- Test and Repeat: Once the alcohol has evaporated, test the buttons and sticks. If they still feel sticky, repeat the cleaning process. Sometimes, deep-seated grime requires a few attempts to fully remove.
This method is highly effective for most cases of stickiness. It avoids the need to open your controller, which can be risky if you are not experienced. Regularly performing this targeted cleaning will keep your controller responsive and enjoyable to use. For specific in-depth advice on resolving stubborn sticky button issues, consider consulting our guide on how to clean sticky buttons on Xbox controller.
Advanced Cleaning: Addressing Battery Compartment and Ports
While the exterior and buttons get most of the attention, other parts of your Xbox controller also collect dirt and grime. The battery compartment and various ports can accumulate dust, lint, and even corrosion over time. Cleaning these areas is important for maintaining good power connections and reliable wired performance. Neglecting these spots can lead to connectivity issues or power interruptions.
Here is how to approach advanced cleaning for these specific areas:
Cleaning the Battery Compartment
The battery compartment often collects dust, lint, and sometimes even battery acid residue if old batteries have leaked. A clean compartment ensures good electrical contact.
- Remove Batteries: Always start by removing all batteries from the compartment. This is a crucial safety step.
- Inspect for Residue: Look closely inside the compartment. You might see white powdery residue (from alkaline batteries) or green/blue corrosion (from rechargeable batteries).
- Clean with Cotton Swab and Alcohol: Dampen a cotton swab with isopropyl alcohol. Carefully wipe down the battery contacts and the inner walls of the compartment. The alcohol helps dissolve any light corrosion or residue. For tougher corrosion, you might gently scrape with a wooden toothpick, then wipe with alcohol.
- Dry Thoroughly: Ensure the compartment is completely dry before inserting new batteries. Alcohol evaporates quickly, but give it a moment.
Cleaning Charging Ports and Headphone Jacks
These ports are open to the environment and can collect dust and lint, especially if the controller is often left lying around. Blockages can prevent proper charging or headphone connection.
- Inspect the Port: Use a flashlight to look inside the charging port (USB-C or Micro-USB) or the 3.5mm headphone jack. You might see compacted lint or dust.
- Use Compressed Air: Direct short bursts of compressed air into the port. This is often enough to dislodge loose debris. Hold the controller so the port faces downwards, allowing gravity to assist.
- Careful Scraping (Caution Required): If compressed air does not work, you can very carefully use a non-conductive, thin object like a plastic toothpick or a small wooden pick. Gently scrape along the inside walls of the port to loosen compacted lint. Avoid metal objects, as they can short-circuit or damage the pins.
- Final Air Blast: After loosening, use compressed air again to blow out the debris.
- Wipe External Port Area: Use an alcohol-dampened cotton swab to clean the plastic surrounding the ports. This removes external grime.
Cleaning Vent Grills
Xbox controllers have small vent grills, especially on the back or top, for ventilation. These can become clogged with dust.
- Use Compressed Air: Blast compressed air directly into the vent grills. This helps push out dust from within.
- Brush if Needed: For stubborn dust, gently brush the grills with a soft-bristled brush (like a clean, soft toothbrush) to dislodge particles, then use compressed air again.
Cleaning these often-overlooked areas ensures every part of your Xbox controller functions correctly. It is a critical part of comprehensive maintenance.
Preventative Measures and Regular Maintenance Tips
Cleaning your Xbox controller after it gets dirty is good. But preventing it from getting dirty in the first place is even better. Regular, simple maintenance can significantly reduce the need for deep cleaning. These preventative measures will keep your controller in top shape for much longer. They are easy to implement and become habits quickly.
Here are some effective tips for keeping your Xbox controller clean and functional:
- Wash Your Hands Before Gaming: This is perhaps the most important tip. Our hands carry oils, dirt, and food residue. Washing your hands with soap and water before you pick up the controller prevents most of the grime transfer. This simple habit dramatically reduces buildup on your controller.
- Avoid Eating and Drinking While Gaming: Spills are a controller’s worst enemy. Sugary drinks are especially damaging as they dry sticky and attract more dirt. Food crumbs can fall into tiny gaps, causing stickiness and blockages. Try to finish eating or drinking before your gaming session starts. If you must have a drink, use a lidded bottle or a cup with a straw.
- Store Your Controller Properly: Do not just toss your controller on the floor or in a dusty drawer. When not in use, store it in a clean, dust-free environment.
- Controller Stands: A controller stand keeps it upright and off dusty surfaces.
- Drawers or Cabinets: Storing it in a closed drawer or cabinet protects it from airborne dust and accidental spills.
- Dust Covers: If you have one, a simple dust cover can work wonders.
- Perform Quick Wipes Regularly: Take a dry microfiber cloth and wipe down your controller after every few gaming sessions. This removes fresh fingerprints and light dust before they harden or settle. This takes less than a minute.
- Use Controller Grips/Skins: Some players use silicone grips or skins. These can protect the controller’s original surface from wear and tear, sweat, and minor spills. The skin is easier to clean or replace than the controller itself. Just ensure they do not trap moisture or heat.
- Educate Others Who Use It: If others in your household use your controller, share these tips with them. Consistency in cleaning habits from all users helps keep the controller pristine.
- Clean Your Gaming Area: A clean environment helps keep your controller clean. Dust on your desk or gaming table can easily transfer to your controller. Regularly wipe down your gaming surface and other peripherals. For general electronics cleaning, consider also reading our guide on how to clean an Xbox One console, as keeping your entire setup clean is beneficial.
By adopting these preventative measures, you will find yourself needing to do deep cleans much less often. A little effort goes a long way in preserving your Xbox controller.
Common Mistakes to Avoid When Cleaning Your Xbox Controller
Cleaning your Xbox controller can seem straightforward, but certain actions can cause more harm than good. Avoiding common mistakes is as important as knowing the correct cleaning techniques. Damage from improper cleaning can range from cosmetic blemishes to complete functional failure. We want your controller to last.
Here are the key mistakes to avoid during your cleaning process:
- Using Too Much Liquid: This is the most common and dangerous mistake. Electronics and excess moisture do not mix. If liquid seeps into the internal components, it can cause short circuits, corrosion, and permanent damage. Always dampen cloths or swabs; never saturate them. Do not spray cleaners directly onto the controller.
- Using Harsh Chemical Cleaners: Products like window cleaner, kitchen sprays, bleach, or abrasive cleaners contain chemicals that are too strong for electronics. They can strip the finish, degrade the plastic, leave sticky residues, or corrode internal parts. Stick to isopropyl alcohol (70-90%) for effective and safe cleaning.
- Using Abrasive Materials: Scouring pads, rough cloths, or stiff brushes can scratch the plastic surface and wear down the textured grips. Always use soft microfiber cloths and cotton swabs. If you need to dislodge stubborn grime, use a soft brush or a wooden toothpick very gently.
- Forgetting to Disconnect Power: Never clean your controller while it is plugged in or has batteries inserted. This is a safety hazard for you and can damage the controller if liquid reaches live circuits. Always remove batteries or unplug the controller first.
- Opening the Controller Unnecessarily: Unless you are experienced with electronics repair and know exactly what you are doing, avoid opening your controller. Disassembly can void warranties, lead to lost screws, or damage delicate internal components. Most cleaning can be done externally. If sticky button issues persist after external cleaning, consider professional help or consult a specific guide for disassembly if you feel confident.
- Ignoring Drying Time: After cleaning with isopropyl alcohol, allow sufficient time for it to evaporate completely before reinserting batteries or plugging the controller in. While alcohol evaporates quickly, rushing this step can trap moisture inside.
- Spraying Compressed Air Incorrectly: Do not tilt the compressed air can excessively. This can cause liquid propellant to spray out, which can be very cold and potentially damage components. Hold the can upright and use short, controlled bursts. Also, avoid blasting air directly into open ports from a very close distance, as it can push debris deeper.
By being mindful of these common errors, you can ensure your Xbox controller cleaning process is effective and safe. Proper cleaning extends the life of your valuable gaming equipment.
When to Consider Professional Help or Replacement
You have tried everything. You followed all the cleaning steps. Yet, your Xbox controller still has issues. Perhaps buttons are unresponsive, joysticks drift, or it loses connection randomly. At some point, cleaning will not fix the problem. This is when you should consider other options. Knowing when to stop cleaning and seek help or replacement is important.
Here are signs it might be time for professional help or a new controller:
- Persistent Stick Drift: If your analog sticks constantly register movement even when you are not touching them, this is “stick drift.” While cleaning the base can sometimes help, often it is a mechanical wear issue with the internal sensor. This usually requires component replacement.
- Unresponsive Buttons After Cleaning: You cleaned around the sticky buttons multiple times, but they still do not click properly or register presses. This might indicate internal damage to the button mechanism or contact pads.
- Intermittent Connectivity Issues: Your controller frequently disconnects from your Xbox or PC. This could be an internal antenna issue, a faulty circuit board, or power management problems. External cleaning will not fix these.
- Battery Drain Issues: Batteries die very quickly, even new ones. This points to an internal power short or component drawing too much power.
- Physical Damage: Cracks in the casing, broken triggers, or a bent USB port usually mean parts need replacing. Cleaning cannot fix structural damage.
- Water Damage: If your controller was submerged or heavily soaked, internal corrosion may have occurred. While you can try to dry it out, full recovery is rare, and long-term issues are common.
Options to Consider:
- Manufacturer’s Warranty/Repair: If your controller is still under warranty, contact Microsoft Xbox support. They might offer a free repair or replacement. Even if out of warranty, they might have a repair service.
- Local Electronics Repair Shop: Some local shops specialize in console or controller repairs. They have the tools and expertise to open controllers, diagnose issues, and replace specific components like joysticks or circuit boards. Get a quote before committing to ensure the repair cost is reasonable compared to a new controller.
- DIY Disassembly (With Caution): For advanced users, there are many online guides and videos on how to disassemble Xbox controllers and replace parts. However, this carries risks. You can easily damage internal ribbons, lose tiny screws, or struggle to reassemble it. This option is best only if you are comfortable with small electronics and accept the risk of further damage.
- Replacement: If the controller is old, heavily damaged, or the repair cost is too high, buying a new controller is often the most practical solution. Xbox controllers come in various models and colors, and new ones often offer improved features or durability.
Remember, a controller that constantly malfunctions detracts from your gaming enjoyment. Sometimes, a new controller is the best way to restore your experience.
Frequently Asked Questions About Cleaning Xbox Controllers
How often should I clean my Xbox controller?
You should perform a quick exterior wipe down with a dry microfiber cloth after every few gaming sessions, or at least once a week. A more thorough clean, targeting sticky buttons and crevices with isopropyl alcohol, is recommended every 1-3 months, depending on how often you use it and your habits (e.g., eating while gaming).
Can I use rubbing alcohol to clean my Xbox controller?
Yes, rubbing alcohol (isopropyl alcohol) is the safest and most effective cleaner for your Xbox controller. Use a concentration of 70% or 90%. It evaporates quickly, disinfects surfaces, and effectively cuts through grease and grime without damaging the plastic or electronics. Always apply it to a cloth or cotton swab, not directly onto the controller.
What should I avoid when cleaning my Xbox controller?
Avoid using excessive liquid, harsh chemical cleaners (like window cleaner, bleach, or abrasive sprays), and abrasive materials (like rough sponges or stiff brushes). Do not spray liquids directly onto the controller. Never clean the controller while it is powered on or has batteries installed. Also, avoid unnecessary disassembly unless you are experienced.
How do I clean sticky buttons without opening the controller?
To clean sticky buttons without opening the controller, use a cotton swab lightly dampened with isopropyl alcohol. Press the sticky button down. While held, carefully clean around the edges of the button. Release and clean the top. Repeat several times, allowing the alcohol to dissolve the residue. Use compressed air to blow out any loosened debris.
Can water damage my Xbox controller during cleaning?
Yes, water can easily damage your Xbox controller. Water conducts electricity and can cause short circuits and corrosion inside the electronic components. Always use isopropyl alcohol, which evaporates quickly and is non-conductive, and apply it sparingly to a cloth or swab rather than directly to the controller. Ensure all parts are dry before reinserting batteries.
Is it safe to use compressed air on my controller?
Yes, using compressed air is safe and effective for blowing dust and crumbs out of crevices. Hold the can upright to prevent liquid propellant from spraying out. Use short, controlled bursts. Avoid spraying continuously or holding the nozzle too close to delicate parts, as the cold propellant can cause condensation or damage.
Conclusion
Cleaning your Xbox controller is a simple yet vital task that greatly enhances your gaming experience. Regular maintenance keeps your controller looking great and, more importantly, ensures its optimal performance and longevity. You have learned how to clean your Xbox controller effectively, from basic surface wipes to tackling tricky sticky buttons and hard-to-reach ports. You now know the essential tools to use and crucial mistakes to avoid.
Embracing these cleaning habits protects your investment and ensures every button press and joystick movement is precise. A clean controller feels better in your hands, responds more accurately, and can even reduce the spread of germs. Do not let dirt and grime diminish your gaming enjoyment. Start implementing these steps today. Your Xbox controller will thank you, and you will enjoy a smoother, more responsive, and hygienic gaming adventure every time you pick it up. Keep your gear clean, and game on!
- Xbox controller cleaning
- game controller care
- sticky buttons fix
- tech maintenance
- electronics cleaning

