· Appliance Maintenance · 16 min read
How To Clean Bissell Crosswave
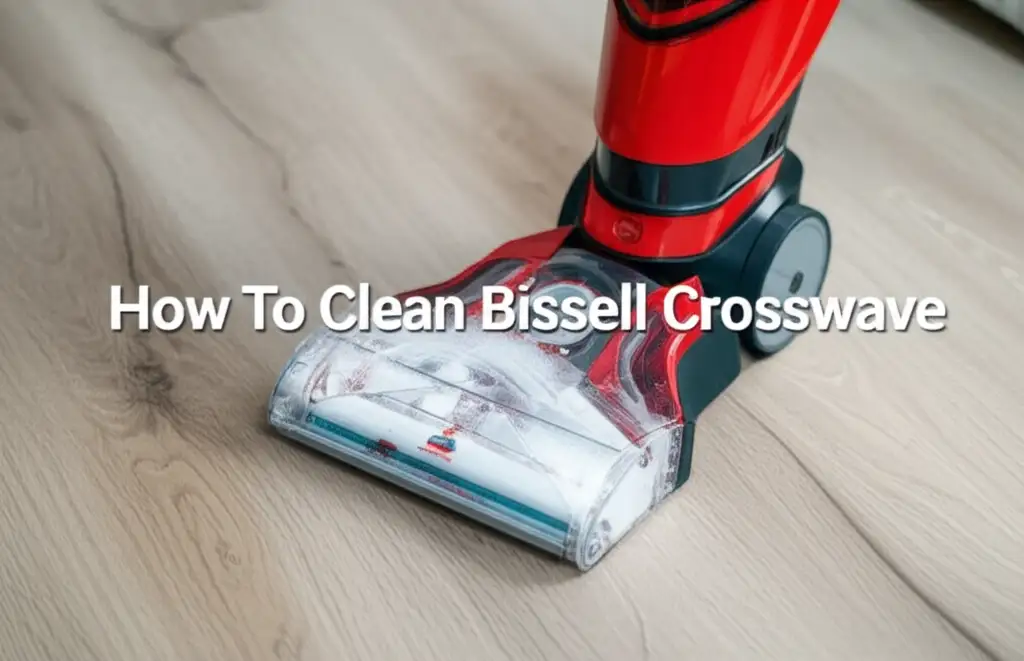
Cleaning Your Bissell Crosswave: A Complete Guide
Keeping your home sparkling clean is easier with the right tools. The Bissell Crosswave multi-surface floor cleaner helps you wash and vacuum floors at the same time. However, to keep your Crosswave working at its best, regular cleaning is a must. Neglecting this simple task can lead to bad smells, poor performance, and even damage to your machine. I know firsthand how a well-maintained cleaner makes all the difference in daily chores. This guide shows you exactly how to clean your Bissell Crosswave effectively, from routine rinses to a deep clean, ensuring it always performs like new.
Takeaway:
- Regularly clean your Bissell Crosswave to maintain its efficiency and prevent odors.
- Disassemble key parts like tanks, brush roll, and filters for thorough cleaning.
- Rinse all components with clean water and allow them to air dry completely.
- Perform deep cleaning for hidden grime and maintain consistent suction.
To clean your Bissell Crosswave, disassemble its main components—dirty water tank, clean water tank, brush roll, and filter—and rinse them thoroughly with warm water. Ensure all parts dry completely before reassembling to prevent mold and maintain optimal performance.
Why Cleaning Your Bissell Crosswave Matters for Your Floors
Your Bissell Crosswave is a powerful cleaning tool for many floor types. It handles spills and dirt with ease, but over time, dirt and debris build up inside the machine. This buildup affects how well your cleaner works. Dirty parts reduce suction power and can leave streaks on your floors.
A dirty Crosswave can also start to smell bad. Trapped dirt, hair, and dirty water create an unpleasant odor that spreads around your home when you use the machine. Imagine cleaning your floors only to have a stale smell left behind. It defeats the purpose of cleaning. Regular cleaning stops these odors from forming. It keeps your machine smelling fresh.
Cleaning your Bissell Crosswave also extends its life. When parts get clogged or dirty, the motor has to work harder. This extra strain can cause parts to wear out faster. It can lead to expensive repairs or even needing a new machine sooner than expected. Simple maintenance prevents these problems. It saves you money in the long run. Keeping it clean ensures your Crosswave delivers consistent results every time you use it. This means truly clean floors without extra effort or frustration.
Dirty filters and brush rolls are common culprits for poor cleaning. They cannot pick up debris effectively when clogged. This leaves behind dirt, making your cleaning efforts less successful. A clean machine guarantees proper airflow and brush action. This ensures your floors get the deep clean they need. Think of it as tuning up a car; regular care makes it run smoothly.
Essential Supplies for Cleaning Your Crosswave Properly
Before you start cleaning your Bissell Crosswave, gather all the necessary supplies. Having everything ready saves time and makes the process smoother. You will not need anything fancy. Most items are common household cleaning tools. This preparation step is simple but very important for an effective clean.
First, you will need clean, warm water. This is crucial for rinsing out dirt and debris from various parts of your machine. You can use it straight from the tap. Next, a mild dish soap is helpful for breaking down stubborn grime and odors. A small amount goes a long way. You do not want to use harsh chemicals that could damage your Crosswave.
You should also have a soft brush or an old toothbrush. These are excellent for scrubbing tight spaces and removing hair from the brush roll. A microfiber cloth or a few paper towels will be useful for wiping down surfaces and drying parts. Having a designated cleaning space, like a sink or a utility tub, is also a good idea. This helps contain any mess during the cleaning process.
Sometimes, you might consider using white vinegar for odor control or to break down mineral deposits. However, always check your Bissell user manual first. Some manufacturers advise against vinegar for certain parts. Using the right tools ensures you clean your machine effectively without causing damage. I always make sure I have these items ready before I begin. It makes the cleaning task much less daunting. This small amount of planning helps you keep your Bissell Crosswave in top condition for years to come. Remember, proper tools make any job easier and more effective.
Step-by-Step Disassembly for a Thorough Clean
Disassembling your Bissell Crosswave is the first step to a deep clean. This allows you to reach all the hidden spots where dirt and grime collect. Do not worry, the process is straightforward and designed for easy user maintenance. I find it helpful to have a clear workspace ready before I start.
First, make sure your Crosswave is unplugged from the wall outlet. Safety comes first. Never attempt to disassemble or clean an appliance while it is still plugged in. Next, remove both the clean water tank and the dirty water tank. Empty any remaining water or solution from the clean water tank. You can pour it down the drain. The dirty water tank often contains a mix of water, dirt, and hair. Be prepared to dispose of this waste properly.
After emptying the tanks, you will need to access the brush roll area. This usually involves removing the brush roll window or cover. On most Bissell Crosswave models, there is a latch or button that releases this part. Once the cover is off, you can lift out the brush roll. This is often where the most stubborn hair and debris accumulate. It is a key area for cleaning.
You might also find a filter near the dirty water tank or the brush roll. This filter traps small particles and needs regular cleaning. Remove this filter carefully. It often just pulls out. Remember the order in which you remove parts. This helps with reassembly later. Lay them out neatly on your cleaning surface. This systematic approach ensures no part is missed during cleaning. Each component plays a vital role in your Crosswave’s performance, so proper disassembly is key for a truly thorough clean.
Cleaning the Dirty Water Tank and Filters for Optimal Performance
The dirty water tank on your Bissell Crosswave collects all the grime and liquid from your floors. This makes it one of the most important parts to clean regularly. If left dirty, it can cause foul odors and reduce your machine’s suction power. I always tackle this part first after emptying it.
Start by completely emptying the dirty water tank. Pour the contents into a sink or toilet. You will likely see a mix of water, dirt, pet hair, and food crumbs. Rinse the inside of the tank thoroughly with warm water. You can swirl the water around to loosen any stuck-on debris. For a more thorough cleaning, add a few drops of mild dish soap to the tank. Fill it partially with warm water, close the lid, and shake it vigorously. This helps break down any film or residue.
Next, focus on the float stack and filter assembly within the dirty water tank. Many Crosswave models have a separate filter that sits above or inside this tank. Remove this filter. Rinse it under running water until all visible dirt and debris are gone. If your filter is particularly dirty, you can gently scrub it with a soft brush or old toothbrush. Pay attention to any mesh or pleated areas where small particles might cling. This is crucial for maintaining good airflow.
After rinsing, make sure all parts of the dirty water tank and filter are completely dry. Air drying is best. Place them in a well-ventilated area for several hours or overnight. You can also use a clean cloth to wipe down the surfaces. Never put damp parts back into your Crosswave. Moisture can lead to mold and mildew growth. A clean dirty water tank and filter ensure your Bissell Crosswave operates at its peak. This helps it effectively remove dirt from your floors. Consistent care for these components will improve your cleaning results significantly. You can also refer to guides on how to clean Bissell vacuums for general advice on filter maintenance.
Maintaining the Brush Roll and Brush Roll Area
The brush roll is the workhorse of your Bissell Crosswave. It scrubs your floors and picks up debris. Because it does so much work, it also collects a lot of hair, dirt, and grime. Cleaning this part is essential for effective floor cleaning. I always find a surprising amount of gunk here.
Once you have removed the brush roll from the machine, you will likely see tangled hair and embedded dirt. The first step is to remove all visible hair. You can use your fingers, a pair of scissors (carefully!), or a small comb to cut and pull out the hair. Be gentle not to damage the bristles. Hair wrapped around the brush roll prevents it from spinning freely and cleaning properly.
After removing the hair, rinse the brush roll under warm running water. You can add a drop of mild dish soap and gently scrub the bristles with a soft brush or an old toothbrush. Make sure to clean between the bristles. This removes any fine dirt particles or greasy residue. Rinse it thoroughly until the water runs clear. This ensures no soap residue is left behind.
Do not forget the brush roll window and the brush roll chamber itself. These areas also accumulate dirt and debris. Wipe down the inside of the brush roll chamber with a damp cloth. Pay attention to the clear window. Dirty windows make it hard to see when the brush roll needs cleaning. Use a damp cloth to wipe it clean. You can use a mild soap solution for stubborn marks.
Allow the brush roll and brush roll window to air dry completely before putting them back into the machine. Place them in a well-ventilated area. Drying can take several hours. Proper drying prevents mold and odors from developing inside your Crosswave. A clean brush roll ensures your Crosswave continues to scrub and clean your floors effectively. Maintaining the brush roll also improves the lifespan of your machine. For insights into cleaning other Bissell devices, you might find useful information on how to clean a Bissell Little Green.
Caring for the Clean Water Tank and Formula System
While the clean water tank holds fresh solution, it still needs attention. Hard water deposits or residue from cleaning formulas can build up over time. This buildup can affect the machine’s performance and even clog the spray nozzles. Taking care of this tank helps ensure your Crosswave sprays formula evenly. I make sure to clean this tank every few uses.
First, empty any remaining cleaning solution from the clean water tank. You should never store cleaning solution in the tank for extended periods. This can lead to residue buildup or the solution becoming stale. Rinse the tank thoroughly with warm water. Swish the water around inside to wash away any film or deposits.
For a deeper clean, especially if you notice white residue from hard water, you can fill the tank with warm water and add a small amount of white vinegar. Let this mixture sit in the tank for 10-15 minutes. The vinegar helps break down mineral deposits. After soaking, rinse the tank multiple times with clean, warm water to remove all traces of vinegar. Make sure the tank is completely free of any strong odors.
Also, check the cap and any small valves or openings on the clean water tank. Residue can sometimes accumulate here, affecting the flow of solution. Use a small brush or a cotton swab to clean these tiny areas if needed. Ensure the cap seals properly. A good seal prevents leaks during operation.
Once cleaned, let the clean water tank air dry completely. Place it upside down on a drying rack or clean cloth. This allows any residual moisture to evaporate. A dry tank prevents mildew or bacterial growth. Proper maintenance of the clean water tank ensures your Bissell Crosswave always dispenses a fresh, clean solution onto your floors. This step is as vital as cleaning the dirty parts.
Deep Cleaning the Exterior and Nozzle of Your Crosswave
After cleaning the internal components, it is time to focus on the exterior of your Bissell Crosswave. The outer casing and the nozzle area can collect dust, spills, and sticky residue. A clean exterior not only makes your machine look better but also ensures all its functions work correctly. I believe a clean machine performs best.
Start by wiping down the entire exterior of your Crosswave with a damp cloth. You can use a mild all-purpose cleaner diluted in water for stubborn spots. Avoid spraying water directly into any openings or electrical components. Focus on the handle, the body, and the wheels. These areas get touched often and can accumulate grime.
Pay special attention to the nozzle or foot area where the suction and spray come out. This part can get clogged with dried formula, hair, or fine dust. If your Crosswave has a removable nozzle, take it off for a more thorough clean. Use a small brush or a toothpick to carefully clear any blockages from the spray jets. Ensure these small holes are completely clear. Clogged jets prevent the even distribution of cleaning solution.
Also, check the air vents on the machine. These are important for proper airflow and preventing the motor from overheating. Use a dry cloth or a soft brush to remove any dust or lint from these vents. Never block the air vents during operation. A clean exterior and clear nozzle mean your Crosswave can suction efficiently and apply solution correctly.
After cleaning, wipe down the entire machine with a dry cloth. Make sure all external surfaces are dry before storing. This prevents water spots and keeps your machine looking new. A well-maintained exterior reflects a well-maintained internal system. For tips on cleaning other floor-cleaning devices, consider checking out guides such as how to clean a Bissell Powerfresh Steam Mop.
Drying and Reassembling Your Bissell Crosswave
After cleaning all the individual parts of your Bissell Crosswave, the drying process is crucial. Rushing this step can lead to big problems later. Proper drying prevents mold, mildew, and unpleasant odors from developing inside your machine. It also helps preserve the longevity of its components. I always give my parts ample time to dry.
Lay out all the disassembled parts on a clean, dry surface. A drying rack, a clean towel, or even a countertop works well. Ensure good airflow around each component. You can place them near a fan or in a well-ventilated room to speed up the drying time. Do not use direct heat sources like a hairdryer, as this can warp plastic parts. Allow all parts, especially the dirty water tank, brush roll, and filter, to air dry completely. This can take several hours, or even overnight, depending on humidity levels. You must be patient during this stage.
Once you are certain every part is bone dry, you can begin reassembling your Bissell Crosswave. Start by placing the dry filter back into its designated spot. Then, reinsert the brush roll into its chamber. Make sure it clicks securely into place. Replace the brush roll window or cover. Ensure it latches properly.
Next, put the clean water tank and the dirty water tank back onto the machine. Make sure they fit snugly and securely. Double-check that all components are correctly seated. A loosely assembled part can cause operational issues or leaks. Once everything is back in place, your Bissell Crosswave is ready for its next cleaning task. This final step ensures your machine is clean, fresh, and ready to perform optimally, delivering streak-free and genuinely clean floors every time. Regular proper drying and reassembly are key to maintaining your cleaner’s top condition. You might find similar advice for other models, such as how to clean a Bissell Revolution Pet Pro.
FAQ Section
How often should I clean my Bissell Crosswave? You should clean the dirty water tank, brush roll, and filter after every use. A deeper clean, including disassembling and thoroughly washing all removable parts, should be done every 3-5 uses or monthly. This regular maintenance prevents clogs, odors, and maintains cleaning efficiency. Frequent use requires more frequent cleaning.
Can I use any cleaning solution in my Bissell Crosswave? No, you should only use Bissell-branded cleaning formulas designed for multi-surface machines. Using other cleaning solutions, especially harsh chemicals or non-Bissell formulas, can damage the internal components of your Crosswave. Always refer to your user manual for recommended solutions. This prevents warranty voiding.
What causes my Bissell Crosswave to smell bad? A bad smell usually comes from trapped dirty water, hair, and debris in the dirty water tank, brush roll, and filter that have not been properly cleaned and dried. Mold and mildew can grow in damp, dirty areas. Regular cleaning and complete drying of all components after each use are essential to prevent odors.
Can I put Bissell Crosswave parts in the dishwasher? No, Bissell does not recommend putting any Crosswave parts in the dishwasher. The high heat and harsh detergents used in dishwashers can damage plastic components, seals, and filters. Always hand wash parts with warm water and mild soap as instructed in the user manual for proper care.
Why is my Bissell Crosswave leaving streaks on the floor? Streaks often happen because of a dirty brush roll, a clogged nozzle, or using too much cleaning solution. A dirty brush roll cannot scrub effectively. Clogged nozzles do not spray evenly. Reduce the amount of solution if you see too many suds. Ensure all parts are clean and functioning correctly to prevent streaks.
How do I store my Bissell Crosswave when not in use? Always store your Bissell Crosswave in a dry, temperate area. Empty both water tanks completely and ensure all removable parts are clean and dry before storing the machine. Keep it upright to prevent any lingering moisture from settling in internal components. This helps maintain its condition and readiness for next use.
Conclusion
Keeping your Bissell Crosswave clean is vital for its performance and longevity. We have covered every step, from why cleaning matters to the detailed process of disassembling, washing, and reassembling each part. By following these simple steps, you ensure your multi-surface cleaner remains an effective tool for a truly clean home. Regular maintenance prevents odors, maintains powerful suction, and protects your investment.
Remember, a little time spent on cleaning your Bissell Crosswave after each use saves you much more time and effort in the long run. It prevents frustrating issues like streaks, clogs, and unpleasant smells. Your floors will look better, and your cleaning routine will be more efficient. Make cleaning your Crosswave a regular part of your home care routine. You will appreciate the difference a well-maintained machine makes. Get into the habit today, and enjoy consistently sparkling floors with your trusty Bissell Crosswave.
- Bissell Crosswave cleaning
- how to clean multi-surface cleaner
- Bissell maintenance
- Crosswave deep clean
- floor cleaner care