· Home Improvement · 14 min read
How To Clean Walls After Removing Wallpaper
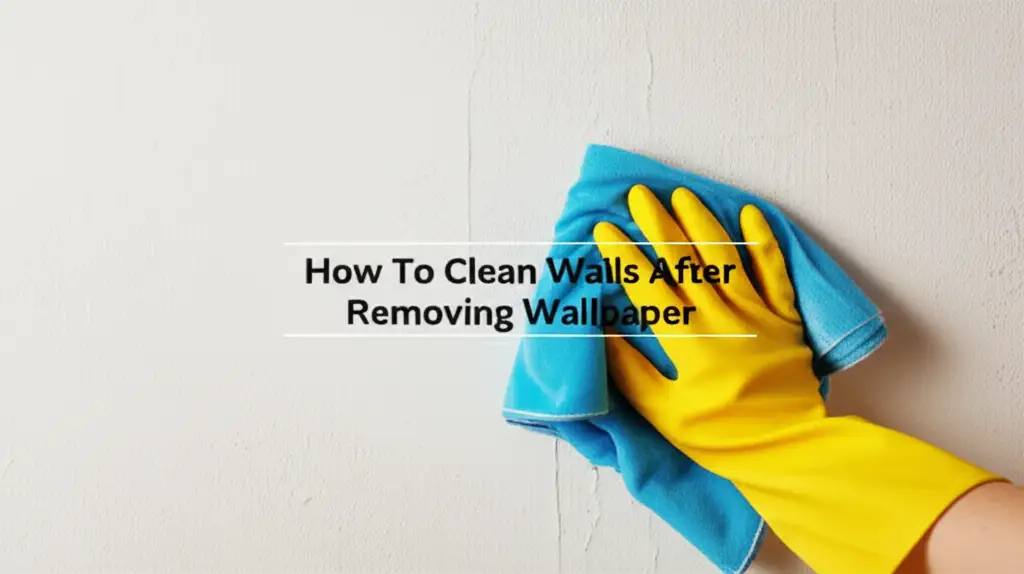
Clean Walls After Removing Wallpaper: Your Ultimate Guide
Removing old wallpaper reveals a blank canvas. This is an exciting step for any home renovation project. However, the walls often look anything but clean. You will find sticky adhesive residue, paper bits, and maybe even some wall damage. Cleaning walls after removing wallpaper is a vital step. This process makes sure your walls are ready for their next look, whether it is paint or new wallpaper. Ignoring proper cleaning causes issues like uneven paint finishes or poor adhesion of new wallpaper. We will walk you through the entire process. This guide covers everything from gathering your tools to tackling tough stains. We will help you achieve perfectly clean and smooth walls.
Takeaway:
- Gather Tools: Collect scrapers, sponges, cleaners, and protective gear before you start.
- Remove Adhesive: Use warm water or specialized solutions to dissolve sticky residue.
- Clean Thoroughly: Wash walls to remove dirt, dust, and any remaining grime.
- Repair Damage: Patch holes and smooth surfaces for a flawless finish.
- Prime Walls: Apply a primer to seal the walls and prepare them for painting.
After removing wallpaper, you must clean your walls. This involves scraping off residual paper and adhesive. Then, wash the entire surface with a suitable cleaning solution. This removes dirt and ensures a smooth, clean base for painting or new wallpaper.
Why Wall Cleaning After Wallpaper Removal Matters So Much
After you pull off wallpaper, your walls are rarely perfectly clean. They often have sticky glue residue, small paper bits, and dirt. Cleaning walls after removing wallpaper is not just about making them look better. It is a critical step for future wall treatments. Skipping this part can cause many problems.
Imagine trying to paint over sticky adhesive. The paint will not stick properly. It will look bumpy or peel off quickly. New wallpaper will also struggle to adhere. It may bubble or lift at the seams. Dust and dirt left behind create similar issues. They prevent paint or primer from forming a strong bond with the wall surface. This leads to a less durable and less attractive finish.
Proper wall preparation is the secret to a professional-looking result. When you clean the walls thoroughly, you create a smooth, clean, and stable surface. This allows paint to flow evenly. It helps primer do its job effectively. It also gives new wallpaper the best chance to last for years. Taking the time to clean ensures your hard work on wallpaper removal pays off. You get beautiful, long-lasting walls. This step truly sets the stage for a successful renovation project.
Essential Tools and Materials You Need
Before you start cleaning walls after removing wallpaper, gather all your supplies. Having everything ready saves time and frustration. The right tools make the job much easier and more effective. You will need several items for cleaning and protecting yourself.
First, protect your floors and furniture. Use drop cloths or old sheets. Lay them down to catch drips and debris. Next, get a sturdy bucket for mixing cleaning solutions. A large sponge or a soft-bristle brush is essential for washing the walls. For tougher adhesive, a plastic or metal scraper helps. Be careful with metal scrapers; they can damage drywall if you are not gentle.
For cleaning solutions, warm water is always a good start. For stubborn glue, you might need a commercial wallpaper adhesive remover. White vinegar is a natural alternative that works well for many types of glue. Dish soap can also be added to warm water for general cleaning. Safety gear is important too. Wear rubber gloves to protect your hands from chemicals and water. Safety glasses keep splashes out of your eyes. Having these materials ready ensures a smooth and safe cleaning process.
- Protective Gear:
- Drop cloths or old sheets
- Rubber gloves
- Safety glasses
- Cleaning Tools:
- Two buckets (one for cleaning solution, one for rinse water)
- Large sponges or soft cloths
- Plastic putty knife or scraper (for adhesive removal)
- Scrub brush (optional, for textured walls or tough spots)
- Cleaning Solutions:
- Warm water
- Liquid dish soap (a few drops)
- White vinegar (for tougher adhesive or mildew)
- Commercial wallpaper adhesive remover (if needed)
- Spray bottle (for applying solutions)
- Other:
- Old towels or rags for drying
- Stepladder or sturdy chair
This comprehensive list helps you prepare for a successful cleaning job.
Step-by-Step Guide to Removing Stubborn Wallpaper Adhesive
Removing stubborn wallpaper adhesive is the most important part of cleaning walls after wallpaper removal. This sticky residue can feel impossible to get off. But with the right approach, you can make your walls smooth again. I usually start with the gentlest method first.
Pre-Cleaning Assessment: Inspecting Your Walls
Before you start scrubbing, take a good look at your walls. Check for any remaining paper pieces. Remove these manually with a scraper. Identify areas with heavy glue buildup versus lighter residue. Also, check for any existing damage like holes or cracks. You will address these later, but it is good to know what you are dealing with. Knowing the wall condition helps you choose the best cleaning method.
Gentle Scrubbing Techniques for Adhesive
Most wallpaper adhesive softens with warm water. Fill a bucket with warm water and add a few drops of dish soap. Dip a large sponge into the solution. Wring it out so it is damp, not dripping. Apply the sponge to a small section of the wall. Let the warm water sit on the adhesive for a few minutes. This softens the glue. Then, gently scrub the area with the sponge. The adhesive should start to loosen and roll off. Repeat this process, working in small sections. This prevents the water from drying before you can clean the area.
Dealing with Tougher Glue Spots
Sometimes, warm water is not enough for older or stronger adhesives. For tougher spots, you have a few options. A solution of white vinegar and warm water (1:1 ratio) can be very effective. Spray it onto the stubborn areas and let it soak for 5-10 minutes. Then, scrub with a sponge or a soft-bristle brush. For extremely tough glue, consider a commercial wallpaper adhesive remover. Follow the product instructions carefully. Always test any strong cleaner in an inconspicuous area first. This prevents damage to your wall surface. After applying and scrubbing, always rinse the area with clean water to remove any chemical residue.
If you encounter any specific marks that are not adhesive related, you can find more tips on how to clean marks off painted walls here or even on how to clean scuff marks off walls here. This ensures you deal with all types of blemishes effectively.
Deep Cleaning Walls: Beyond Adhesive
Once you have removed all the adhesive, your walls might still look a bit dull or dirty. Deep cleaning walls means tackling general grime, dust, and any remaining marks. This step ensures your walls are truly spotless. I find it makes a huge difference in the final look.
Cleaning Stains and Marks
Walls gather dust and dirt over time. After wallpaper removal, you might see outlines of old furniture or even smudges. Start with a general cleaning solution. Mix a small amount of mild dish soap with warm water in a bucket. Use a clean sponge or soft cloth. Wipe down the entire wall from top to bottom. Make sure to rinse your sponge frequently in a separate bucket of clean water. This prevents spreading dirt around. For tougher stains like pencil marks or light grease, a magic eraser can work wonders. Use it gently to avoid damaging the wall surface. Always wipe down with a damp cloth afterward to remove any residue.
Addressing Mold and Mildew
Wallpaper can sometimes hide moisture issues, leading to mold or mildew growth. If you find dark spots or a musty smell, you probably have mold. It is important to treat mold quickly and safely. Mix one part bleach with three parts water in a spray bottle. Always wear gloves and safety glasses when using bleach. Spray the solution directly onto the moldy area. Let it sit for about 10-15 minutes. Then, scrub the area with a stiff brush. Rinse with clean water. For persistent mold, or if you are concerned about deeper issues, consider consulting a professional. Ensuring your walls are mold-free is crucial for a healthy home environment. You can learn more about how to clean mold off basement walls here, which shares similar principles for wall surfaces.
After this deep cleaning, your walls should look dramatically better. They will be free of stickiness, dirt, and any lingering issues. This clean slate is essential for the next steps in your wall renovation journey.
Repairing and Prepping Walls for the Next Finish
After cleaning walls after removing wallpaper, the next phase is repair and preparation. This step is crucial for achieving a smooth, flawless finish. Even if you were careful, wallpaper removal often leaves behind minor imperfections. These can include small holes, dings, or uneven patches. Addressing these now saves you headaches later.
First, let the walls dry completely. This might take 24-48 hours, depending on how much water you used. Once dry, examine the walls closely under good light. Circle any areas that need attention with a pencil. Small nail holes or minor dings can be filled with lightweight spackle or drywall joint compound. Apply a small amount with a putty knife. Smooth it flush with the wall surface. For larger holes or damaged drywall sections, you might need a drywall patch kit. Follow the kit instructions for proper application.
After the spackle or compound dries, sand the repaired areas gently. Use fine-grit sandpaper (around 120-150 grit) or a sanding sponge. The goal is to make the patched area perfectly smooth and blend it with the surrounding wall. Remove all sanding dust with a damp cloth or vacuum. This dust will interfere with primer and paint adhesion.
Finally, apply a coat of primer. A good quality primer seals the wall surface. It creates a uniform base for paint. It also helps block any remaining adhesive residue from bleeding through your new paint. Use a roller for large areas and a brush for edges. Let the primer dry according to the manufacturer’s instructions. Your walls are now perfectly prepared. They are ready for their new coat of paint or wallpaper.
Common Mistakes to Avoid When Cleaning Walls
When cleaning walls after removing wallpaper, it is easy to make mistakes. These errors can damage your walls or make the cleaning process harder. Knowing what to avoid helps ensure a smooth and successful project. I have learned these lessons over time.
One common mistake is over-wetting the walls. Using too much water can saturate the drywall. This leads to bubbling, weakening, or even mold growth within the wall. Always wring out your sponge or cloth thoroughly. Aim for damp, not dripping. Work in small sections so water does not sit on the wall for too long. This helps control moisture levels.
Another error is using abrasive tools or harsh chemicals. Steel wool, sandpaper, or overly aggressive scrub brushes can scratch or gouge the wall surface. This leaves permanent damage that shows through paint. Similarly, strong, undiluted cleaners can strip paint, fade colors, or react poorly with drywall materials. Always start with the mildest cleaner, like warm water and dish soap. Only move to stronger solutions if absolutely necessary. Test any new cleaner in a hidden spot first.
Not rinsing thoroughly is another pitfall. Leftover cleaning solution or adhesive remover can cause problems. It can leave a sticky residue or interfere with paint adhesion. Always follow cleaning with a rinse of clean, plain water. Wipe down the walls well to remove all traces of cleaner.
Finally, not allowing sufficient drying time before priming or painting is a big mistake. Walls must be completely dry. Painting over a damp wall leads to blistering, peeling, or uneven finishes. Give your walls at least 24 hours, or even 48 hours in humid conditions. Patience here saves you from having to redo your hard work. Avoiding these common errors makes your wall cleaning project much more effective and less frustrating.
Safety Precautions and Ventilation
When you clean walls after removing wallpaper, safety should always come first. Working with water, chemicals, and potentially dusty environments requires careful attention. Taking proper precautions protects your health and your home.
First, wear appropriate personal protective equipment (PPE). Rubber gloves are essential. They protect your hands from drying out from prolonged water exposure or from chemical irritation. Safety glasses shield your eyes from splashes of cleaning solution or airborne debris. If you are using strong chemical strippers or bleach, consider wearing a respirator. This protects your lungs from fumes.
Ensure proper ventilation. Opening windows and doors creates airflow. This helps dry the walls faster. It also disperses any fumes from cleaning solutions. If natural ventilation is not enough, use a fan to circulate air. Good ventilation is especially important when using products with strong odors or volatile organic compounds (VOCs). Without good airflow, fumes can build up and cause headaches or respiratory irritation.
Be mindful of electrical outlets and switches. Water and electricity do not mix. If possible, turn off the power to the room at your circuit breaker before you start cleaning. If not, be extremely careful around outlets and switches. Do not spray water directly onto them. Use a damp cloth to clean around these areas instead of a dripping sponge. Cover outlets with painter’s tape if you are worried about splashes.
Finally, keep children and pets away from the work area. Cleaning solutions and tools can be hazardous. Make sure your workspace is secure. Proper safety precautions make your cleaning project safer and more enjoyable for everyone involved.
FAQ Section
Q: How long should walls dry after cleaning wallpaper adhesive? A: Walls should dry for at least 24 to 48 hours after cleaning wallpaper adhesive. The exact time depends on humidity levels and air circulation in the room. Ensure the walls feel completely dry to the touch before any further steps. This prevents issues with paint adhesion or mold growth.
Q: Can I paint directly after cleaning wallpaper glue? A: No, you should not paint directly after cleaning wallpaper glue. First, ensure the walls are completely dry. Then, inspect for and repair any damage. After repairs, apply a high-quality primer. Primer seals the surface, blocks remaining residue, and creates a uniform base for paint.
Q: What if my walls still feel sticky after cleaning? A: If walls still feel sticky, it means some adhesive or cleaner residue remains. Re-clean the sticky areas. Use warm water with a bit of white vinegar or a commercial adhesive remover. Scrub gently and rinse thoroughly with clean water. Ensure all residue is gone before drying.
Q: Is it better to use commercial wallpaper stripper or homemade solutions? A: Both commercial strippers and homemade solutions have their place. Homemade solutions like vinegar and water are cost-effective and often work well for lighter adhesive. Commercial strippers are more powerful for stubborn or old glue. Always test any solution in an inconspicuous area first.
Q: How do I prevent damage to drywall when cleaning? A: Prevent drywall damage by using gentle tools and techniques. Avoid metal scrapers if possible. Opt for plastic putty knives. Use warm water or mild solutions to soften glue. Do not over-wet walls. Scrub gently, and rinse thoroughly. Always patch and sand any minor dings before priming.
Conclusion
Cleaning walls after removing wallpaper is a critical step. It transforms a messy surface into a clean, smooth canvas. You start by gathering the right tools. Then, you methodically remove every trace of old adhesive. I always focus on patience during this stage. Using proper cleaning solutions, like warm water, vinegar, or specialized removers, makes a huge difference. Deep cleaning ensures dirt and hidden issues like mold are gone. Finally, repairing any imperfections and priming the walls sets the stage for a perfect finish.
By following these steps, you ensure your walls are ready for their next chapter. Whether you plan to paint, re-wallpaper, or apply another finish, a thoroughly cleaned and prepped wall surface is key to a beautiful result. Take the time to do it right. Your hard work will pay off with walls that look flawless and last for years. Ready to get started? Your beautifully clean walls await!
- wallpaper removal
- wall cleaning
- adhesive removal
- wall preparation
- DIY home