· Tech Maintenance · 18 min read
How To Clean Computer Screen Without Streaks
How to Clean Your Computer Screen Without Streaks
Have you ever finished cleaning your computer screen, only to find it covered in annoying streaks? A dirty or streaky monitor makes everything harder to see. It reduces clarity and causes eye strain. I know this frustration well; a clear screen makes a big difference in my daily work. Learning the right way to clean your computer screen avoids these problems. This guide will show you exactly how to achieve a perfectly clean, streak-free display. We will cover safe tools, proper techniques, and common mistakes to avoid. You will learn how to make your monitor look new again.
Takeaway
- Always power down and unplug your screen first.
- Use a soft, lint-free microfiber cloth only.
- Never spray liquid directly onto the screen.
- Opt for distilled water or specialized screen cleaner.
- Wipe gently in one direction or a circular motion.
To clean a computer screen without streaks, first turn off and unplug the monitor. Use a dry, clean microfiber cloth to gently wipe away dust and loose debris. For stubborn marks, lightly dampen a separate part of the microfiber cloth with distilled water or a dedicated screen cleaning solution. Wipe the screen gently, then immediately follow with a dry section of the cloth.
Why Your Computer Screen Needs Proper Cleaning
Your computer screen collects dust, fingerprints, and smudges every day. These particles build up, making your display look dull. Dust reduces image sharpness and colors appear less vibrant. Fingerprints from touching the screen block parts of the view. Smudges spread grease, making details hard to see.
Regular cleaning helps your screen perform its best. A clean screen provides clear, sharp images. This improves your overall viewing experience. It also helps reduce eye strain, especially during long work sessions. I find my eyes feel less tired when I work on a spotless monitor.
Improper cleaning methods can cause damage. Harsh chemicals or abrasive cloths scratch the screen surface. This creates permanent marks. It can also strip protective coatings from the display. Using too much liquid might damage internal electronics. Knowing the right way to clean helps extend your screen’s life.
Many people think any cloth and water work. This is a common misunderstanding. Computer screens, especially modern LCD, LED, and OLED displays, require specific care. They are sensitive surfaces. Their delicate coatings need gentle treatment. Using the wrong materials leaves streaks or causes damage. For example, cleaning a glossy display requires more care to avoid smudges than a matte one.
Proper cleaning keeps your screen looking good. It helps maintain its value over time. A well-maintained display reflects your care for your equipment. This simple maintenance task has big benefits. It ensures a clear, crisp picture for all your tasks.
Gathering Your Gear: Essential Supplies for a Streak-Free Screen Clean
Having the correct tools makes all the difference when you clean your computer screen. You need simple items that are safe for electronics. Using the wrong materials can harm your display. This means you need to be selective with your cleaning kit. I always gather my supplies before I start.
First, you need a high-quality microfiber cloth. This is the most important tool. Microfiber cloths are soft, lint-free, and highly absorbent. They pick up dust and oils without scratching. Do not use paper towels, tissues, or old t-shirts. These materials can leave lint or scratch the screen surface. A good microfiber cloth will glide smoothly over the display.
Next, consider your cleaning solution. Distilled water is often the safest and most effective option for light cleaning. Tap water contains minerals that can leave streaks or residue. For tougher grime, use a specialized screen cleaning solution. Look for products specifically designed for electronics or optical lenses. These solutions are usually alcohol-free and ammonia-free. Harsh chemicals like window cleaner or household sprays damage screen coatings. Avoid these at all costs. You can learn more about cleaning various surfaces without streaks, such as when you clean a black glass stove top without streaks, and notice the common theme of gentle methods.
You might also want a soft brush or compressed air. These help remove loose dust and debris before wiping. A small, soft brush can gently sweep away dust from edges and corners. Compressed air, used carefully, blows dust off the screen. Make sure to hold the can upright to avoid spraying liquid propellant.
Gathering these items beforehand saves time and prevents mistakes. A dedicated kit for screen cleaning ensures you always have the right tools ready. This makes the cleaning process simple and effective. A clean screen starts with the right tools in your hand.
Microfiber Cloths:
- Choose soft, lint-free cloths.
- Use separate cloths for dry dusting and wet wiping.
- Wash microfiber cloths regularly without fabric softener.
Cleaning Solutions:
- Distilled water: Ideal for light dust and fingerprints.
- Dedicated screen cleaner: Use for tougher smudges. Ensure it is alcohol-free and ammonia-free.
- Do not use: Window cleaner, kitchen sprays, or abrasive liquids. These can damage coatings.
Optional Tools:
- Soft brush: Removes dust from crevices.
- Compressed air can: Blows away loose dust particles. Always use in short bursts.
Having these items ready ensures you are prepared. This setup helps you clean your computer screen effectively. It also prevents any accidental damage.
The Gentle Touch: Step-by-Step Cleaning for LCD, LED, and OLED Screens
Cleaning modern computer screens requires a gentle and specific approach. LCD, LED, and OLED displays all have delicate surfaces. Using the wrong method causes scratches or permanent damage. Follow these steps carefully to achieve a streak-free clean. I always make sure to turn off my monitor first.
Step 1: Power Down and Unplug. First, turn off your computer and the monitor. Unplug the monitor from its power source. This is a very important safety step. It prevents accidental shocks. It also allows you to see dust and smudges better against a dark screen. You can clearly see dirt when the screen is black.
Step 2: Remove Loose Dust. Begin by removing any loose dust. Take a clean, dry microfiber cloth. Gently wipe the screen from top to bottom. Use light, broad strokes. Do not press hard. You are simply lifting the dust, not scrubbing. For stubborn dust in corners, you can use a soft brush or a few short bursts of compressed air. Hold the compressed air can upright and keep it a safe distance from the screen.
Step 3: Address Smudges with Damp Cloth. For fingerprints or smudges, slightly dampen a separate clean microfiber cloth. Use distilled water or a small amount of screen cleaning solution. Do not spray liquid directly onto the screen. This can cause liquid to seep into the display. Instead, spray or pour the liquid onto the cloth. The cloth should be damp, not wet. It should not drip.
Step 4: Wipe the Screen Gently. With the slightly damp cloth, wipe the screen in gentle, consistent motions. You can use a straight motion from top to bottom. Some people prefer a circular motion. Experiment to see what works best for your screen. Apply very little pressure. The goal is to lift the smudges, not to scrub them. Pay attention to edges and corners. Learning how to clean various displays, like when you clean fingerprints off your MacBook screen, uses similar gentle wiping techniques.
Step 5: Buff Dry for a Streak-Free Finish. Immediately after wiping with the damp cloth, use a dry section of the microfiber cloth. Gently buff the screen. This removes any leftover moisture and prevents streaks. Continue buffing until the screen is completely dry and clear. Inspect the screen from different angles to check for any missed spots or remaining streaks. If you see any, repeat the damp and dry wiping process. This careful drying step is key to a streak-free result. The principle of buffing dry is also essential when you clean a TV screen without leaving fingerprints.
Remember, patience and gentle movements are crucial. Rushing or scrubbing hard can cause damage. A little care goes a long way in keeping your screen clean and bright.
Special Screen Situations: Cleaning Laptop and Touchscreen Displays
Different types of screens need slightly different approaches. Laptops, touchscreens, and mobile devices have unique considerations. Understanding these differences helps you clean them safely. I always adjust my method based on the device I am cleaning.
Cleaning Laptop Screens
Laptop screens are often more delicate than standalone monitors. They also attract more fingerprints due to their portability. When cleaning a laptop screen, ensure the laptop is completely off. Close the lid if possible, then gently open it enough to clean the screen. This prevents accidental key presses. Support the screen from behind with one hand if it feels wobbly. This stops too much pressure on the hinges. Use the same microfiber cloth and distilled water or screen cleaner method. Pay extra attention to the keyboard area; dust and crumbs often collect there. Cleaning a laptop screen also involves cleaning fingerprints off your MacBook screen, which requires a similar gentle touch.
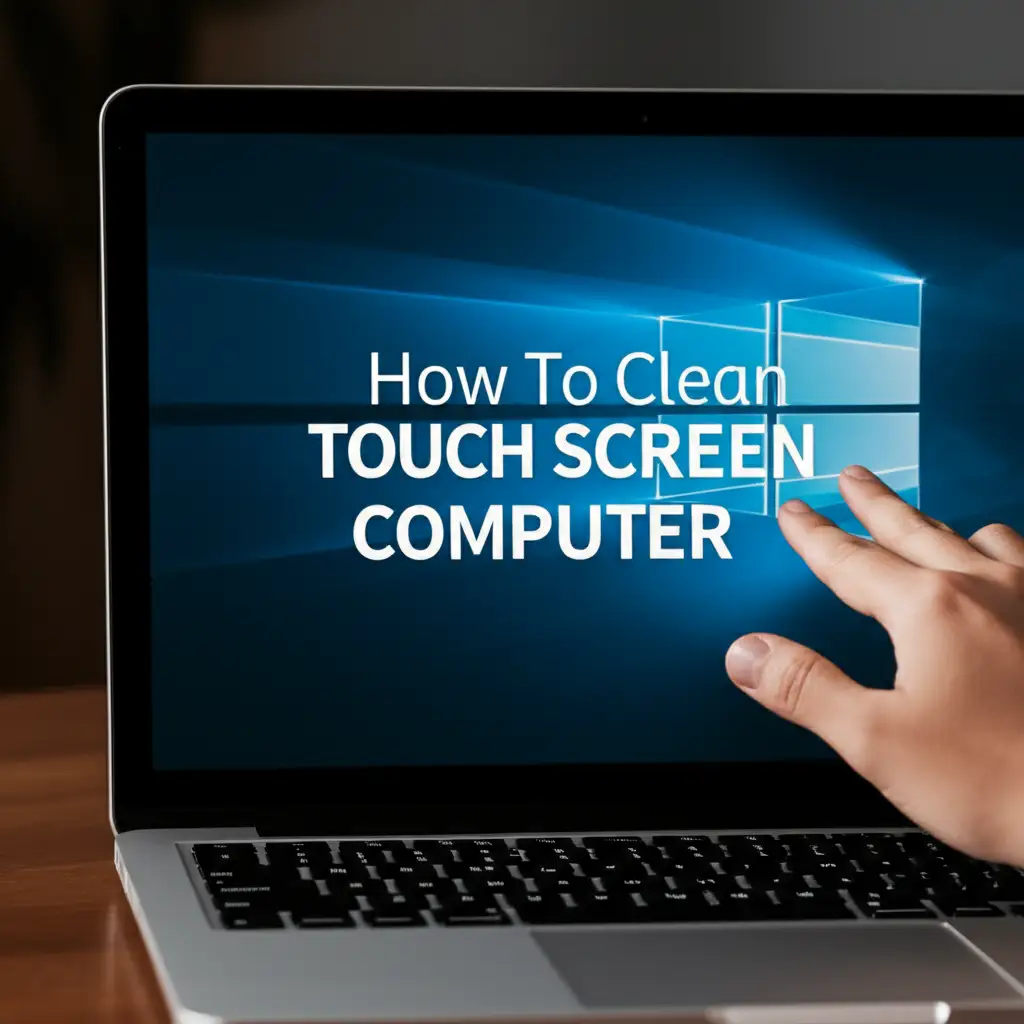
Cleaning Touchscreen Displays
Touchscreens, found on many laptops, tablets, and smartphones, get very dirty. They collect fingerprints and smudges quickly. The same cleaning principles apply. Turn the device off. Use a dry microfiber cloth first. For smudges, dampen the cloth with distilled water or an electronics-safe cleaner. Wipe the screen gently. These screens often have oleophobic (oil-repellent) coatings. Harsh cleaners damage these coatings. Always use mild solutions. The goal is to lift the oils, not to strip the coating. Cleaning these screens often involves removing more oil than dust. You can learn more about how to clean a mobile phone touch screen effectively, as the methods are very similar.
Cleaning Monitors with Anti-Glare Coatings
Many monitors have anti-glare coatings. These coatings reduce reflections. They are usually more durable than glossy screens. However, they can still scratch. Avoid abrasive cloths. Do not scrub hard. The cleaning method for these screens is the same as for LCD/LED/OLED. Just be mindful of the coating. If you notice a hazy film after cleaning, it means you might have used too much liquid or did not buff dry enough.
Always remember that screens are sensitive. A cautious approach prevents damage. Taking a few extra moments for careful cleaning pays off. Your display will remain clear and free of streaks. It will serve you well for years.
Homemade Helpers: Simple DIY Solutions for Clear Displays
You do not always need a specialized cleaner to get a streak-free computer screen. Many effective cleaning solutions are simple to make at home. These DIY options use common household items. They are safe for most screens when used correctly. I often use these methods myself for a quick clean.
Distilled Water Only
For everyday dust and light fingerprints, distilled water is often enough. It is the safest option. Tap water contains minerals that can leave streaks when it dries. Distilled water is pure water; it has no minerals. To use distilled water, dampen a clean microfiber cloth. Make sure the cloth is only slightly damp, not wet. Wipe the screen gently. Immediately follow with a dry microfiber cloth to buff away any moisture. This prevents water spots and streaks. This method is especially good for maintaining your screen between deeper cleans.
Vinegar and Distilled Water Mixture
For tougher smudges and grease, a mixture of white vinegar and distilled water works well. Vinegar is a mild acid. It cuts through oils and grime. Mix equal parts white vinegar and distilled water in a spray bottle. Shake the mixture gently before use. Never spray this solution directly onto your screen. Instead, spray it onto a clean microfiber cloth until it is damp. Wipe the screen with the damp cloth. Then, quickly buff dry with a separate, dry microfiber cloth. The vinegar smell will dissipate quickly. This solution is very effective for removing stubborn marks. Using vinegar in cleaning is a versatile approach; for example, you can clean with vinegar and baking soda for many different tasks.
Isopropyl Alcohol and Distilled Water (Use with Caution)
A mixture of 70% isopropyl alcohol and distilled water can be used for very greasy screens. This is usually a 50/50 mix. However, use this solution with caution. Alcohol can damage some anti-glare or oleophobic coatings. Check your screen’s manufacturer recommendations first. If you are unsure, avoid alcohol-based solutions. Like other solutions, never spray directly onto the screen. Apply it to a microfiber cloth. Wipe gently, then dry immediately. This solution evaporates quickly. It is less likely to leave streaks if buffed properly. This method is a last resort for me when other solutions fail.
Always test any DIY solution on a small, inconspicuous area first. This helps ensure it does not damage your screen. A small test spot can save you from big problems. These homemade options offer a cost-effective way to keep your computer screen looking clear and streak-free.
Common Screen Cleaning Mistakes to Avoid for a Spotless Result
Cleaning your computer screen seems simple. However, many common mistakes can lead to streaks, scratches, or even damage. Avoiding these pitfalls ensures your display stays clear and functional. I have made some of these errors myself in the past. Learning from them helps me keep my screens perfect.
Spraying Liquid Directly onto the Screen
This is perhaps the most common and damaging mistake. Spraying cleaner directly onto the screen allows liquid to seep into the bezel. It can get inside the monitor or laptop casing. This liquid can damage internal electronic components. It may cause short circuits or corrosion. Always spray your cleaning solution onto a microfiber cloth first. Then, use the damp cloth to wipe the screen. This controls the amount of liquid.
Using the Wrong Cleaning Products
Household cleaners like window cleaner, kitchen sprays, or all-purpose cleaners are too harsh for computer screens. These products often contain ammonia, alcohol, or other strong chemicals. Such chemicals strip anti-glare coatings. They can also permanently stain or damage the screen surface. Always use distilled water or a cleaner specifically made for electronics. You will find that streak-free results often rely on the gentleness of the cleaner, much like how you clean black glass stove tops without streaks using mild solutions.
Using Abrasive Materials
Never use paper towels, tissues, rough cloths, or old rags to clean your screen. These materials are abrasive. They can leave tiny scratches on the screen surface. Over time, these scratches accumulate. They make your screen look dull and damaged. Always use a soft, clean, lint-free microfiber cloth. Microfiber is designed to capture dust and oils without scratching.
Applying Too Much Pressure
Scrubbing your screen hard will not make it cleaner. It can push dirt around, causing streaks. Worse, excessive pressure can damage the display panel itself. It might create dead pixels or discolored areas. Apply only gentle pressure. Let the cleaning solution and the microfiber cloth do the work. Wipe softly in consistent motions. The goal is to lift dirt, not to grind it in.
Forgetting to Power Down
Cleaning a live screen is less effective and potentially risky. You cannot see smudges as clearly on a bright screen. The screen might flicker or react to pressure. More importantly, it creates a risk of static discharge. Always turn off your computer and unplug the monitor before you begin cleaning. A dark screen reveals all the spots you need to clean. It also ensures safety.
By avoiding these common mistakes, you protect your valuable electronics. You also ensure a truly clean, streak-free display every time. Simple prevention goes a long way.
Maintaining Your Monitor: Daily Habits for a Brighter View
Keeping your computer screen clean is not just about deep cleaning. Good daily habits prevent excessive dirt buildup. This means less frequent deep cleaning. It also helps your screen stay clear and bright consistently. I find a few simple routines make a big difference.
Regular Dry Dusting
Dust is the most common culprit for a dirty screen. Make it a habit to lightly dust your screen every day or every few days. Use a clean, dry microfiber cloth. Simply wipe the screen from top to bottom. This removes loose dust before it has a chance to settle and attract more grime. Dry dusting is quick and easy. It stops dust from becoming sticky residue.
Avoid Touching the Screen
Fingerprints are a major source of smudges and streaks. Try to avoid touching your screen directly. Use your mouse or keyboard for navigation. If you need to point something out, use a stylus or point with a clean finger from a distance. This simple habit drastically reduces the need for wet cleaning. It keeps your screen cleaner for longer periods. Preventing fingerprints is key to keeping displays clear, similar to how you clean a TV screen without fingerprints by avoiding direct contact.
Keep Food and Drinks Away
Eating or drinking near your computer can lead to splashes and crumbs on the screen. Sugary drinks leave sticky residue. Food particles attract dust and can be tough to remove. Try to keep your workspace free of food and drinks. If spills happen, clean them immediately and carefully. This prevents difficult stains.
Protect Your Screen When Not in Use
If you have a desktop monitor, consider covering it when not in use. A simple cloth cover or a dedicated monitor cover prevents dust from settling. For laptops, simply closing the lid protects the screen. This is especially helpful if your computer sits unused for long periods. Dust accumulation happens less rapidly this way.
Clean Your Hands Regularly
Your hands carry oils and dirt. Before using your computer, especially if it is a touchscreen, make sure your hands are clean. Washing your hands or using hand sanitizer reduces the transfer of oils to the screen. This is a very effective way to minimize fingerprints. This practice is crucial when cleaning any device that involves touch, similar to how to effectively clean a mobile phone touch screen.
These simple daily habits save you time and effort. They help maintain your computer screen’s clarity and extend its life. A little preventive care goes a long way.
Beyond the Screen: Cleaning Other Computer Components Safely
While the screen gets most of the attention, other computer components also need cleaning. Dust, dirt, and grime can accumulate on keyboards, mice, and even the computer casing. Cleaning these parts safely helps maintain your entire setup. This also improves overall hygiene and function.
Cleaning Your Keyboard
Keyboards collect a lot of dust, crumbs, and skin oils. First, turn off your computer and unplug the keyboard. Tilt the keyboard upside down and gently shake it. This helps dislodge larger debris. You can also use compressed air. Spray short bursts between the keys. For surface cleaning, dampen a microfiber cloth with a small amount of isopropyl alcohol (70%). Wipe the keycaps and the spaces between them. Use cotton swabs for hard-to-reach areas. This helps remove grime and disinfects the surface.
Cleaning Your Mouse
Mice also accumulate dirt, especially around their sensors and buttons. Unplug your mouse. Use a damp microfiber cloth with alcohol solution to wipe down the entire surface. Pay attention to the areas where your hand rests. For optical mice, use a cotton swab lightly dampened with alcohol to clean the sensor lens. This ensures smooth tracking. For mechanical mice, if you still use one, clean the ball and rollers thoroughly.
Cleaning the Computer Tower or Laptop Casing
The outer casing of your computer can get dusty and smudged. Use a dry microfiber cloth to wipe down all surfaces. For stubborn marks, lightly dampen the cloth with distilled water or a mild all-purpose cleaner. Avoid spraying liquid directly onto the casing. For vents and ports, use compressed air to blow out dust. Be careful not to force dust further inside. Regular dusting prevents buildup and helps with cooling.
Cleaning Wires and Cables
Cables often get dusty and sticky. Unplug them if safe to do so. Wipe them down with a damp cloth. For sticky cables, a small amount of isopropyl alcohol on a cloth can help remove residue. Ensure cables are dry before plugging them back in. Clean cables look better and prevent dust accumulation around ports.
Regular cleaning of all computer components improves their appearance. It also helps them last longer. A clean computer workspace is a pleasant and efficient one.
Troubleshooting Streaks and Smudges: What to Do If They Remain
Sometimes, even after careful cleaning, streaks or smudges persist on your computer screen. This can be frustrating. Do not worry; there are usually simple solutions. I have encountered this myself and found these troubleshooting steps helpful.
Re-Wipe with a Clean, Dry Microfiber Cloth
The most common reason for streaks is residual moisture or cleaning solution. Take a fresh, completely dry microfiber cloth. Gently wipe the entire screen again. Use consistent, light strokes. Focus on buffing away any remaining moisture or residue. Sometimes, the first wipe spreads the liquid. A second, dry wipe removes it. Ensure your cloth is truly clean. Even a slightly dirty cloth can leave new streaks.
Check Your Cleaning Solution
If streaks continue, your cleaning solution might be the problem. Are you using tap water? Minerals in tap water leave streaks. Switch to distilled water. Is your specialized screen cleaner leaving residue? Some cleaners, even those designed for screens, can leave a film. Try switching to a different brand or simply use distilled water. If you used a DIY solution, ensure the proportions are correct. Too much vinegar or alcohol can cause issues. For stubborn smudges on glass-like surfaces, similar troubleshooting might be needed, such as when you clean black glass stove tops without streaks.
Inspect Your Microfiber Cloth
A dirty or old microfiber cloth can cause streaks. If your cloth is greasy, linty, or has built-up residue from previous cleaning, it will not clean effectively. Wash your microfiber cloths regularly. Use only water and a small amount of mild detergent. Avoid fabric softeners, as they can clog the fibers and make the cloth less effective. Always ensure the cloth is completely dry before use.
Assess Your Wiping Technique
Sometimes,
- computer screen cleaning
- streak-free screen
- monitor cleaning