· Tool Maintenance · 13 min read
How To Clean Rusted Tools
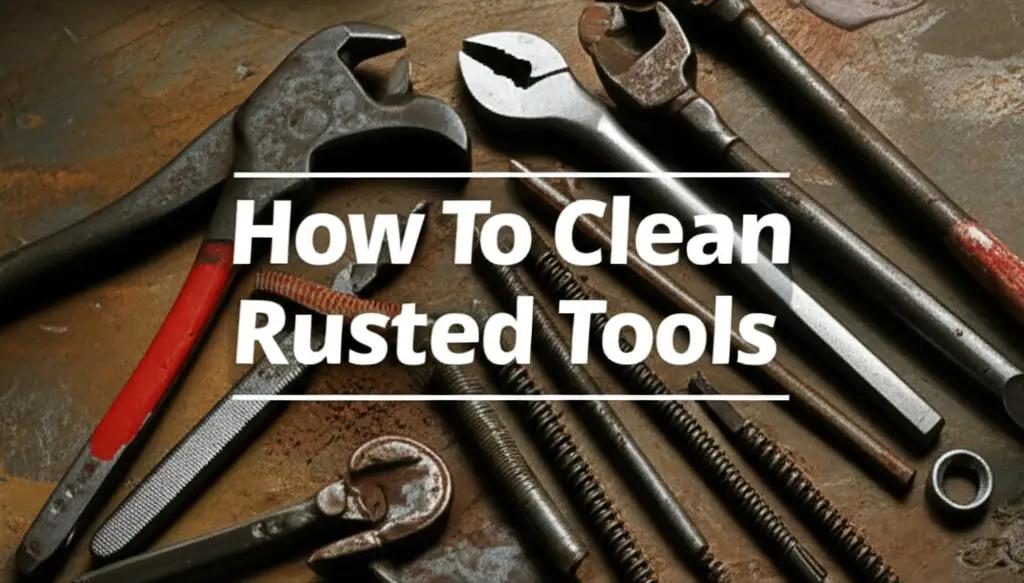
Restore Your Tools: How To Clean Rusted Tools Effectively
Do you look at your once shiny tools and see a dull, orange-brown coating instead? Rust happens. It attacks metal tools, making them stick, dull, and sometimes unusable. This article helps you understand how to clean rusted tools and bring them back to life.
Rust not only makes tools look bad, but it also reduces their performance and lifespan. Ignoring rust leads to damage that cannot be reversed. Fortunately, you can remove most rust with common household items and a little effort. I will guide you through effective methods to clean rusted tools, from light surface corrosion to stubborn layers. You will learn about safe cleaning agents, proper techniques, and important safety measures. We also discuss how to protect your tools from future rust. Get ready to make your tools functional and durable again.
Takeaway:
- Identify the type of rust affecting your tools.
- Choose the right cleaning method for each rust level.
- Always prioritize safety during the cleaning process.
- Implement protective measures to prevent future rust.
Rust forms when iron or its alloys, like steel, react with oxygen and water. This chemical process creates iron oxides, which we call rust. You can clean rusted tools by using various methods. These methods typically involve chemical reactions or abrasive action to break down and remove the rust layer. Common cleaning agents include acids like vinegar, bases like baking soda, or specialized rust removers. Physical methods include wire brushing, sanding, or using abrasive pads. The best approach depends on the tool type and rust severity.
Understanding Rust: What It Is and Why It Forms
Rust is a common issue for metal tools. It is a reddish-brown flaky coating that forms on iron and its alloys. This process, called oxidation, occurs when iron reacts with oxygen and moisture. Humidity, water, and even damp air cause rust to appear.
Tools often sit in garages or sheds where humidity changes. This environment makes them vulnerable to rust. Every time you use a tool, moisture from your hands can transfer to it. Over time, these small amounts of moisture add up. Even a little scratch on the tool’s surface can expose fresh metal to the elements. This speeds up the rusting process. Understanding how rust forms helps us choose the best cleaning methods. It also helps us prevent future rust. Preventing rust is always easier than removing it.
Safety First: Essential Precautions for Rust Removal
Working with rusted tools and cleaning agents requires careful attention to safety. Always protect yourself before you begin. Rust particles can irritate your skin or eyes. Chemical cleaners can cause burns or other harm.
Wear sturdy gloves to protect your hands from both rust and chemicals. Safety glasses or goggles are also vital. They shield your eyes from flying debris, rust flakes, and chemical splashes. Work in a well-ventilated area, especially if you use strong cleaning solutions. This prevents you from breathing in harmful fumes. If you use power tools like a wire brush attachment, be extra cautious. Secure the tool firmly and maintain a steady grip. Always read the labels on any commercial rust removers. Follow the manufacturer’s instructions for safe use and disposal. Your safety is most important when you clean tools.
Gentle Approaches: Cleaning Light Surface Rust
You can often clean light surface rust with simple household items. These methods are less abrasive and kinder to your tools. They work best on tools that show only small patches of rust or a thin layer.
The Vinegar Method
Vinegar is a mild acid that works well on rust. I often use it for items around my house. For cleaning tools, you can soak the rusted part in white vinegar. Submerge the tool completely in a container of vinegar. Let it sit for several hours, or even overnight, depending on the rust. The acid in the vinegar reacts with the rust, causing it to loosen. After soaking, remove the tool. Use a stiff brush, steel wool, or an old toothbrush to scrub away the softened rust. Rinse the tool thoroughly with water and dry it completely. Vinegar is an effective way to clean many items. You can even use it for general cleaning, like when you clean a shower with vinegar. This method is effective for many types of rust.
The Baking Soda Paste
Baking soda is a gentle abrasive and a mild alkali. It also works on light rust. Mix baking soda with a small amount of water to form a thick paste. Apply this paste directly onto the rusted areas of your tool. Let the paste sit on the rust for a few hours. This gives it time to work. The paste will help lift the rust away. After it sits, use a scrubbing pad, an old toothbrush, or a fine wire brush to scrub the rust off. You might need to add a little more water as you scrub to keep the paste moist. Rinse the tool well and dry it immediately to prevent new rust. This method is safe for most tool finishes.
More Aggressive Solutions: Tackling Stubborn Rust
Sometimes, light methods are not enough. For heavier rust, you need more aggressive cleaning. These methods use stronger chemicals or more abrasive action. They can remove thick layers of corrosion.
Citric Acid and Lemon Juice
Citric acid is another natural alternative for rust removal. You can find citric acid powder in many stores, often near canning supplies. Dissolve a few tablespoons of citric acid powder in hot water. Place your rusted tools into this solution. Let them soak for several hours. The warm water helps the citric acid work faster. For an easy option, lemon juice also contains citric acid. You can simply squeeze lemon juice onto small rust spots. Add a pinch of salt to create a stronger abrasive. Let it sit, then scrub. Both citric acid and lemon juice are effective yet still relatively gentle on tools compared to harsher chemicals.
Oxalic Acid (Rust Removers)
For more severe rust, commercial rust removers are an option. Many of these products contain oxalic acid. Oxalic acid is stronger than vinegar or citric acid. It dissolves rust more quickly. Always read the product label carefully before using any commercial rust remover. Wear proper safety gear, including gloves and eye protection. Use these products in a well-ventilated area. Apply the remover as directed, usually by brushing it onto the rusted area or soaking the tool. Follow the recommended contact time. After treatment, rinse the tool thoroughly with water. Make sure to neutralize any remaining acid if the product requires it. These specialized cleaners are effective for heavy rust.
Electrolysis for Heavily Rusted Tools
Electrolysis is a powerful method for removing severe rust from metal objects. This process uses electricity to reverse the rusting reaction. You will need a plastic container, a battery charger or power supply, a piece of scrap steel (not stainless steel) for the anode, and a non-conductive object to suspend the rusted tool. Mix a solution of washing soda (sodium carbonate, not baking soda) in water. Place the scrap steel (anode) around the sides of the container. Connect the positive (+) terminal of the charger to the anode. Connect the negative (-) terminal to the rusted tool (cathode). Submerge the tool and anode in the solution, making sure they do not touch. Turn on the charger. Bubbles will form, and the rust will transfer from the tool to the anode. This method is very effective but requires careful setup and supervision. It is a common technique used to clean old tools that are heavily corroded.
Mechanical Methods: Scrubbing and Grinding Rust Away
Sometimes, physical force is the most direct way to remove rust. These methods involve scrubbing, sanding, or grinding. They work well for thick rust layers or on surfaces that can handle abrasion.
Wire Brushes and Steel Wool
For many rusted tools, a simple wire brush is incredibly effective. You can use a hand-held wire brush or an attachment for a drill. Scrub the rusted areas vigorously. The stiff bristles will scrape away loose rust flakes. Steel wool, especially coarser grades, also works well. Apply firm pressure and rub the steel wool over the rust. For stubborn spots, combine steel wool with a mild abrasive cleaner or a bit of vinegar. These methods are excellent for general rust removal on durable tools like wrenches, pliers, or shovels. Remember to clean greasy tools before starting rust removal to ensure the brush can make direct contact with the rust.
Sandpaper and Abrasive Pads
Sandpaper is useful for smoother surfaces or for removing rust that is deeply embedded. Start with a coarse grit sandpaper (like 80-120 grit) to remove the bulk of the rust. Then, move to finer grits (like 220-400 grit) to smooth the surface and remove scratches. You can wrap sandpaper around a block for flat surfaces. For curved parts, simply use your hands. Abrasive pads, such as Scotch-Brite pads, also work well. These pads come in different grits, similar to sandpaper. They conform to tool shapes more easily. These methods are particularly good for restoring the edge of a shovel or other garden tools where smoothness matters. You might also find these useful when you need to clean stains on wood handles of your tools.
Rotary Tools and Grinders
For extremely heavy rust or on large metal surfaces, rotary tools with wire brush attachments or grinding wheels can save a lot of time. Dremel tools with small wire brushes are great for detailed work on smaller tools. Angle grinders with wire wheels are suitable for large, flat surfaces. These tools remove rust quickly. However, they also remove metal if you are not careful. Use a light touch and let the tool do the work. Always wear heavy-duty gloves and eye protection when using power tools. Be aware of flying debris. Power tools make the job faster, but they require extra caution.
The Finishing Touch: Protecting Your Newly Cleaned Tools
Once you remove the rust, the job is not finished. Protecting your tools from future corrosion is crucial. A clean tool is just as vulnerable to rust as a rusty one if not protected.
Thorough Drying
After any cleaning method involving water, thorough drying is the most important step. Water is a main ingredient for rust formation. Use a clean cloth to dry the tools immediately and completely. For hard-to-reach areas, use compressed air. You can also place tools in direct sunlight or use a hairdryer for a few minutes. Ensure every crevice is dry before storage. Even a small amount of residual moisture can cause new rust spots.
Applying Protective Coatings
After drying, apply a protective coating. A light coat of machine oil, mineral oil, or a specialized rust preventative spray works wonders. Apply it evenly over all metal surfaces. Wipe away any excess oil. This creates a barrier between the metal and the air/moisture. For tools with moving parts, such as pliers or shears, apply oil to the joints. This not only protects against rust but also lubricates the mechanism. For garden tools, consider a heavier coat of oil or even a wax coating, especially if they are stored in a damp environment. Regularly reapply these coatings, especially after each use. This simple step extends the life of your tools significantly.
Proper Storage
Storage conditions play a huge role in rust prevention. Store your tools in a dry environment. A toolbox or cabinet that closes tightly can protect them from humidity and dust. Consider adding desiccant packets, like silica gel, to your toolbox. These absorb moisture from the air. Avoid storing tools directly on concrete floors, as concrete can draw moisture. Hang tools on a pegboard or store them in drawers lined with rust-inhibiting paper. Keeping tools organized also encourages better care. When you put tools away properly, you are less likely to leave them exposed to elements. This helps ensure they remain rust-free for many years.
Frequently Asked Questions
What is the best household item to remove rust from tools?
White vinegar is often the best household item for general rust removal. Its mild acidity dissolves rust effectively. Simply soak the rusted tools in white vinegar for several hours or overnight. Then, scrub the loosened rust off with a brush or steel wool. Remember to rinse and dry the tools completely afterwards to prevent new rust.
Can Coke remove rust from tools?
Yes, Coca-Cola can remove light rust from tools. It contains phosphoric acid, which reacts with iron oxide (rust). Soak small tools in Coca-Cola for several hours. The acid helps to loosen the rust. Afterwards, scrub the tools with a wire brush or steel wool. Always rinse and dry the tools thoroughly after using Coke to prevent stickiness and new rust.
How long does it take for vinegar to remove rust?
The time it takes for vinegar to remove rust depends on the rust’s severity. For light surface rust, a few hours of soaking might be enough. For moderate or heavy rust, leave the tools submerged in vinegar overnight, or even for 24 hours. Check periodically and scrub as needed until the rust is gone.
Is it safe to use WD-40 for rust removal?
WD-40 can help loosen light rust and lubricate tools. It is not a primary rust remover. It can penetrate and displace moisture, making it easier to scrub off surface rust. For heavy rust, you will need a stronger chemical solution or an abrasive method. Always clean the tool thoroughly after using WD-40, then apply a proper rust preventative.
What causes tools to rust quickly?
Tools rust quickly when exposed to moisture and oxygen. High humidity, direct water contact, and even sweat from your hands contribute to rust. Storing tools in damp basements, garages, or outdoors without protection accelerates corrosion. Tools also rust faster if they are not cleaned or dried properly after use.
How do I prevent tools from rusting after cleaning them?
After cleaning tools, dry them completely. Apply a light coat of protective oil, such as mineral oil or specialized tool oil. Store tools in a dry environment, like a sealed toolbox or a climate-controlled area. Consider using desiccant packets or rust-inhibiting liners in storage containers. Regular maintenance and proper storage are key to prevention.
Conclusion
Cleaning rusted tools is a rewarding task that extends their life and restores their usefulness. You have learned various effective methods, from gentle household solutions like vinegar and baking soda to more aggressive techniques for stubborn corrosion. Remember to prioritize safety at all times. Always wear gloves and eye protection, and ensure good ventilation.
After successfully removing the rust, the critical next step is protecting your tools. Thorough drying and applying a protective coating are vital. Storing your tools in a dry environment will prevent rust from returning. By following these steps, you keep your tools in excellent condition for many years.
This proactive approach saves you money and ensures your tools are always ready for any task. Get started on how to clean rusted tools today, and enjoy your revitalized collection!
- rust removal
- tool care
- metal cleaning
- corrosion prevention