· 3D Printing Maintenance · 15 min read
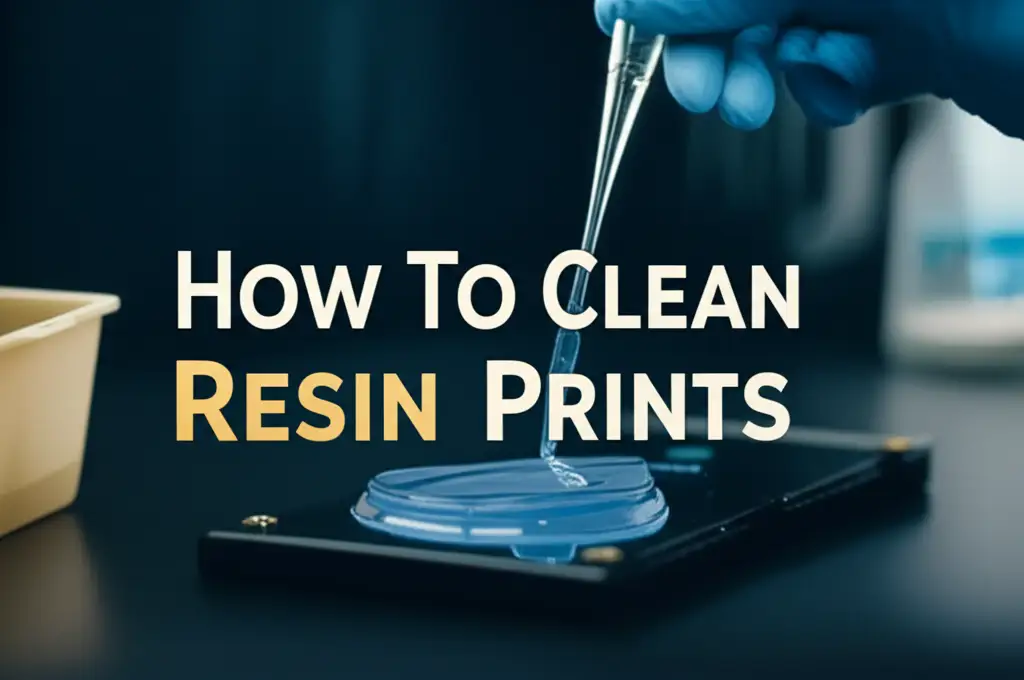
How To Clean Resin Prints

Clean Your Resin Prints: A Step-by-Step Guide
Creating intricate models with a resin 3D printer is exciting. However, the printing process is only half the journey. After your print finishes, a crucial step remains: cleaning resin prints. Proper cleaning ensures your models look their best. It also makes them durable and safe to handle.
Uncured resin is sticky and harmful. It needs careful removal. Many new 3D printing enthusiasts wonder how to get started. I remember my first few prints, covered in a gooey mess. This guide will walk you through each step. You will learn the best methods for washing and curing your resin prints. We will cover safety, common issues, and essential tools. Let us make your resin prints shine.
Takeaway
- Always prioritize safety with uncured resin.
- Use a two-stage wash process for best results.
- Cure prints thoroughly for strength and final finish.
- Troubleshoot common issues like stickiness and white residue.
- Dispose of resin and chemicals responsibly.
How to clean resin prints?
To clean resin prints, carefully remove them from the build plate. Then, wash off excess uncured resin using isopropyl alcohol (IPA) or a resin cleaner. Use two baths for effective cleaning. Finally, cure the print thoroughly with UV light to harden the resin completely.
Gather Your Cleaning Arsenal
Before you start cleaning resin prints, you need the right tools. Having everything ready makes the process smooth and safe. Proper preparation prevents messes and ensures good results. Let us look at what you need to gather.
First, safety gear is non-negotiable. Uncured resin can irritate your skin and eyes. Always wear nitrile gloves when handling prints or liquid resin. Regular latex gloves may not offer enough protection. Safety glasses are also important to shield your eyes from splashes. A respirator or mask is a wise choice, especially if you are sensitive to fumes. You want to breathe easy while working.
Next, consider your cleaning solutions. Isopropyl alcohol (IPA) is the most common choice. It dissolves uncured resin effectively. Look for 90% concentration or higher for best performance. Some resins are “water-washable.” These resins allow you to use plain water for cleaning. Check your resin manufacturer’s instructions. Specialized resin cleaners are also available. These cleaners often have lower odor and are less flammable than IPA. Choose the solution that best suits your resin and workspace.
You also need containers for washing. Two separate containers are ideal for a two-stage wash process. Plastic tubs or glass jars work well. Just make sure they are wide enough for your prints. A soft brush, like an old toothbrush or a dedicated resin brush, helps remove stubborn resin from crevices. Paper towels or microfiber cloths are useful for drying. An ultrasonic cleaner can greatly improve cleaning efficiency. It uses sound waves to agitate the cleaning solution. This helps remove resin from even tiny details.
Essential Safety Equipment:
- Nitrile gloves (multiple pairs)
- Safety glasses
- Respirator or face mask (optional but recommended for fumes)
- Ventilated workspace
Cleaning Solutions for Resin:
- Isopropyl Alcohol (IPA) 90% or higher
- Dedicated resin cleaner
- Water (for water-washable resins only)
Other Tools:
- Two washing containers (plastic tubs, glass jars)
- Soft brush (toothbrush, paintbrush)
- Paper towels or microfiber cloths
- Curing station or UV light
- Optional: Ultrasonic cleaner
- Optional: Dental picks or exacto knife for supports
When cleaning your tools after handling resin, remember that uncured resin sticks to many surfaces. For general cleaning of resin off tools, you might find useful tips on how to clean resin off tools. This helps keep your workspace tidy and your tools ready for the next print.
Initial Wash: Removing Excess Resin
The first wash is crucial for cleaning resin prints. Its purpose is to remove the bulk of the uncured resin still clinging to your model. If you skip this step or do it poorly, your print might remain sticky. It can also have a milky appearance after curing. This primary wash sets the stage for a clean, professional finish.
After carefully removing your print from the build plate, gently detach any large, obvious supports. Be careful not to damage the model. Now, it is time for the first wash. Place the print into your first container of cleaning solution. This container will get quite dirty. It will hold most of the excess resin. Swirl the print around in the solution for a minute or two. You can also use a soft brush to gently scrub away visible resin. Focus on areas where resin might pool, like crevices or hollows. This physical agitation helps dislodge the sticky liquid.
Many people use an ultrasonic cleaner for this initial wash. An ultrasonic cleaner can dramatically improve cleaning. Fill the cleaner with your chosen solution (IPA, resin cleaner, or water for water-washable resins). Place your print in a separate mesh basket or small container. Immerse this container in the ultrasonic cleaner’s water bath. Run the cycle for 2-5 minutes. The vibrations reach every nook and cranny. This method is especially good for detailed prints. It reduces the need for manual scrubbing. This saves time and minimizes print damage.
After this first wash, much of the uncured resin should be gone. The solution in this first container will appear cloudy. It will likely contain many resin particles. Do not worry about achieving perfect cleanliness at this stage. The goal is to remove the majority of the liquid resin. Prepare for the next step, which ensures a pristine surface.
The Secondary Rinse: Ensuring Cleanliness
Once you have completed the initial wash, your resin print is much cleaner. However, it is not perfectly clean yet. The first wash solution, while effective, is now contaminated with uncured resin. This is why a secondary rinse is vital for truly clean resin prints. This step ensures no sticky residue remains. It also prepares your print for proper curing.
For the secondary rinse, use a fresh batch of your cleaning solution. This means new isopropyl alcohol, clean water for water-washable resins, or fresh resin cleaner. Place your partially cleaned print into this second container. Swirl it around gently for another 1-2 minutes. You can use a clean, soft brush here too. Lightly brush all surfaces. This action washes away any remaining microscopic resin particles. It leaves your print truly pristine.
If you are using an ultrasonic cleaner, this is where it really shines again. After the first wash, empty and clean your ultrasonic cleaner. Refill it with fresh solution. Then, place your print in for a second ultrasonic bath. Another 2-3 minute cycle in fresh solution is usually enough. This ensures a thorough cleaning. The print should feel dry to the touch once removed. It should not feel sticky at all.
After the second rinse, carefully remove your print from the solution. Place it on a clean paper towel or a dedicated drying rack. Allow it to air dry completely. Evaporation happens quickly with IPA. Water-washable resins might take a bit longer. Ensure there is no liquid remaining on the surface. Any wet spots could interfere with the curing process. They could also leave behind a white, powdery residue. A completely dry print is ready for the next critical step: curing.
Curing Your Resin Prints Properly
After thorough cleaning and drying, the next vital step is curing your resin prints. Curing is the process of exposing the resin to UV light. This hardens the liquid resin completely. It transforms it into a strong, durable, solid object. Proper curing ensures your prints achieve their intended strength and finish. Incomplete curing can leave prints brittle or sticky. They might also deform over time.
There are several ways to cure your resin prints. The most common method uses a dedicated UV curing station. These stations are specifically designed for resin prints. They often feature multiple UV LED lights and a rotating turntable. This ensures even exposure from all angles. Simply place your clean, dry print inside. Follow the manufacturer’s recommended curing times. Times vary depending on the resin type and the size of your print. Most small to medium prints cure in 5-20 minutes. Larger or thicker prints may need more time.
Natural sunlight is another option for curing. If you do not have a UV curing station, sunlight works well. The sun emits UV radiation that will cure your resin. Place your prints outdoors on a sunny day. Rotate them periodically to ensure all sides get exposure. The curing time varies greatly with sunlight intensity. A bright, sunny day might cure a small print in an hour or two. Overcast days will take much longer. Be aware that direct, intense sunlight can sometimes over-cure prints. This makes them brittle. Monitor your prints closely.
Whichever method you choose, ensure the print is fully cured. A fully cured print should feel hard and solid. It should not be sticky or flexible. If it still feels tacky, cure it for longer. Some resins might emit a slight odor during curing. This is normal. Ensure you have good ventilation in your curing area. Proper curing finishes the transformation of your raw print. It prepares it for any post-processing, like sanding or painting.
Troubleshooting Common Resin Cleaning Issues
Even with the best techniques, you might encounter issues when cleaning resin prints. Don’t worry, many problems have simple solutions. Understanding these common pitfalls helps you achieve perfect results every time. Let’s tackle some of the most frequent challenges.
One very common problem is sticky resin prints. If your print feels tacky after washing and initial curing, it means uncured resin remains. This can happen for a few reasons. Maybe your cleaning solution was dirty or too diluted. Perhaps your wash time was too short. Or, the print did not get enough UV exposure during curing. To fix this, first, re-wash the print in fresh IPA or cleaner. Use a soft brush to scrub all surfaces again. Then, dry it completely. Finally, give it more UV curing time. Ensure all surfaces get direct light. Sometimes, slightly cloudy IPA can still leave prints tacky. Always aim for clean washing solution.
Another frequent issue is white residue on prints. This often appears as a chalky film after drying or curing. This residue usually indicates that the cleaning solution, like IPA, dried on the print before all uncured resin was fully dissolved. It can also happen if you do not dry the print completely before curing. The IPA evaporates, leaving behind minuscule resin particles that form the white film. To prevent this, ensure your prints are thoroughly washed and agitated. Dry them completely before curing. If you get residue, you can try gently scrubbing it off with a soft brush and fresh IPA. For some stubborn cases, a light sanding and re-cure might be necessary.
Sometimes, prints look cloudy or hazy. This is similar to white residue but more uniform. It might be due to very dirty washing solution or insufficient washing. The uncured resin creates a thin layer that scatters light. Again, re-washing in fresh solution and ensuring complete drying often resolves this. Over-curing can also make prints look slightly yellow or brittle. Find the right balance for your specific resin and curing setup. Remember that thorough cleaning is the foundation for a flawless final print.
Safety First: Handling Uncured Resin
When you clean resin prints, safety must be your top priority. Uncured liquid resin is a chemical. It requires careful handling. Ignoring safety precautions can lead to skin irritation, allergic reactions, or respiratory issues. Taking simple steps protects your health and your workspace.
Always wear proper personal protective equipment (PPE). Nitrile gloves are essential. They protect your hands from direct contact with the resin. Resin can absorb into your skin. This may cause sensitization over time. Safety glasses protect your eyes from splashes. Resin can cause severe eye irritation. A respirator is also highly recommended. Resin fumes can irritate your respiratory system. Especially when working in an enclosed space, good ventilation is key. Always work in a well-ventilated area. Open windows or use an exhaust fan. This helps dissipate resin fumes.
Proper disposal of uncured resin and used cleaning solutions is crucial. Never pour liquid resin or contaminated IPA down the drain. Uncured resin is toxic to aquatic life. It can also clog pipes. For small amounts of uncured resin, you can cure it in sunlight. Spread it thinly on a disposable surface like a plastic bag. Once hardened, you can dispose of it with regular solid waste. Large amounts of uncured resin should be handled according to local hazardous waste regulations.
Used IPA or resin cleaner, contaminated with uncured resin, also needs careful disposal. Do not pour it down the drain. You can often let the resin settle out in the container. Let the container sit undisturbed for a few days. The resin particles will sink to the bottom. Carefully pour the cleaner off the top. The cleaner might be reusable for initial washes. The hardened resin sludge at the bottom can be disposed of as solid waste after curing. For persistent or stubborn resin spills on glass surfaces, knowing how to clean resin from glass can be incredibly helpful. This ensures a clean and safe environment. If you accidentally get resin on your tools, you’ll find useful guidance on how to clean epoxy resin off tools. This helps maintain your equipment safely.
Maintenance and Storage of Cleaned Prints
After you meticulously clean resin prints and cure them, they are almost ready. There are a few final steps to consider. These steps involve finishing touches and proper storage. Good maintenance ensures your prints look great and last a long time. They will remain high-quality pieces.
Sometimes, despite careful support removal, small nubs or rough spots remain. These are areas where supports connected to the model. You can gently remove these using hobby nippers or a sharp craft knife. For smoother finishes, light sanding with fine-grit sandpaper (600-grit or higher) can work wonders. Be gentle. Resin can scratch easily. After sanding, you might want to wash the print again to remove dust. A quick rinse and re-cure might be necessary. You can also prime and paint your prints at this stage. Primer helps paint adhere better. Painting adds color and protection.
Proper storage of your finished resin prints is also important. While cured resin is durable, it is not indestructible. Avoid prolonged exposure to direct sunlight. Even fully cured resin can yellow or become brittle over time with constant UV exposure. Store your prints in a cool, dry place. Keep them away from strong light sources. Display cases or closed shelves are ideal. If you need to transport prints, use padded containers. This prevents damage during transit. Avoid storing prints where they might be knocked or dropped.
Remember that cured resin can still be sensitive to certain chemicals. Avoid cleaning agents that contain harsh solvents. These solvents might react with the resin. A soft, dry cloth is usually sufficient for dusting. For deeper cleaning, a damp cloth with plain water should be enough. By taking these extra steps, your resin prints will maintain their quality. They will look fantastic for years to come.
FAQ Section
Why is cleaning resin prints important?
Cleaning resin prints is vital for several reasons. It removes uncured, sticky resin. This makes the print safe to handle. It also allows the print to cure properly. A clean print cures fully, making it stronger and more durable. It also ensures a smooth, non-tacky surface. This prepares the print for painting or display.
Can I use water to clean resin prints?
You can use water to clean resin prints only if your resin is specifically “water-washable.” Check the label on your resin bottle. Most standard resins require isopropyl alcohol (IPA) or a dedicated resin cleaner. Using water on non-water-washable resin will not clean it properly. It can also cause the resin to polymerize into a sticky, impossible-to-remove mess.
What if my prints are still sticky after cleaning?
If your prints feel sticky after washing and curing, it means some uncured resin remains. First, try re-washing the print in fresh isopropyl alcohol (IPA) or resin cleaner. Use a soft brush to gently scrub all surfaces. Dry the print completely. Then, give it additional UV curing time. Ensure all sides receive light exposure.
How do I dispose of used IPA?
Never pour used IPA or contaminated cleaning solutions down the drain. This pollutes water and is illegal in many places. For small amounts, let the IPA sit in a clear container. The resin particles will settle to the bottom. Pour off the cleaner liquid, which can sometimes be reused. Cure the settled resin sludge with UV light until solid. Then, dispose of the hardened resin as regular solid waste. For larger quantities, follow local hazardous waste disposal guidelines.
How long does it take to clean a resin print?
The cleaning process for a resin print typically takes 5 to 15 minutes of active time. This includes the two wash stages and drying. Using an ultrasonic cleaner can speed this up. The subsequent curing time varies. It can range from 5 minutes in a UV curing station to a few hours in natural sunlight.
Do all resin prints need cleaning?
Yes, almost all resin prints require cleaning. Resin 3D printers work by selectively curing liquid resin. This leaves a layer of uncured, sticky resin on the surface of the printed object. Removing this uncured resin is essential. It ensures the print is fully hardened, non-toxic, and ready for use or further post-processing.
Conclusion
Cleaning resin prints is a critical step in the 3D printing journey. It transforms a sticky, raw object into a durable, finished piece. You now know the complete process. Start by gathering your safety gear and cleaning supplies. Perform a two-stage wash using fresh solution for the second rinse. Then, dry your prints thoroughly before curing them under UV light. Remember that proper curing is key for strength.
You also learned how to troubleshoot common issues. Sticky prints usually need more washing and curing. White residue often means incomplete drying before curing. Most importantly, always prioritize safety. Wear gloves and eye protection. Work in a well-ventilated area. Dispose of uncured resin and contaminated solutions responsibly. Following these steps ensures beautiful, lasting results every time. Now, go forth and create stunning resin prints! Your efforts in cleaning resin prints will truly pay off.
- resin 3D printing
- post-processing
- resin cleaning tips
- curing resin
- SLA prints


