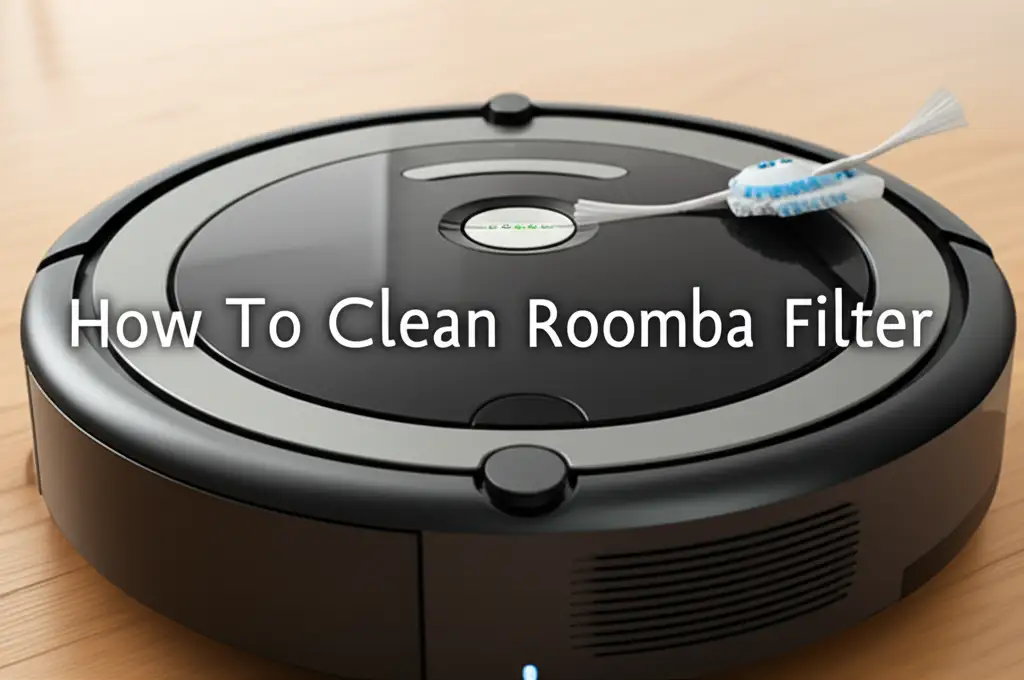
· Smart Home Cleaning · 21 min read
How To Clean Roborock Sensor
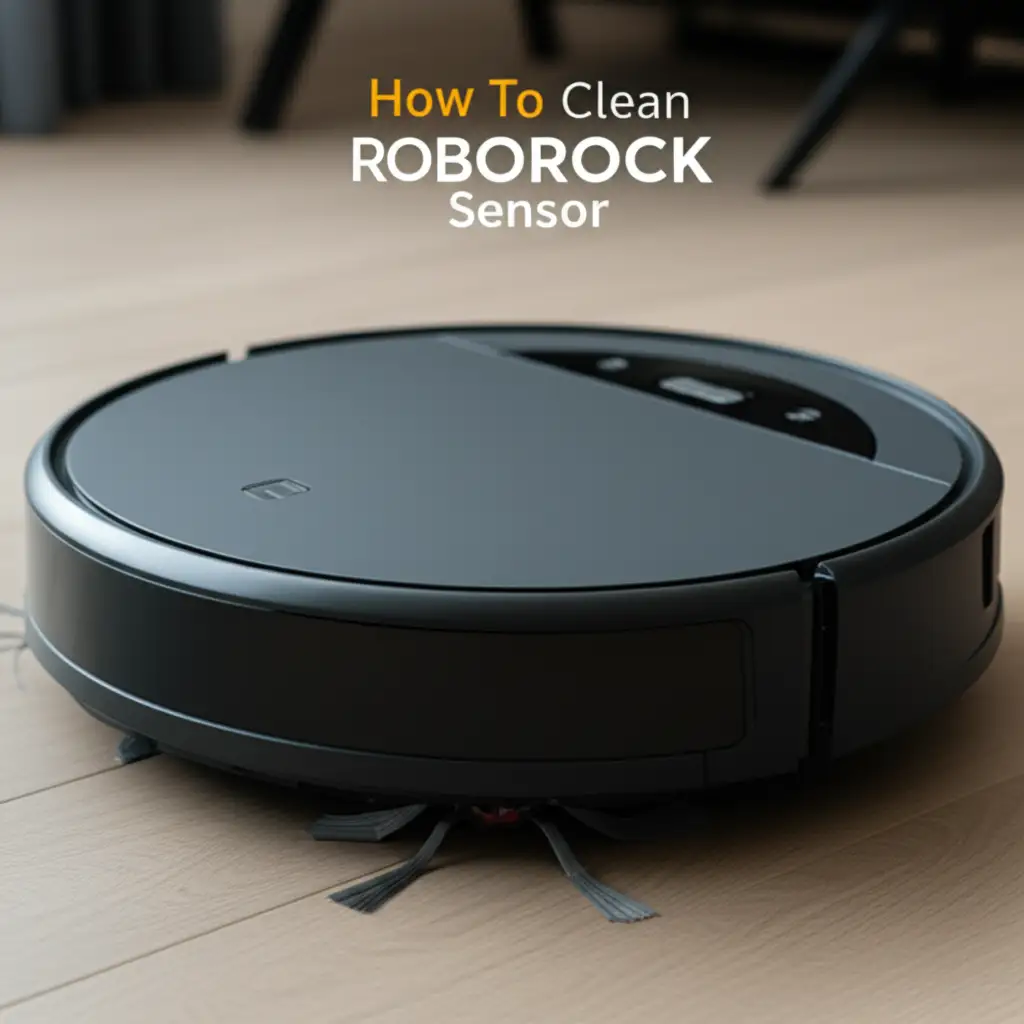
Unlock Peak Performance: How To Clean Roborock Sensors
Is your Roborock robot vacuum acting strange? Maybe it bumps into furniture more often, misses spots, or gets stuck for no clear reason. You probably rely on your Roborock to keep floors clean and your home tidy. When it does not work right, it is frustrating. Often, the main reason for these problems is dirty sensors.
Cleaning your Roborock’s sensors is important for its best operation. Dust, hair, and debris build up on these small parts. This build-up blocks the sensors. It stops the vacuum from seeing its surroundings clearly. This guide shows you how to clean Roborock sensor types effectively. You will learn simple steps to bring your robot vacuum back to its top cleaning form. We will cover each sensor, tools you need, and tips for regular care.
Takeaway
- Identify Sensor Types: Know the location and function of LIDAR, cliff, bumper, and side sensors.
- Gather Tools: Use soft cloths, cotton swabs, and compressed air.
- Clean Carefully: Gently wipe sensors. Avoid harsh chemicals or liquids.
- Prevent Build-up: Perform regular sensor checks to maintain performance.
- Address Errors: Clean sensors if your Roborock shows navigation issues or error codes.
Clear, Concise Answer to the Main Query
To clean Roborock sensors, turn off the device and unplug it. Use a soft, dry microfiber cloth to gently wipe the LIDAR, cliff, optical, and bumper sensors. For small crevices, a dry cotton swab or a puff of compressed air can remove stubborn dust and debris.
Understanding Roborock Sensors and Their Purpose
Your Roborock vacuum is more than just a motor and brushes. It uses a network of sensors to move around your home. Each sensor type has a specific job. These sensors help the vacuum map your space, avoid falls, and detect objects. Without clean sensors, your Roborock cannot do its job properly. It relies on these “eyes” to clean efficiently.
Think of the sensors as the robot’s eyes and ears. They tell it where to go and what to avoid. If these sensors get dirty, the robot becomes “blind.” It might clean the same spot many times. It could also miss dirty areas entirely. Understanding each sensor’s role helps you know which part to check when problems appear. We will explore the key sensor types in your Roborock.
The LIDAR Sensor: Your Roborock’s “Brain”
The LIDAR sensor is on top of your Roborock. It usually looks like a small tower. This sensor spins fast. It sends out laser beams. These beams bounce off objects and return to the sensor. The Roborock uses this data to create a map of your home. It sees walls, furniture, and other obstacles. This map helps the vacuum plan its cleaning path. It knows where it has been and where it needs to go.
If the LIDAR sensor is dirty, your Roborock may have trouble mapping. It might not know where it is. It could bump into things or get lost. Dust or hair on the LIDAR tower prevents accurate mapping. A clear LIDAR sensor ensures your Roborock cleans logically and efficiently.
Cliff Sensors: Preventing Falls
Cliff sensors are at the bottom of your Roborock. There are usually four of them. These sensors detect sudden drops. They stop the vacuum from falling down stairs or off ledges. They work by sending out an infrared beam. If the beam does not reflect back, the sensor knows there is a drop. The robot then changes direction.
Dirt or dust on cliff sensors makes them think a drop exists when it does not. This causes the Roborock to stop cleaning certain areas. It might also show an error. Or, worse, it might actually fall if the sensors are completely blocked. Keeping these sensors clean is vital for safety. It also helps your Roborock clean all areas, even near stairs.
Bumper and Side Sensors: Obstacle Detection
Your Roborock has bumper sensors on its front. These are physical sensors. When the robot touches an object, the bumper pushes in. This tells the robot to change direction. Many Roborocks also have infrared side sensors. These sensors detect objects very close to the side of the robot. They help it clean along walls without constantly bumping.
These sensors stop your Roborock from crashing into furniture. They also help it clean edges well. If bumper sensors are stuck or dirty, the robot might hit things harder. If side sensors are blocked, it might not clean close enough to walls. Regular checks on these sensors prevent damage to furniture and your vacuum.
Optical Sensors: Fine-Tuning Movement
Some Roborock models have optical sensors. These often work with other sensors for better navigation. They might be small windows on the side or front. Optical sensors help with precise distance measurement. They can help the robot detect subtle changes in its environment. This leads to smoother movement.
A dirty optical sensor might make your Roborock move less smoothly. It could cause slight navigation issues. While not as critical as LIDAR or cliff sensors, keeping them clean improves overall performance. Think of them as additional small eyes that help the robot see its path clearly.
Essential Tools for Roborock Sensor Cleaning
Cleaning your Roborock sensors does not need many special tools. You likely have most items already. Using the right tools is important. It helps you clean effectively without causing damage. Always use soft materials. Hard or abrasive items can scratch the sensor lenses. This can make the sensors useless.
Gathering your tools before you start makes the process smooth. It saves time. A small collection of simple cleaning supplies is all you need. Always handle your Roborock with care during cleaning. We will go through the list of items you will need for a thorough sensor cleaning session.
Soft Microfiber Cloths
A soft, dry microfiber cloth is your best friend for cleaning sensors. These cloths are gentle. They do not scratch delicate surfaces. They also pick up dust and fine particles very well. Use a clean cloth. Make sure it is free of dirt or debris from other cleaning tasks. You can also use lens cleaning cloths, like those used for glasses.
Always use a dry cloth. Do not use wet cloths or cleaning sprays directly on the sensors. Moisture can damage electronics inside your Roborock. Gently wipe the sensor windows. Rubbing too hard is not necessary. The goal is to remove surface dust.
Dry Cotton Swabs
Cotton swabs are good for small spaces. They reach into crevices where a cloth cannot go. They are perfect for cleaning around the edges of sensors. They also work for the small openings of some optical sensors. Use them dry. Just like with microfiber cloths, do not add any liquid.
Swabs help remove stubborn dust or hair stuck in tight spots. Use a fresh swab for each sensor if one gets dirty. Gently push the swab into the space. Twist it slightly to pick up debris. Be careful not to press too hard or push anything deeper inside.
Canned Compressed Air (Optional)
Canned compressed air helps remove loose dust. It is useful for the LIDAR tower. It can also clear dust from cliff sensor recesses. Hold the can upright. Use short bursts of air. Do not spray too close to the sensor. The strong force might cause damage.
Never use your mouth to blow air. This can introduce moisture. You also risk spitting small particles onto the sensors. Compressed air is a safe and effective way to clear fine dust without touching the sensor surface. It is especially useful for areas that are hard to reach directly. For other sensor cleaning needs, you might find tips on how to clean other sensitive parts like an Apple Watch sensor or even a mass airflow sensor, which also benefit from careful, dry cleaning methods.
Small Soft Brush (Optional)
A small, clean, soft-bristled brush can also be helpful. This could be a clean paintbrush or a soft toothbrush. It works well for brushing away dust from the LIDAR tower’s rotating part. It can also clear dust from the bumper areas. Make sure the bristles are very soft. Hard bristles can scratch the plastic or sensor surfaces.
Use the brush gently. Brush the dust away from the sensor. Do not push it in. This tool is good for larger areas with accumulated dust that is not stuck. It helps loosen debris before wiping with a cloth or using compressed air.
Step-by-Step Guide to Cleaning Each Roborock Sensor Type
Cleaning your Roborock sensors is a straightforward process. You need to approach each sensor type with care. The steps below ensure you clean all vital parts of your robot vacuum. Follow them in order for best results. This makes sure you do not miss any critical areas.
Remember to turn off and unplug your Roborock before you start. Safety first. This prevents accidental activation during cleaning. It also protects you from any electrical hazards. Let’s begin the cleaning process for each sensor.
1. Preparing Your Roborock for Cleaning
Before you touch any sensor, turn off your Roborock. Most models have a power button on top. Press and hold it until the robot shuts down. If your model has a physical switch, turn it off. Unplug the charging dock from the wall outlet. This stops the robot from trying to charge or move.
Move your Roborock to a well-lit area. This helps you see all the sensors clearly. A clean, flat surface is best for working. This prevents dirt from transferring back onto the robot. Having good light makes sure you do not miss any spots.
2. Cleaning the LIDAR Sensor (The Top Tower)
The LIDAR sensor is the dome or tower on top. It rotates during operation. First, gently wipe the entire LIDAR dome with a soft, dry microfiber cloth. Make sure to clean around the edges where dust can collect. The top clear part is the main lens. Clean it very well.
Next, carefully rotate the tower with your hand. While it spins, look for any hair or debris stuck under it. Use a dry cotton swab to reach into any small gaps. If you see dust inside the LIDAR tower’s window, use compressed air in short bursts. Spray from a distance of about 6-8 inches. This helps clear internal dust. Be gentle, as this is a delicate part.
3. Cleaning the Cliff Sensors (Bottom of Robot)
Flip your Roborock over carefully. You will see several small dark windows or slots along the front edge of the bottom. These are the cliff sensors. There are usually 3 to 4 of them. Use a dry cotton swab to clean each sensor window. Gently wipe away any dust, dirt, or hair.
Dust and hair often cling to these sensors. This is especially true if you have pets. Make sure no hair is wrapped around the sensor openings. If debris is stubborn, use a tiny puff of compressed air. This can dislodge it. Keep cleaning until the sensors look clear. These sensors are crucial for avoiding falls. You might also encounter similar cleaning methods for other devices with sensors, such as learning how to clean a Bosch dryer moisture sensor, where dust and lint can also impair function.
4. Cleaning the Bumper and Side Sensors
The bumper sensors are behind the spring-loaded front bumper. You cannot always see the internal sensors directly. However, you can ensure the bumper moves freely. Push the bumper in several spots along its front. Make sure it springs back out without sticking. If it sticks, dirt might be trapped. Use compressed air to blow out dust from the gap behind the bumper.
For side sensors, look for small clear or dark windows on the sides of your Roborock. These are typically near the front corners. Wipe these small windows with a dry microfiber cloth. Use a cotton swab for any tiny grooves. These sensors help the robot navigate tight spaces and along walls. Keeping them clean ensures it does not bump into things too hard or miss wall edges.
5. Cleaning Optical Sensors and Charging Contacts
Some Roborock models have additional optical sensors. These are usually small, clear windows. They are found on the side or front. Wipe these gently with a dry microfiber cloth. Make sure they are perfectly clear. Any smudge or dust can affect their accuracy.
While you are cleaning, also check the metal charging contacts on the underside of your Roborock and on the charging dock. These can get dirty and prevent proper charging. Wipe them clean with a dry cloth. Clean contacts ensure your Roborock charges fully. This prepares it for its next cleaning cycle. A clean Roborock means it works better for longer. Similar cleaning for electrical contacts is important for many devices, like knowing how to clean a hood latch sensor on a car, which also relies on good electrical contact.
Troubleshooting Common Roborock Sensor Errors
Even after cleaning, your Roborock might still have issues. This section helps you understand common problems related to sensors. We provide simple solutions to fix them. Many problems come from dirty sensors. Sometimes, the problem is something else. Knowing what to look for saves you time and frustration.
Error messages on your Roborock or in the app are good clues. They often tell you which sensor or system has a problem. Pay attention to these messages. They guide your troubleshooting efforts. Let’s look at common sensor-related issues and how to solve them.
”Error 1: LIDAR sensor blocked” or Mapping Issues
This error means something blocks the LIDAR tower. It cannot scan your room. The robot might spin in circles or show a “sensor blocked” message.
- Solution: Check the LIDAR tower on top. Ensure no hair, dust, or small objects are on it. Spin the tower manually to see if it moves freely. If not, carefully remove any foreign material. Wipe the top lens and blow compressed air into the opening. Make sure the tower can spin without friction. If the tower does not spin even after cleaning, there might be a mechanical issue.
Roborock Falling Down Stairs or Bumping Hard
If your Roborock falls off ledges or hits stairs, its cliff sensors are not working. If it bumps into walls or furniture harder than usual, its bumper or side sensors might be the cause.
- Solution: For falling issues, flip the Roborock over. Clean all cliff sensors with a dry cotton swab. Make sure no dust or debris covers them. For bumping, check the front bumper. Push it in several places to ensure it springs back. Clean any dust or debris from behind the bumper. Wipe the side sensors thoroughly. If the problem persists, try a full factory reset of the robot. Sometimes, a software glitch can affect sensor readings. Keeping other types of sensors clean, like knowing how to clean an FCW sensor in a car, also prevents dangerous malfunctions.
Roborock Gets Stuck Frequently or Cleans Randomly
If your robot gets stuck in clear areas, or moves in odd patterns, its navigation sensors might be off. This often points to dirty or obstructed optical or side sensors.
- Solution: Clean all small optical windows on the robot’s sides and front. Use a dry microfiber cloth. Check for any sticky residue or smudges. Also, ensure the side sensors (often small dark windows) are clean. These help with precise movement. If the robot frequently reports being “stuck” even on flat ground, check the wheel sensors. Ensure no hair wraps around the wheels or axles. Also, verify that the wheels can move freely.
”Error 5: Main brush stuck” or “Error 8: Fan blocked” After Cleaning
While not sensor issues directly, these errors sometimes show up due to general debris. A clean sensor system helps overall performance. If your Roborock still shows errors after you clean its sensors, look at other parts.
- Solution: Check the main brush. Remove hair and debris. Clean the filter and dustbin. For fan errors, check the suction inlet for blockages. Regular cleaning of all parts helps the robot run smoothly. A clean robot often prevents sensor overload from excessive debris. Just as you care for your vacuum, similar principles apply to other devices; knowing how to clean a DSLR sensor is also crucial for its longevity and performance.
Persistent Issues: Reset and Professional Help
If cleaning all sensors and checking for debris does not fix the problem, a factory reset may help. This clears software glitches. Look up your specific Roborock model’s instructions for a factory reset. This usually involves holding down a combination of buttons.
If problems continue after a reset, your Roborock might have a hardware problem. In this case, contact Roborock customer support. They can offer more advanced troubleshooting or suggest repairs. Always refer to your user manual for specific error codes and their meanings.
Maintaining Roborock Sensor Health for Longevity
Regular maintenance is key to keeping your Roborock working well for a long time. Cleaning sensors should be part of your routine. It prevents problems before they start. A little effort often saves you from major issues later. This section gives you tips for ongoing care.
Consistency is important. Do not wait for an error message to clean your sensors. Integrate sensor checks into your regular Roborock maintenance schedule. This proactive approach ensures your vacuum stays smart and effective.
Establish a Cleaning Schedule
How often you clean your sensors depends on how much you use your Roborock. It also depends on your home environment. If you have pets or a lot of dust, clean them more often.
- Light Use (1-2 times a week): Check sensors monthly.
- Moderate Use (3-4 times a week): Check sensors every 2-3 weeks.
- Heavy Use (Daily): Check sensors weekly.
This schedule is a general guide. Adjust it based on your Roborock’s performance. If you notice slight changes in navigation, clean the sensors right away.
Tips for Preventing Dust Buildup
Preventing dust and debris buildup on sensors is better than cleaning it. Here are some simple steps:
- Clean the Dustbin Regularly: Empty the dustbin after every few cleaning cycles. A full dustbin can lead to dust escaping and settling on sensors.
- Clean the Main Brush and Side Brush: Hair and fibers from these brushes can migrate to sensors. Clean them weekly.
- Replace Filters: Replace your Roborock’s filter as recommended in the manual (usually every 3-6 months). A clogged filter makes the vacuum work harder. This can stir up more dust.
- Keep Charging Dock Area Clear: Ensure the area around the charging dock is clean. Dust can build up here and transfer to the robot.
- Occasional Full Clean: Every few months, give your entire Roborock a deep clean. This includes wheels, internal components (if accessible), and all brushes.
What to Avoid During Sensor Maintenance
Certain actions can damage your Roborock’s delicate sensors. Avoid these at all costs:
- No Liquids or Sprays: Never spray cleaning solutions directly onto sensors. Do not use wet cloths. Moisture can cause irreversible damage to internal electronics.
- No Abrasive Materials: Do not use rough cloths, paper towels, or harsh brushes. These can scratch the sensor lenses. Scratches block the sensor’s view.
- No Strong Cleaning Agents: Avoid alcohol, ammonia, or other strong chemicals. They can degrade plastic or coatings on sensors.
- Do Not Disassemble: Do not try to open up your Roborock to reach internal sensors. This voids your warranty. It can also cause damage. Stick to external cleaning.
- Avoid Over-Pressing: Be gentle when wiping or using cotton swabs. Excess force can push debris further in or damage the sensor mounting.
By following these guidelines, you extend the life of your Roborock. You also ensure it delivers consistent cleaning performance. A well-maintained robot vacuum makes your life easier.
Advanced Tips and Best Practices for Roborock Sensor Care
Beyond basic cleaning, a few advanced tips can further improve your Roborock’s performance. These practices help you get the most out of your robot vacuum. They also ensure its sensors stay sharp. These insights come from understanding how robot vacuums interact with their environment.
These tips focus on both hardware and software aspects. They help you optimize your Roborock’s ability to navigate and clean effectively. A fully optimized Roborock runs smarter and cleaner.
Optimize Your Home Environment
Your home layout affects how your Roborock’s sensors work. Simple changes can help.
- Reduce Clutter: Remove small objects, cables, and toys from the floor before cleaning. This reduces chances of the robot getting stuck. It also reduces debris getting tangled in brushes or sensors.
- Ensure Good Lighting: While LIDAR works in the dark, optical and cliff sensors might rely on some light. A very dark room can sometimes affect navigation.
- Manage Pet Hair: If you have pets, vacuum regularly with a standard vacuum. This reduces the amount of pet hair your Roborock has to deal with. Less hair means less chance of sensor blockages.
Utilize the Roborock App for Diagnostics
The Roborock app is a powerful tool. It provides insights into your vacuum’s health.
- Check Maintenance Reminders: The app often reminds you when to clean brushes, filters, and sometimes sensors. Pay attention to these.
- Monitor Cleaning Maps: Look at the maps your Roborock creates. If you see areas it misses, or strange lines, it could indicate a sensor issue. For example, if it consistently avoids a clean area, a cliff sensor might be falsely triggered.
- Review Error Logs: The app stores error messages. These logs are very useful for troubleshooting. They tell you exactly what issue the robot faced and when.
Calibrating Sensors (If Applicable)
Some high-end Roborock models or specific software updates might offer sensor calibration options. Check your user manual or the Roborock app settings. Calibration helps the robot re-learn its environment. It fine-tune its sensor readings.
- When to Calibrate: Consider calibration after a major software update. Also, calibrate if you move the robot to a completely new environment. Or, if it shows minor, persistent navigation oddities. Not all models have this feature. Always follow the specific instructions for your model.
Understanding Sensor Limitations
Even with clean sensors, robot vacuums have limitations. Knowing these helps set realistic expectations.
- Reflective Surfaces: Highly reflective surfaces (like mirrors or shiny metal legs) can confuse LIDAR or optical sensors. The robot might struggle to map these areas.
- Dark Floors/Carpets: Very dark or black floors can sometimes absorb infrared beams. This can cause cliff sensors to falsely detect a drop. The robot might avoid cleaning these areas.
- Small, Low Obstacles: Very thin objects or extremely low furniture might not always be detected by bumper sensors. The robot might try to climb over them. This can lead to it getting stuck.
By understanding these points, you can adjust your cleaning strategy. This includes preparing your home better for your Roborock. This helps the sensors work at their best.
Frequently Asked Questions About Roborock Sensor Cleaning
Q1: How often should I clean my Roborock’s sensors?
You should clean your Roborock’s sensors regularly. For average use, aim for every 2-4 weeks. If you have pets, long hair, or a very dusty home, clean them more often, perhaps weekly. Checking the sensors is fast. It helps prevent performance issues before they start.
Q2: Can I use water or cleaning solutions to clean the sensors?
No, you must not use water or any cleaning solutions directly on Roborock sensors. Moisture can damage the delicate internal electronics. Always use a dry, soft microfiber cloth, dry cotton swabs, or compressed air for cleaning. This prevents harm to the sensor components.
Q3: What happens if I do not clean my Roborock sensors?
If you do not clean Roborock sensors, dirt and dust will build up. This blocks their view. The robot will then have trouble navigating. It might bump into things, fall down stairs, get stuck, or miss cleaning areas. Its overall performance will drop significantly.
Q4: My Roborock gives an error after cleaning the sensors. What should I do?
First, double-check that all sensors are perfectly clean and free of any dust or debris. Restart the Roborock. If the error persists, try a factory reset. This can clear software glitches. If the issue continues, there might be a hardware problem. Contact Roborock support for further help.
Q5: Are all Roborock models’ sensors cleaned the same way?
Most Roborock models have similar sensor types like LIDAR, cliff, and bumper sensors. The cleaning methods are generally the same: gentle dry wiping. Always refer to your specific model’s user manual for any unique sensor locations or special cleaning instructions.
Q6: Can dirty sensors affect my Roborock’s battery life?
Yes, dirty sensors can indirectly affect battery life. If sensors are blocked, the Roborock will struggle to navigate efficiently. It might take longer to clean an area. It could also get stuck more often. This causes the battery to drain faster. Clean sensors help your robot finish its job quicker and use less power.
Conclusion
Keeping your Roborock’s sensors clean is a simple but vital part of its care. You learned how to clean Roborock sensor types, including LIDAR, cliff, and optical sensors. We also covered the tools you need and common troubleshooting steps. A clean sensor system ensures your robot vacuum navigates smoothly. It helps it clean your home effectively.
Regular sensor cleaning prevents many common Roborock problems. It keeps your vacuum mapping accurately and avoiding obstacles. This leads to a longer lifespan for your device. Make sensor cleaning a routine part of your robot vacuum maintenance. Your Roborock will thank you with consistently clean floors. Start cleaning your sensors today to unlock your Roborock’s full potential and enjoy a smarter, cleaner home.
- Roborock maintenance
- robot vacuum cleaning
- sensor care