· Robot Vacuum Maintenance · 17 min read
How To Clean Roomba Brushes
How To Clean Roomba Brushes: Keep Your Robot Running Strong
Does your Roomba seem slower? Is it leaving dirt trails? The problem often lies with dirty brushes. Learning how to clean Roomba brushes is crucial. This simple task improves your robot’s cleaning power. It also extends its lifespan. Dirty brushes prevent proper suction. They also waste battery power.
I once found my Roomba struggling on carpets. I opened it up and saw the brushes. They were full of hair and lint. Cleaning them brought my Roomba back to life. This guide shows you how to clean Roomba brushes step by step. We will cover all brush types. You will also learn about the right tools and maintenance frequency. This keeps your Roomba working like new.
Takeaway
Cleaning your Roomba brushes is essential for optimal performance.
- Remove brushes from the Roomba first.
- Cut away tangled hair and debris carefully.
- Wipe brushes clean with a damp cloth.
- Check the side brush and caster wheel too.
- Perform this cleaning regularly for best results.
Clear and Concise Answer
To clean Roomba brushes, remove them from the robot. Use a small pair of scissors or the included cleaning tool to cut and pull away tangled hair, string, and debris. Wipe down the brushes and their yellow end caps. Reinsert them securely. This process restores cleaning efficiency and prevents damage.
Why Cleaning Roomba Brushes Matters for Performance
Your Roomba works hard to keep floors clean. Its brushes are the main tools for this job. They sweep dirt and debris into the dust bin. Over time, these brushes collect a lot of hair, dust, and other junk. This build-up harms your Roomba’s performance. It can also damage the robot.
Dirty brushes cannot rotate freely. This reduces their ability to pick up dirt. The Roomba works harder to move the brushes. This drains the battery faster. It also puts strain on the motor. Eventually, a dirty brush can break. Regular cleaning prevents these issues. It makes your Roomba clean better. It also makes your Roomba last longer.
Think about a broom with tangled bristles. It does not sweep well. A Roomba’s brushes are similar. They need to be clear to do their job. Hair and string wrap around the brush axles. This creates friction. The Roomba’s cleaning paths become less effective. It might miss spots or leave debris behind. Cleaning these brushes keeps the bristles soft and effective. It ensures every sweep counts. This keeps your home cleaner. It also saves you money on repairs or replacements.
Cleaning these parts also prevents odor buildup. Pet hair and dust can smell bad over time. A clean Roomba means a fresher home. It also ensures the robot runs quietly. Dirty brushes can cause squeaks or grinding sounds. Regular maintenance solves these problems. Your Roomba will run smoother. It will also pick up more dirt.
Essential Tools for Roomba Brush Cleaning
You do not need many tools to clean your Roomba’s brushes. Most Roombas come with a special cleaning tool. This tool has a small hook and a cutting blade. It is perfect for removing tangled hair. If you lost yours, do not worry. Common household items work just as well.
Here is a list of tools that help:
- Small Scissors: These are very useful. They cut through tightly wrapped hair. Use them carefully to avoid damaging the brushes. Nail scissors or craft scissors work well.
- Roomba Cleaning Tool: This tool comes with your Roomba. It usually has a hook to pull hair out. It also has a blade to slice through tangles. This is the safest and most efficient tool.
- Microfiber Cloth: Use this cloth to wipe down the brushes. It picks up dust and fine debris. A damp cloth helps remove sticky grime.
- Flathead Screwdriver (small): Some Roomba models might need this. It helps to remove certain brush modules. Check your Roomba’s manual if you are unsure. Most brush access is tool-free now.
- Gloves (optional): Brushes can be quite dirty. Gloves keep your hands clean. This is good if you are sensitive to dust.
I always keep my Roomba cleaning tool handy. It makes the job much faster. If the hair is very tightly wound, scissors are a lifesaver. Remember to use a well-lit area. This helps you see all the debris. Have a small trash can nearby too. You will collect a surprising amount of gunk. These simple tools make cleaning Roomba brushes easy. They ensure you can complete the task quickly and effectively.
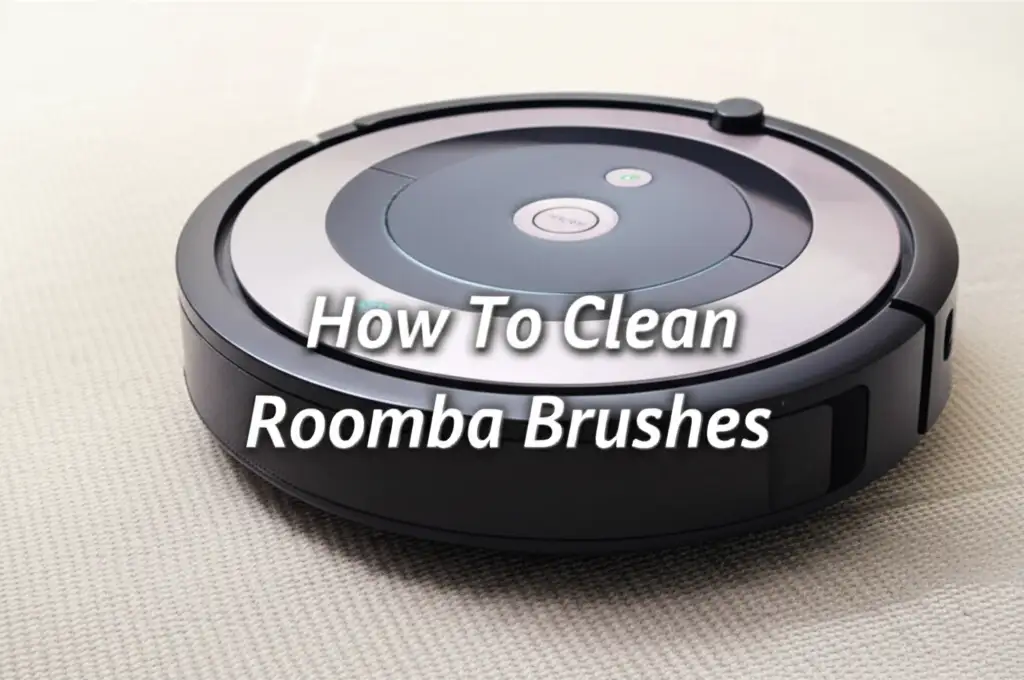
Step-by-Step Guide to Cleaning Roomba Main Brushes
Cleaning the main brushes is crucial for your Roomba’s performance. These are the two large brushes located underneath the robot. One is usually a bristled brush, and the other is a rubber-finned brush. They work together to agitate and sweep debris. Follow these steps for a thorough clean.
1. Prepare Your Roomba
First, turn off your Roomba. Press the CLEAN button until the light turns off. Then, flip the robot over. Place it on a clean, flat surface. A table works well. This gives you easy access to the underside. Remove the dust bin. This prevents dirt from falling out. It also gives you more room to work.
2. Remove the Brush Frame
Locate the yellow or green brush frame. This frame holds the main brushes. There are usually two tabs or latches. Press or lift these tabs to release the frame. Once released, lift the frame away. The brushes are now visible and accessible.
3. Remove the Main Brushes
Take out the two main brushes. They lift straight out of their compartment. Notice their positions. One is often bristled, the other rubber. They have yellow end caps. These caps often hold a lot of tangled hair. Gently pull off the yellow end caps from each brush.
4. Clean the Brushes
This is the main part of cleaning Roomba brushes. Use your Roomba cleaning tool or small scissors.
- Bristle Brush: Carefully cut any hair or string wrapped around the bristles. Slice along the brush length. Then, use the hook tool to pull the debris away. You can also use your fingers to remove loose hair. Many users find cleaning combs and brushes helpful for general brush maintenance, and the same principles apply here.
- Rubber Brush: Hair and debris can get stuck in the rubber fins. Peel these away with your fingers. The cleaning tool can help dislodge stubborn bits. Hair also wraps tightly around the metal axle. Use scissors to cut it free. This is similar to how you would clean plastic hair brushes that collect hair.
5. Clean the Yellow End Caps and Brush Bearings
The yellow end caps often have hair wrapped around their central pin. Remove this hair completely. These small parts are critical. They help the brushes spin smoothly. Also, check the square or hexagonal plastic pegs on the opposite end of the brushes. Make sure they are clear of debris. Clean out the brush bearings within the Roomba’s brush module as well. These are the sockets where the brushes sit.
6. Reassemble the Brushes
Once clean, reattach the yellow end caps to the brushes. Ensure they snap on securely. Place the brushes back into the Roomba. The rubber brush usually goes in first, closest to the dust bin. The bristled brush goes next. Match their shapes to the openings. The square peg goes into the square hole, and the hexagonal into the hexagonal. Make sure they sit properly.
7. Reinstall the Brush Frame
Place the brush frame back over the brushes. Press it down until it latches securely. You should hear a click. This confirms the frame is locked. Flip your Roomba back over. You have successfully cleaned your main brushes. Your Roomba is now ready to clean more efficiently.
Cleaning the Roomba Side Brush and Front Caster Wheel
Beyond the main brushes, your Roomba has other vital parts. The side brush and front caster wheel also collect debris. Cleaning these parts is important for overall Roomba function. They ensure your robot moves correctly and cleans edges. Neglecting them can cause navigational errors or poor edge cleaning.
Cleaning the Side Brush
The side brush is a small, three or six-armed brush. It spins to sweep debris from walls and corners into the Roomba’s main cleaning path. This brush is usually held by a single screw.
- Remove the Screw: Flip your Roomba over. Locate the side brush. Use a small Phillips head screwdriver to remove the screw holding it in place. Keep the screw safe.
- Remove the Side Brush: Lift the side brush straight off. It might be a little stiff.
- Clean the Brush: Pull off any hair, lint, or string wrapped around the brush’s base. Also, clean the post it attaches to on the Roomba. Wipe down the brush arms with a damp cloth if they are dusty or sticky.
- Reattach the Side Brush: Place the clean side brush back onto its post. Make sure it seats properly. Reinsert the screw and tighten it gently. Do not overtighten, as this can strip the plastic. A clean side brush helps your Roomba reach all the hidden dirt. It ensures complete corner coverage.
Cleaning the Front Caster Wheel
The front caster wheel allows your Roomba to steer and pivot. Hair and debris often get trapped inside its housing. This prevents the wheel from spinning freely. A stuck wheel causes the Roomba to drive in circles or get stuck.
- Remove the Wheel Module: Grasp the front wheel. Pull it firmly to remove the entire wheel module. It usually pulls straight out without tools.
- Remove the Wheel: Pull the small wheel out of its housing. It might pop out easily.
- Clean the Wheel and Axle: Remove any hair or debris wrapped around the wheel’s axle. Also, clean inside the wheel’s housing. A cotton swab can help reach tight spots.
- Reassemble: Pop the wheel back into its housing. Ensure it spins freely.
- Reinsert Module: Push the cleaned wheel module back into the Roomba until it clicks into place. A smoothly turning front wheel ensures your Roomba navigates efficiently. It prevents unnecessary wear and tear. Regular attention to these parts boosts your Roomba’s overall health.
Dealing with Stubborn Tangles and Debris
Sometimes, Roomba brushes get very tangled. Hair and string can wrap so tightly they seem impossible to remove. Do not get discouraged. Stubborn tangles require a bit more patience and specific techniques. These methods help you tackle even the toughest clogs.
Using the Cleaning Tool’s Blade Effectively
The Roomba cleaning tool often has a small, sharp blade. This blade is designed to slice through hair tangles.
- Locate the Cut Line: The main brushes usually have a small groove or line running along their length. This is where you should use the blade.
- Slide and Slice: Slide the blade along this groove. Apply gentle pressure. The blade cuts through the hair, making it easier to pull off.
- Repeat as Needed: If the tangle is thick, you may need to make several passes. Work in small sections. This prevents the hair from re-tangling.
I often find that multiple short slices are better than one long one. This gives you more control. Always cut away from your body. This ensures safety.
Scissors for Deeply Embedded Hair
When the cleaning tool is not enough, small, sharp scissors are your best friend.
- Nail Scissors or Craft Scissors: Their small size allows for precision. They can get into tight spots.
- Careful Cutting: Insert one blade of the scissors under the tangled hair. Be very careful not to cut the brush bristles or the rubber fins. Snip the hair in short segments.
- Pull Away: After cutting, use your fingers or the cleaning tool’s hook to pull the cut hair away. You might be surprised how much hair can build up.
Sometimes, hair gets melted onto the brush axle due to friction. This creates a hard, plastic-like ring. Gently scrape it off with a blunt tool or the edge of a sturdy card. Avoid anything too sharp that might scratch the axle.
Water and Mild Soap (Use with Caution!)
Generally, Roomba brushes are not designed to be submerged in water. However, for extremely greasy or grimy buildup that won’t wipe away, a very light damp cleaning can help.
- Damp Cloth: Lightly dampen a cloth with water. You can add a tiny drop of mild dish soap.
- Wipe Brushes: Wipe down the rubber fins and bristles. Do not soak the brushes. Focus on the dirty spots.
- Dry Completely: This step is critical. Let the brushes air dry completely before putting them back in the Roomba. Water can damage the motor or bearings. It can cause rust. I usually leave them out for several hours, even overnight, to ensure they are bone dry.
These techniques help you tackle the most challenging brush cleaning tasks. Consistent use of these methods keeps your Roomba working efficiently. It prevents permanent damage from stubborn debris.
Frequency and Best Practices for Roomba Brush Maintenance
How often should you clean Roomba brushes? The answer depends on your home. Factors like pets, long hair, and carpet types affect cleaning frequency. A regular cleaning schedule keeps your Roomba performing at its best. It also prevents major issues.
Recommended Cleaning Frequency
- Weekly Cleaning (or more often): If you have pets that shed a lot, or if family members have long hair, check the brushes weekly. You might even need to do a quick check every few days. Long hair and pet fur are the biggest culprits for tangles.
- Bi-Weekly Cleaning: For homes without pets or long hair, cleaning every two weeks is usually sufficient. This ensures regular maintenance without too much effort.
- Monthly Deep Clean: Even with regular checks, a monthly deep clean is good. Take out all brushes, side brush, and front wheel. Clean them thoroughly. Check inside the brush compartment for hidden debris.
I find that a quick weekly check prevents bigger problems. It takes only a few minutes. If I wait too long, the cleaning takes much longer.
Best Practices for Longevity
Maintaining your Roomba brushes goes beyond just cleaning. These practices help extend the life of your brushes and your robot.
- Pre-Clean Your Floors: Before running your Roomba, do a quick pick-up. Remove large items, loose cords, and very large clumps of hair. This prevents them from getting tangled in the brushes. It reduces the strain on your Roomba.
- Use Genuine Roomba Parts: If you need to replace brushes, buy genuine iRobot parts. Third-party brushes might not fit perfectly. They might not perform as well. They could even damage your Roomba over time.
- Check Brush Wear: Brushes wear out over time. Bristles can fray. Rubber fins can crack. Inspect them during cleaning. Replace them if they show significant wear. iRobot recommends replacing brushes every 6-12 months. This depends on usage.
- Clean Beyond the Brushes: While cleaning Roomba brushes, remember other parts. The dust bin and filter also need attention. A dirty Roomba filter reduces suction. A full Roomba dust bin stops dirt collection. Cleaning all parts ensures optimal performance.
- Store Properly: When not in use, keep your Roomba in its charging base. This keeps it ready for action. It also helps maintain battery health.
Following these practices extends your Roomba’s life. It ensures it continues to clean your home effectively. Regular, simple maintenance makes a big difference. It saves you money and hassle in the long run.
Beyond the Brushes: Complete Roomba Care
Cleaning Roomba brushes is a vital part of robot vacuum maintenance. However, your Roomba has other components that need regular attention. A full maintenance routine ensures your robot vacuum runs at peak efficiency. It also prevents premature wear and tear. Neglecting these other parts can impact your Roomba’s cleaning power and navigation.
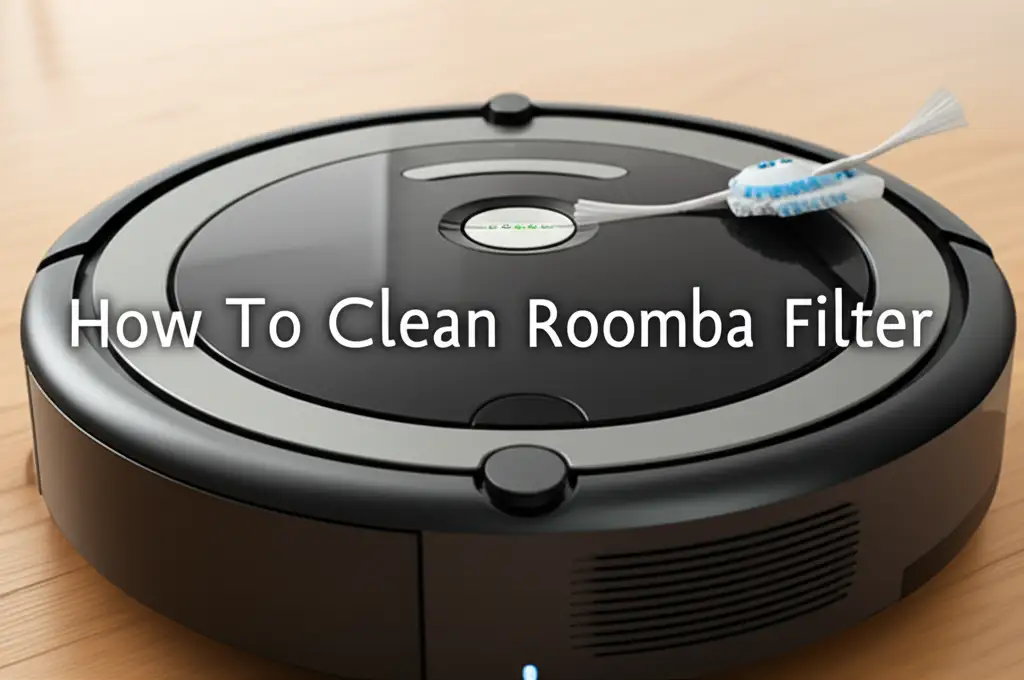
The Dust Bin and Filter
The dust bin collects all the debris your Roomba picks up. The filter traps fine dust and allergens.
- Emptying the Dust Bin: Empty the dust bin after every cleaning cycle. A full bin cannot hold more dirt. Your Roomba will stop cleaning effectively.
- Cleaning the Filter: Roomba filters, especially HEPA filters, get clogged with fine particles. A clogged filter reduces suction power. It also forces the motor to work harder. Tap the filter over a trash can to remove loose debris. Some filters are washable, but check your model’s instructions first. I typically clean my Roomba filter once a week. Replacing the filter every 2-3 months is also a good practice. A clean filter ensures maximum suction for your Roomba.
Charging Contacts
The charging contacts on both your Roomba and its home base can get dirty. Dust and grime can build up. This prevents the Roomba from charging properly.
- Wipe Regularly: Use a clean, dry microfiber cloth to wipe down the metal charging contacts on both the robot and the home base. A slightly damp cloth (with water, no cleaners) can be used for stubborn grime, but ensure contacts are dry before charging. Clean contacts ensure a reliable charge every time.
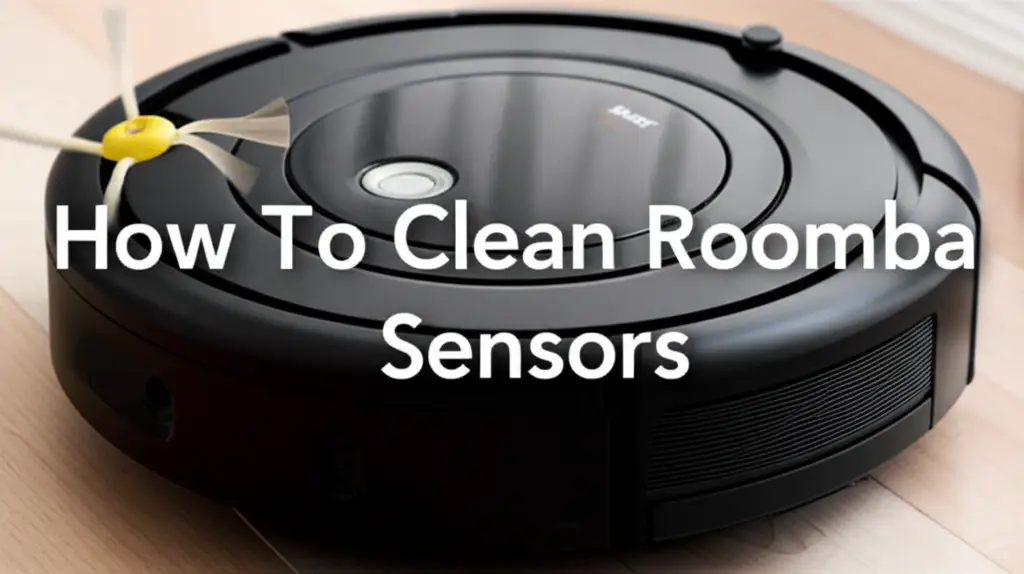
Cliff Sensors and Optical Sensors
Roomba uses sensors to navigate your home. Cliff sensors prevent it from falling down stairs. Optical sensors help it map and detect dirt.
- Wipe Sensor Windows: Dust and dirt can accumulate on these sensor windows. This blinds your Roomba. It may cause it to get stuck or fall. Use a clean, dry cotton swab or microfiber cloth to gently wipe the clear windows on the underside and front bumper. This simple step ensures your Roomba navigates safely and efficiently.
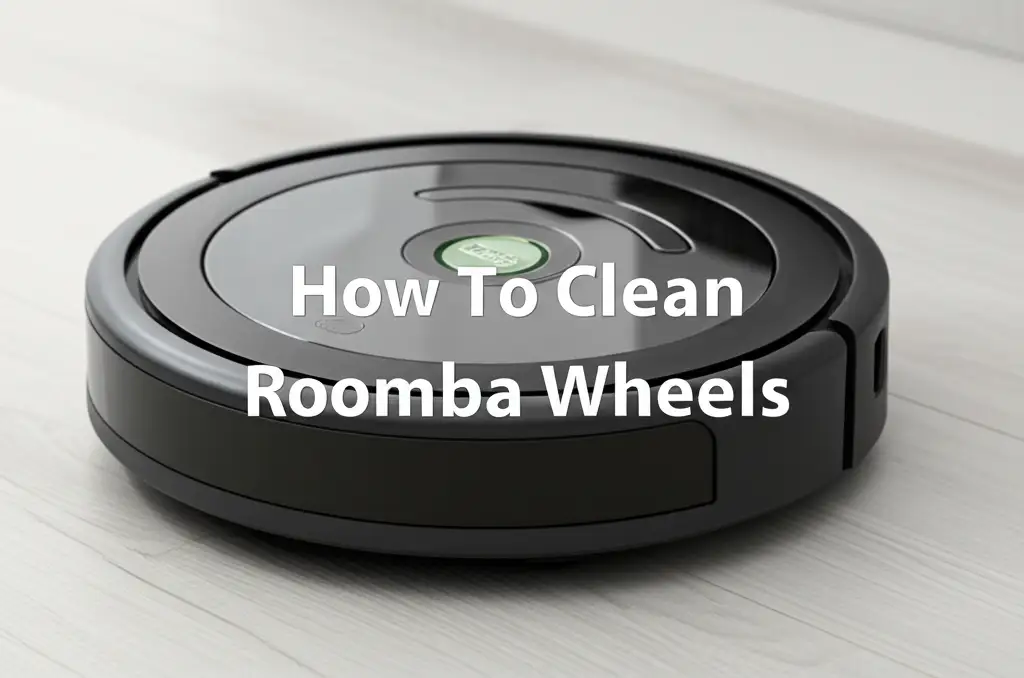
Wheels
Beyond the front caster wheel, your Roomba has two main drive wheels. Hair and debris can get stuck in their axles.
- Check for Debris: Regularly check the drive wheels. Pull out any hair or string wrapped around the axles. Use tweezers or small scissors if needed.
- Clean Wheel Wells: Wipe inside the wheel wells. Ensure nothing obstructs the wheels’ movement. Free-moving wheels ensure your Roomba travels smoothly. This prevents it from getting stuck on carpets or uneven surfaces.
By paying attention to these areas, you ensure your Roomba performs optimally. A clean robot is a happy and efficient robot. It will serve you well for many years.
Frequently Asked Questions About Cleaning Roomba Brushes
Keeping your Roomba in top shape means regular care. Here are some common questions about cleaning Roomba brushes and other essential maintenance.
Q1: How often should I clean my Roomba brushes?
A1: Clean Roomba brushes at least once a week, especially if you have pets or long hair. For homes with less debris, every two weeks is often enough. A quick visual check before each cleaning cycle is always a good habit. Regular checks prevent performance issues and extend brush life.
Q2: Can I wash Roomba brushes with water?
A2: Generally, it is not recommended to wash Roomba brushes with water, especially the main brushes. Water can damage the bearings or cause rust on metal components. If brushes are very dirty, use a slightly damp cloth with mild soap, then air dry completely for several hours before reinserting. The rubber fins can tolerate a gentle wipe.
Q3: What tools do I need to clean Roomba brushes?
A3: Most Roombas come with a specialized cleaning tool. This tool often includes a hook and a cutting blade. If you do not have it, small scissors (like nail scissors) and a flathead screwdriver are very useful. A microfiber cloth is also helpful for wiping down surfaces and brushes.
Q4: Why is my Roomba leaving dirt trails after cleaning?
A4: Dirt trails often mean your Roomba brushes are dirty or worn out. Hair and debris reduce their effectiveness. Clean the main brushes thoroughly. Also, check the side brush and the dust bin. A full dust bin or a clogged filter can also cause dirt trails.
Q5: How do I remove hair from the Roomba’s main brushes?
A5: First, remove the brushes from the Roomba. Use the cleaning tool’s blade or small scissors to cut along the grooves of the brushes. This breaks up tangled hair. Then, use the hook tool or your fingers to pull away the cut hair and debris. Clean the yellow end caps too.
Q6: Should I replace my Roomba brushes? If so, when?
A6: Yes, brushes wear out over time. Roomba recommends replacing brushes every 6-12 months, depending on usage. Look for signs of wear like frayed bristles, cracked rubber fins, or if they no longer spin freely even after cleaning. Replacing worn brushes restores optimal cleaning performance.
Conclusion
Mastering how to clean Roomba brushes is a small effort that yields big rewards. Your Roomba is an investment in a cleaner home. Regular brush maintenance ensures that investment pays off. It keeps your robot vacuum cleaning effectively, quietly, and efficiently for years to come.
Remember, a clean Roomba is a happy Roomba. You now have the knowledge and steps to tackle brush cleaning with confidence. Make it a regular part of your cleaning routine. Your floors will look better, and your Roomba will work harder for you. Do not let tangled brushes slow your robot down. Keep them spotless, and enjoy sparkling floors every day. Keep up with your Roomba’s maintenance, and it will keep your home pristine.
- Roomba maintenance
- Robot vacuum cleaning
- Brush care