· Device Maintenance · 15 min read
How To Clean Usb Port
Restore Your Connection: How to Clean a USB Port Safely
Have you ever plugged in a USB device, only to find it does not work? A dirty USB port often causes this problem. Dust, lint, and debris accumulate inside these small openings over time. This buildup stops your device from making a proper connection. Learning how to clean a USB port is a simple skill that solves many frustrating tech issues.
It can fix connectivity problems, restore charging functions, and even prevent damage. Many people think a broken port needs replacement, but often a good cleaning saves the day. In this article, I will show you how to clean your USB port safely and effectively. We will explore different methods, tools, and safety steps. By the end, you will know how to keep your USB ports in top condition.
Takeaway:
- Always power down your device before cleaning.
- Use non-conductive tools like toothpicks or compressed air.
- Avoid liquid cleaners directly in the port.
- Work gently to prevent internal damage.
Cleaning a USB port involves carefully removing debris like lint and dust. You can use compressed air, a non-conductive toothpick, or a small brush. Always make sure the device is off before you start cleaning. This process helps restore proper connection for charging and data transfer.
Understanding USB Ports and Common Issues
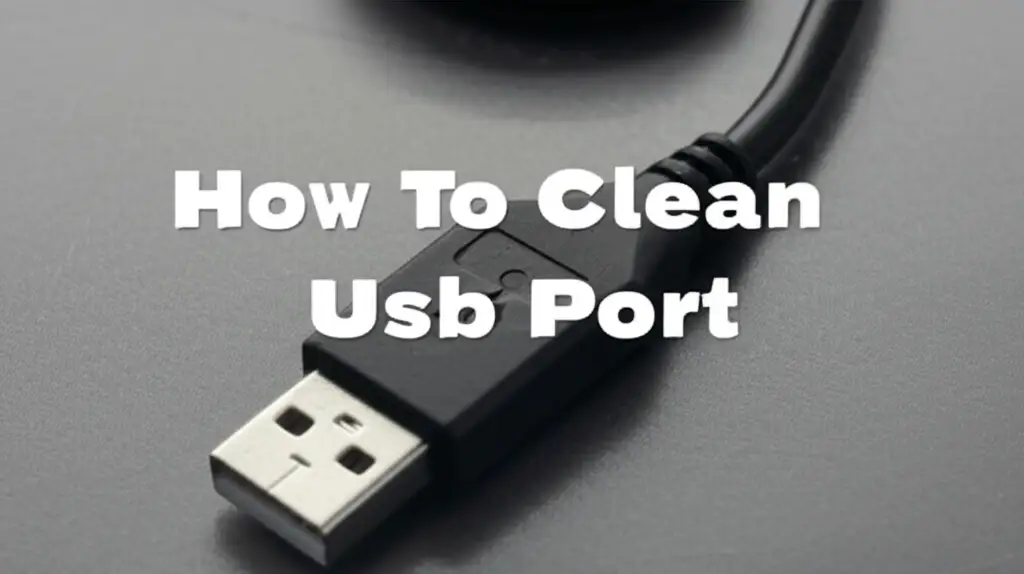
USB ports are essential for connecting many devices. They allow us to charge phones, transfer files, and use peripherals. These ports come in various types, like USB-A, USB-B, USB-C, and micro-USB. Each type has a specific shape and pin arrangement. Over time, these ports collect debris.
Lint from pockets, dust from the environment, and small food particles can get stuck inside. This debris blocks the metallic contacts. When contacts are blocked, your device cannot communicate properly. This causes connection issues, slow charging, or no charging at all. Recognizing these symptoms helps you know when a clean USB port is needed.
A common sign of a dirty port is when you have to wiggle the cable to make it work. Sometimes, the cable feels loose even when fully inserted. Other times, your device might show a “charging slowly” message. All these issues point to physical blockage within the port. Regular use makes ports vulnerable to dirt. Understanding how they work helps us clean them better.
Maintaining clean ports extends the life of your devices. It ensures reliable data transfer and charging. We often overlook these small openings until they cause problems. Knowing what affects them is the first step in effective cleaning.
Essential Tools for Cleaning USB Ports
Before you begin cleaning, gather the right tools. Using the correct items ensures safety and effectiveness. You do not need many specialized tools. Most items are easy to find around your home or at a local store. Always choose non-conductive materials to avoid electrical shorts.
Here is a list of essential tools you should have ready:
- Compressed Air Can: This is great for blowing out loose dust and lint. Make sure to use short bursts. Hold the can upright to prevent propellant discharge.
- Wooden or Plastic Toothpick: A wooden or plastic toothpick is ideal for gently dislodging stubborn debris. Avoid metal objects, as they can scratch the contacts or cause short circuits.
- Small Soft Brush: A clean, dry toothbrush or a fine-bristled artist’s brush works well. Use it to sweep out dust that compressed air might miss.
- Isopropyl Alcohol (99%): For very stubborn grime or corrosion, 99% isopropyl alcohol is safe. It evaporates quickly and leaves no residue. Apply it to a cotton swab, not directly into the port.
- Cotton Swabs or Q-tips (with fine tips): These are useful for applying alcohol or wiping contacts. Look for ones with compact tips to fit into the small space. You might want to learn how to clean an iPhone charging port with alcohol if you have an Apple device, as the process is similar.
- Bright Light Source: A flashlight or headlamp helps you see inside the port clearly. This allows you to identify the debris.
Having these tools ready makes the cleaning process smooth. It reduces the risk of damaging your device. Remember, patience and gentle actions are key.
Safety Precautions Before Cleaning Any USB Port
Safety is paramount when you clean a USB port. Failing to take proper precautions can damage your device or even cause injury. Always follow these important steps before you start any cleaning. These steps ensure your safety and the longevity of your electronics.
First, power down your device completely. This means shutting it off, not just putting it to sleep. If you are cleaning a phone, turn it off. If it is a laptop, shut it down and unplug it from the power source. If your device has a removable battery, take it out. This step eliminates any electrical current in the port. It prevents short circuits or accidental shocks. This is a critical step for any phone charging port cleaning or similar task.
Second, unplug all cables and accessories. Remove any USB cables, chargers, or peripherals connected to the device. This provides clear access to the port. It also stops you from accidentally pulling on a cable while working.
Third, work in a well-lit area. A bright light source helps you see the tiny components inside the port. This prevents you from accidentally scraping contacts or damaging internal parts. A desk lamp or a flashlight works well.
Fourth, avoid metal objects. Never use metal tools like paper clips or pins to clean a USB port. Metal conducts electricity. It can scratch the contacts, bend pins, or cause a short circuit. Stick to non-conductive materials like wood or plastic. This is especially true when you clean sensitive connectors, such as when you need to clean a USB-C charging port.
Finally, be gentle. USB ports have delicate internal components. Apply minimal force when inserting tools or blowing air. Aggressive cleaning can permanently damage the port. Remember these rules, and your cleaning process will be safe and effective.
Step-by-Step Guide to Cleaning Your USB Port
Cleaning a USB port is a straightforward process. Follow these steps carefully to ensure a thorough and safe clean. I will guide you through each part.
Step 1: Inspect the Port
Begin by thoroughly inspecting the USB port. Use a bright light source, like a flashlight, to look inside. Identify any visible debris, such as lint, dust bunnies, or dirt. Pay attention to the metallic contacts and the plastic divider. This initial inspection helps you know what kind of cleaning is needed.
Step 2: Use Compressed Air for Loose Debris
Once you inspect the port, start with compressed air. Hold the can upright to prevent propellant liquid from spraying. Use short, controlled bursts. Aim the nozzle directly into the port. This method helps dislodge and blow out loose dust and lint. Avoid tilting the can, which can release cold liquid propellant that may harm your device. You can also use a small air blower, like those used for camera lenses, as an alternative. This method is effective for many types of ports, including if you need to clean an iPad charger port.
Step 3: Gentle Scraping with a Non-Conductive Tool
If compressed air does not clear all the debris, use a non-conductive tool. A wooden or plastic toothpick works best. Gently insert the tip into the port. Carefully scrape along the inner walls and around the plastic divider. The goal is to hook and pull out any packed-in lint or dirt. Be extremely gentle. Do not apply force that could bend the internal pins. Focus on the corners and the bottom of the port where lint often collects. Repeat this step until you see no more visible debris.
Step 4: Finishing Touches with Isopropyl Alcohol (Optional)
For persistent grime or minor corrosion, a small amount of 99% isopropyl alcohol helps. Dip a fine-tipped cotton swab (like a specialized electronics swab or a trimmed Q-tip) into the alcohol. Make sure the swab is damp, not dripping wet. Gently wipe the internal contacts of the port. The alcohol quickly evaporates, leaving no residue. This step helps remove oily films or oxidized layers. Allow the port to air dry completely for at least 15-30 minutes before reinserting any cables. This ensures all alcohol has evaporated.
Step 5: Re-inspect and Test
After cleaning, use your light source to re-inspect the port. Confirm all debris is gone. The metallic contacts should look clean and shiny. Then, plug in your USB device. Test the connection. Your device should now connect securely and function correctly. If the issue persists, the problem may be beyond a simple cleaning.
Addressing Specific USB Port Types
While the general cleaning steps apply to most USB ports, each type has unique features. Understanding these differences helps you clean more effectively. Different USB types have varying sizes and pin arrangements. This impacts how you approach the cleaning process.
USB-A Ports
USB-A ports are the most common rectangular ports. They are found on computers, chargers, and many other devices. They have a flat plastic divider in the middle. When cleaning, pay special attention to the space between the divider and the port walls. Lint often packs tightly here. Use a toothpick to scrape along all four sides of this divider. Compressed air helps clear loose debris from these wider ports.
USB-C Ports
USB-C ports are small and oval-shaped. They are reversible, meaning you can plug the cable in either way. This design makes them somewhat less prone to debris buildup. However, their small size means any lodged dirt can significantly affect performance. When cleaning a USB-C port, be extra gentle due to its delicate central tongue. Use a very thin toothpick or a soft, fine brush. Compressed air is very effective for these ports. For more detailed instructions, you might want to look at how to clean a USB-C charging port specifically.
Micro-USB Ports
Micro-USB ports are small, trapezoidal ports often found on older phones and small electronics. They have a narrow opening and a small tongue. Debris can get easily trapped around this tongue. Use a fine-tipped toothpick or a trimmed cotton swab. Work slowly and gently around the central tongue. Compressed air is useful here too. These ports are quite fragile.
Lightning Ports
While not a USB standard, Lightning ports are common on Apple devices. They are similar in function to USB ports. These ports also collect lint and dust. Cleaning them follows similar principles. Use a thin, non-metallic tool to scrape along the bottom and sides. Be gentle around the internal pins. If you have an iPhone, understanding how to clean an iPhone charging port is very useful. Always prioritize safety and gentleness, regardless of the port type.
What to Do If Cleaning Does Not Fix the Problem
Sometimes, cleaning a USB port does not solve the issue. This can be frustrating, but it does not mean your device is ruined. There are other potential causes for connectivity or charging problems. It is important to troubleshoot further before assuming a major repair is needed.
First, check the USB cable. A damaged cable is a very common culprit. Cables can fray internally, even if they look fine outside. Try using a different, known-good USB cable. Test it with another device if possible. Often, a simple cable swap fixes the problem. This is especially true if you are experiencing issues with charging or data transfer.
Second, test with another device. Plug your USB device into a different port or a different computer. If the device works on another port or computer, the original port might have a hardware issue. If it does not work anywhere, the problem could be with the USB device itself, not the port. For example, if you are having issues connecting a USB drive, test it on another device to confirm it is not faulty.
Third, check for software or driver issues. On computers, sometimes software conflicts or outdated drivers cause USB problems. Try updating your device drivers. Restart your computer. For phones, a simple restart can sometimes resolve temporary software glitches.
Fourth, inspect for visible damage. Look closely at the port. Are any pins bent or broken? Is the plastic divider cracked or missing? If you see physical damage, cleaning will not help. Bent pins are a common problem. Trying to fix bent pins yourself can cause more damage.
Finally, seek professional help. If you have tried all the above steps and the problem persists, the port likely has physical damage. A professional technician can assess the damage. They can often repair or replace the port. This is safer than attempting complex repairs yourself. Sometimes, the issue is more complex, such as a faulty chip on the motherboard. A professional can diagnose these deeper problems.
Preventing Future USB Port Issues
Preventing problems is always better than fixing them. A few simple habits can keep your USB ports clean and functioning. These tips help extend the life of your devices and save you future hassle. Maintaining a clean environment for your electronics makes a big difference.
First, keep your devices in clean environments. Avoid using or storing your phone, tablet, or laptop in dusty or lint-filled areas. For example, do not leave your phone in a pocket full of lint. Keep your laptop off dusty surfaces. This simple step reduces the amount of debris that can enter the ports.
Second, use port covers or plugs. Small rubber or silicone plugs are available for USB ports. These plugs fit snugly into the opening. They create a barrier against dust and lint when the port is not in use. This is a very effective way to keep ports clean. They are inexpensive and easy to find online.
Third, handle cables gently. When you insert or remove a USB cable, do it straight in and straight out. Avoid wiggling or forcing the cable. Yanking cables out can damage the internal contacts or deform the port. A gentle, direct motion prevents stress on the port components.
Fourth, clean regularly with compressed air. Even if your ports seem fine, a quick blast of compressed air every few months helps. This prevents significant buildup. It blows out loose dust before it packs in tightly. Regular, light cleaning is a proactive measure.
Fifth, avoid extreme temperatures and humidity. High humidity can lead to moisture inside ports, causing corrosion. Extreme cold can also affect port integrity. Store and use your devices in moderate conditions. This helps preserve all internal components, including ports. By adopting these preventive measures, you can significantly reduce the chances of encountering a dirty or damaged USB port. Consistent care leads to consistent connectivity.
Frequently Asked Questions
Q1: Is it safe to clean a USB port with a needle or paper clip?
No, it is not safe. Metal objects like needles or paper clips can scratch the delicate internal contacts. They can also cause a short circuit if the device is not completely powered down. Always use non-conductive tools like wooden or plastic toothpicks.
Q2: Can compressed air damage my USB port?
Compressed air is generally safe if used correctly. Hold the can upright to prevent liquid propellant from spraying out. Use short bursts. Avoid tilting the can. This prevents damage from cold liquid or excessive force.
Q3: How often should I clean my USB port?
Clean your USB port when you notice connectivity or charging issues. For preventive maintenance, a light cleaning with compressed air every few months is a good practice. This is especially true if you use your device in dusty or lint-prone environments.
Q4: Can I use rubbing alcohol to clean my USB port?
Yes, 99% isopropyl rubbing alcohol is safe to use. Apply a tiny amount to a cotton swab. Make sure the swab is damp, not dripping. Isopropyl alcohol evaporates quickly and leaves no residue. Allow the port to dry completely before use.
Q5: What if my USB port is still not working after cleaning?
If cleaning does not fix the issue, the problem might be with the cable or the USB device itself. Try a different cable or test the device on another port or computer. If the problem persists, the port may have physical damage. Seek professional repair.
Q6: Can a dirty USB port cause slow charging?
Yes, a dirty USB port can cause slow charging. Debris like lint and dust can block the electrical contacts. This prevents a full and stable connection. A poor connection reduces the current flow, leading to slow charging or no charging at all. Cleaning the port often resolves this issue.
Conclusion
A clean USB port is key to reliable device performance. Learning how to clean a USB port helps you maintain stable connections and consistent charging. We have covered the importance of proper tools, safety precautions, and step-by-step cleaning methods. Remember to always power off your device and use non-conductive tools. Gently remove debris, and consider using isopropyl alcohol for tough grime.
By taking these simple steps, you can avoid frustrating connectivity problems. You will extend the life of your devices and enjoy seamless data transfer and charging. If cleaning does not fix the problem, consider testing cables or seeking professional help. Proactive maintenance, like using port covers and cleaning regularly, will keep your USB ports in top shape. Don’t let a bit of lint ruin your day; a clean port keeps your tech running smoothly. Take action now and restore your device’s full functionality.
- USB port cleaning
- device maintenance
- tech cleaning
- charging issues
- port repair
- digital hygiene
- connectivity

