· Automotive Maintenance · 11 min read
How To Clean Valve Cover
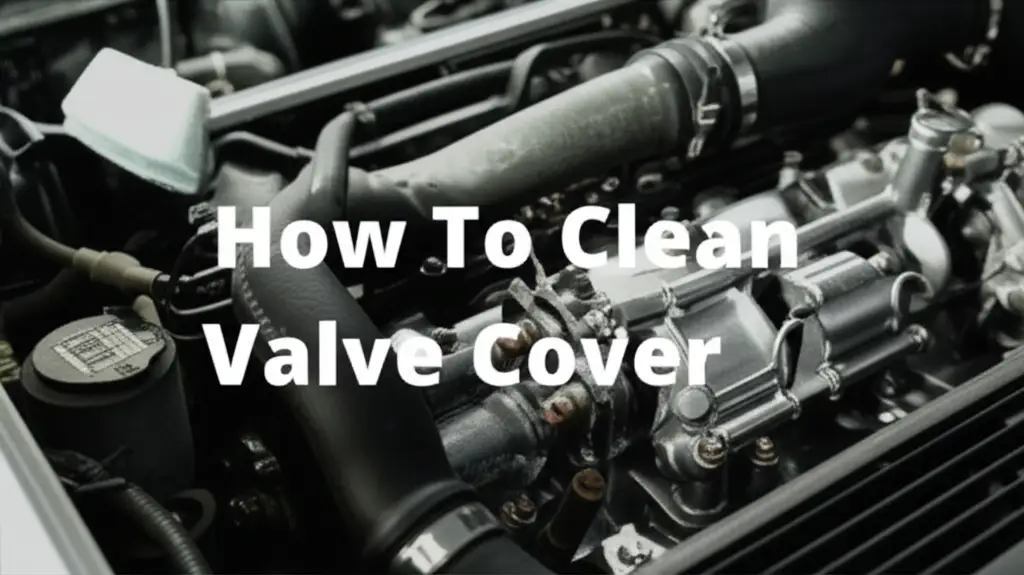
Clean Your Valve Cover: A Comprehensive Guide
Have you ever wondered about the black, grimy buildup under your car’s hood? That often includes the valve cover, a crucial part of your engine. Keeping your valve cover clean is more than just about looks. It plays a big role in engine health and performance. Over time, oil, dirt, and combustion byproducts can coat this component, leading to issues.
Learning how to clean your valve cover can prevent common engine problems. This guide will walk you through the entire process. We cover everything from understanding its function to the best cleaning methods and reinstallation. You will gain the knowledge to maintain your engine’s cleanliness and extend its life.
Takeaway
- Understand Function: The valve cover seals the top of the engine, protecting moving parts.
- Recognize Signs: Look for oil leaks, unusual smells, or engine performance drops.
- Gather Supplies: Collect degreasers, brushes, scrapers, and new gaskets.
- Remove Carefully: Disconnect components and unbolt the cover safely.
- Clean Thoroughly: Use appropriate cleaners for oil and sludge removal.
- Inspect and Reinstall: Check gaskets and reattach the cover correctly.
Answer to the Main Query
To clean a valve cover, remove it from the engine, scrape away thick sludge, apply a strong degreaser, and scrub thoroughly with brushes. Rinse well, dry completely, and inspect for damage before reinstalling with a new gasket. This process removes buildup and helps prevent oil leaks.
Understanding Your Valve Cover’s Role
The valve cover sits on top of your engine’s cylinder head. Its main job is to enclose the valvetrain components. These parts include camshafts, rocker arms, and valve springs. The cover protects these moving parts from dirt and debris. It also keeps engine oil contained within the engine.
Over time, this cover can accumulate significant grime. Internal surfaces collect oil sludge from engine blow-by and oil breakdown. External surfaces gather road grime, dust, and spilled fluids. A dirty valve cover can indicate a larger engine issue. It can also lead to more serious problems if ignored.
Maintaining a clean valve cover helps engine longevity. It ensures proper sealing and heat dissipation. A clean cover also makes it easier to spot potential oil leaks. I always check my valve cover during routine maintenance. It gives me a quick snapshot of the engine’s internal health. Regular cleaning avoids performance issues and costly repairs.
Signs Your Engine Valve Cover Needs Cleaning
Recognizing when your valve cover needs attention is important. Several signs can tell you it is time for a cleaning. The most common sign is visible oil leaks around the cover’s edges. This happens when the gasket hardens or cracks. Oil then seeps out and accumulates on the valve cover.
Another sign is a burning oil smell. This odor occurs when leaked oil drips onto hot engine parts. You might notice smoke coming from the engine bay. This smoke is also a result of burning oil. These are clear indicators that oil is escaping the valve cover. I once noticed a faint burning smell in my car. It led me to discover a small leak around the valve cover gasket.
Engine performance can also suffer. A severely clogged PCV valve, often connected to the valve cover, affects engine vacuum. This can lead to rough idling or decreased fuel economy. While cleaning your valve cover, it is also a good idea to inspect and potentially clean your PCV valve. Excessive sludge inside the cover restricts oil drain-back. This can starve parts of lubrication. Do not ignore these warning signs. Timely cleaning prevents more extensive engine problems.
Essential Tools for Valve Cover Cleaning
Before you start cleaning, gather all your tools and supplies. Having everything ready saves time and makes the job smoother. You will need a socket set and wrenches. These are for removing bolts and disconnecting hoses. Pliers are also useful for stubborn clamps.
Safety gear is a must. Wear safety glasses to protect your eyes from debris and chemicals. Gloves protect your hands from grease and cleaning solutions. A drain pan is essential to catch any oil that spills during removal. You also need shop rags or old towels for wiping and absorbing spills.
For the cleaning itself, you need a good degreaser. Automotive degreasers or heavy-duty engine cleaners work well. Brushes of various sizes are helpful. A stiff bristle brush can tackle tough grime. Smaller brushes reach tight spots. A plastic scraper can remove thick sludge without scratching the cover. Consider a wire brush for metal covers, but use it carefully to avoid damage. Remember to buy a new valve cover gasket. You cannot reuse the old one. A torque wrench is vital for proper reinstallation, ensuring bolts are tightened to the correct specification.
Safe Valve Cover Removal: A Step-by-Step Guide
Removing the valve cover requires care and patience. First, ensure your engine is cool to the touch. This prevents burns and makes handling parts easier. Disconnect the negative terminal of your car battery. This avoids accidental electrical shorts.
Next, you need to clear the area around the valve cover. Disconnect any hoses, wires, or sensors attached to the cover. This might include PCV hoses, spark plug wires, or ignition coils. Label them if needed to ensure correct reinstallation. Carefully unclip wiring harnesses and move them aside. I always take pictures with my phone before disconnecting anything. This helps me remember where everything goes.
Once clear, begin unbolting the valve cover. Use the correct size socket. Loosen the bolts in a crisscross pattern, working from the center outwards. This helps prevent warping the cover. Do not remove all bolts at once. Gradually loosen them, then remove them. Once all bolts are out, gently pry the valve cover loose. Use a plastic pry tool or a flathead screwdriver carefully. Avoid bending the cover. Be prepared for some oil to drip out as you lift the cover. Place it on a clean surface, ready for cleaning.
Cleaning Your Valve Cover: Methods That Work
Once the valve cover is off, the real cleaning begins. There are several effective methods. The goal is to remove all oil sludge, carbon buildup, and external grime. Always wear your gloves and eye protection for this stage.
Start by scraping off any thick, caked-on sludge from the inside. A plastic scraper works well for this. For aluminum valve covers, be gentle to avoid scratches. For very stubborn deposits, you might need a dedicated carbon cleaner. After scraping, apply a generous amount of automotive degreaser. Spray it evenly over both the inside and outside surfaces. Let the degreaser sit for the recommended time, usually 10-15 minutes. This allows it to break down the grease and grime.
Now, use brushes to scrub the surfaces. A stiff bristle brush is good for larger areas. Use a detail brush or an old toothbrush for corners and crevices. Pay close attention to recessed areas where sludge collects. For heavily oxidized or stained aluminum covers, consider using specific methods for cleaning aluminum valve covers. Some people use a parts washer with hot water and degreaser for a deep clean. Others use an ultrasonic cleaner for truly pristine results. Rinse the cover thoroughly with water. Make sure no degreaser residue remains. A pressure washer can be effective for rinsing, but use a low-pressure setting. This prevents damage to the cover. Finally, dry the valve cover completely. Compressed air helps dry hard-to-reach areas. Ensure it is bone-dry before reinstallation to prevent rust and ensure proper gasket adhesion.
Gasket Inspection and Reinstallation Prep
With your valve cover sparkling clean, the next step is preparation for reinstallation. This is a critical stage. First, inspect the valve cover itself for any cracks or damage. Look closely at the bolt holes and mounting surfaces. A damaged cover can lead to future oil leaks, even with a new gasket.
Next, focus on the engine’s cylinder head surface. This is where the valve cover gasket seals. Use a plastic scraper or a razor blade to carefully remove all old gasket material. Be very gentle. You do not want to scratch or gouge the cylinder head. Any remaining old gasket bits will prevent a proper seal. After scraping, wipe the surface clean with a rag and some brake cleaner or rubbing alcohol. This removes any oil residue. The surface must be perfectly clean and dry for the new gasket to seal correctly.
Now, prepare your new valve cover gasket. Most modern gaskets are rubber or silicone. Some may require a thin bead of RTV (Room Temperature Vulcanizing) sealant in specific corners or around certain curves. Check your vehicle’s service manual for exact instructions. Always use a new gasket. Reusing an old gasket almost guarantees a leak. Place the new gasket onto the valve cover. Many gaskets have tabs or pins that help hold them in place. Ensure it sits flush and is not twisted. Proper preparation here guarantees a leak-free seal.
Proper Valve Cover Reinstallation Steps
Reinstalling your clean valve cover correctly is just as important as the cleaning itself. Improper installation can lead to immediate oil leaks. First, carefully place the valve cover, with its new gasket, back onto the cylinder head. Align it precisely with the bolt holes. Make sure the gasket does not pinch or shift during placement.
Once aligned, thread all the valve cover bolts in by hand. Do not tighten any yet. Just get them all started in their respective holes. This ensures everything is seated properly before tightening. Refer to your vehicle’s service manual for the correct bolt tightening sequence. Most manuals recommend a crisscross pattern, starting from the center and working outwards. This helps distribute pressure evenly. It prevents warping the valve cover or cracking the cylinder head.
Use a torque wrench to tighten the bolts to the manufacturer’s specified torque settings. This is crucial. Over-tightening can crack the cover or strip threads. Under-tightening causes leaks. Tighten in stages. For example, first tighten all bolts to half the final torque, then to the full torque. Reconnect all hoses, wires, and sensors that you removed earlier. Refer to your pictures to ensure everything goes back in its correct place. Finally, reconnect the negative battery terminal. Start the engine and let it run for a few minutes. Check for any immediate oil leaks around the valve cover. Drive for a bit, then recheck after the engine has reached operating temperature. Your engine will appreciate the fresh seal.
FAQ Section
How often should I clean my valve cover? You do not need to clean your valve cover on a fixed schedule. Instead, clean it when you notice signs of oil leaks or significant sludge buildup. This often happens when you replace the valve cover gasket. Consider inspection during other engine maintenance tasks. Proactive cleaning prevents bigger issues.
Can a dirty valve cover affect engine performance? Yes, a dirty valve cover can indirectly affect engine performance. Excessive internal sludge can block oil return passages. This might lead to oil starvation for some components. External grime can make it hard to spot leaks. A clogged PCV system, often connected to the valve cover, directly impacts engine vacuum and combustion efficiency, causing rough idling.
What kind of degreaser is best for valve cover cleaning? For valve covers, a strong, automotive-specific degreaser is best. Look for products designed to break down oil, grease, and carbon deposits. Engine degreasers or parts cleaner sprays work well. Always follow the product’s instructions. Ensure good ventilation when using chemical cleaners.
Is it necessary to replace the valve cover gasket when cleaning the cover? Yes, it is highly recommended to replace the valve cover gasket every time you remove the cover. The old gasket usually hardens and loses its sealing ability. Reusing it almost guarantees an oil leak. A new gasket ensures a proper, leak-free seal after reinstallation.
What if I find a crack in my valve cover? If you find a crack in your valve cover, cleaning will not fix the issue. A cracked valve cover needs replacement. Welding can be an option for some metal covers, but often replacement is more reliable. Driving with a cracked valve cover will lead to significant oil leaks.
Can I clean the valve cover without removing it? You can clean the outside of the valve cover without removing it, using engine degreasers and brushes. However, you cannot effectively clean the inside where most of the harmful sludge accumulates without removal. For a complete and beneficial clean, removal is necessary.
Conclusion
Cleaning your valve cover is a vital step in maintaining your vehicle’s engine health. It goes beyond just aesthetics. A clean valve cover helps prevent oil leaks, ensures proper engine sealing, and allows you to monitor for potential issues more easily. We have covered the reasons why this maintenance is important, how to identify when it is needed, and the exact steps to take.
From gathering your tools to the careful reinstallation, each step ensures a successful outcome. By learning how to clean your valve cover, you actively contribute to your car’s longevity and performance. This DIY project can save you money and give you a deeper understanding of your engine. Take the time to keep this component clean. Your car will thank you with smooth, reliable operation. If you need assistance, consider professional help.
- engine cleaning
- valve cover maintenance
- oil leak prevention
- DIY car care